How to backup Microsoft 365 with Xopero ONE
Microsoft is a leader in the industry of productivity applications suites. And as such is trying to provide as complex security measures as possible. Yet it’s not possible to avoid nor protect from every threat. That is why you should not blindly trust the protection provided by Microsoft in their Office 365 suite, but rather add layers of protection to ensure your data is safe. That layer of protection can be a Microsoft 365 backup. With Xopero ONE Backup & Recovery you can set up Microsoft 365 backup, manage it, and recover data if needed with ease. In this article, we will walk you through the steps you need to take to start backup Microsoft 365 data in your organization with Xopero ONE, and we will go into more detail about setting up a personalized backup plan.
Steps to starting your Microsoft 365 backup
Adding your Microsoft 365 organization to Xopero ONE
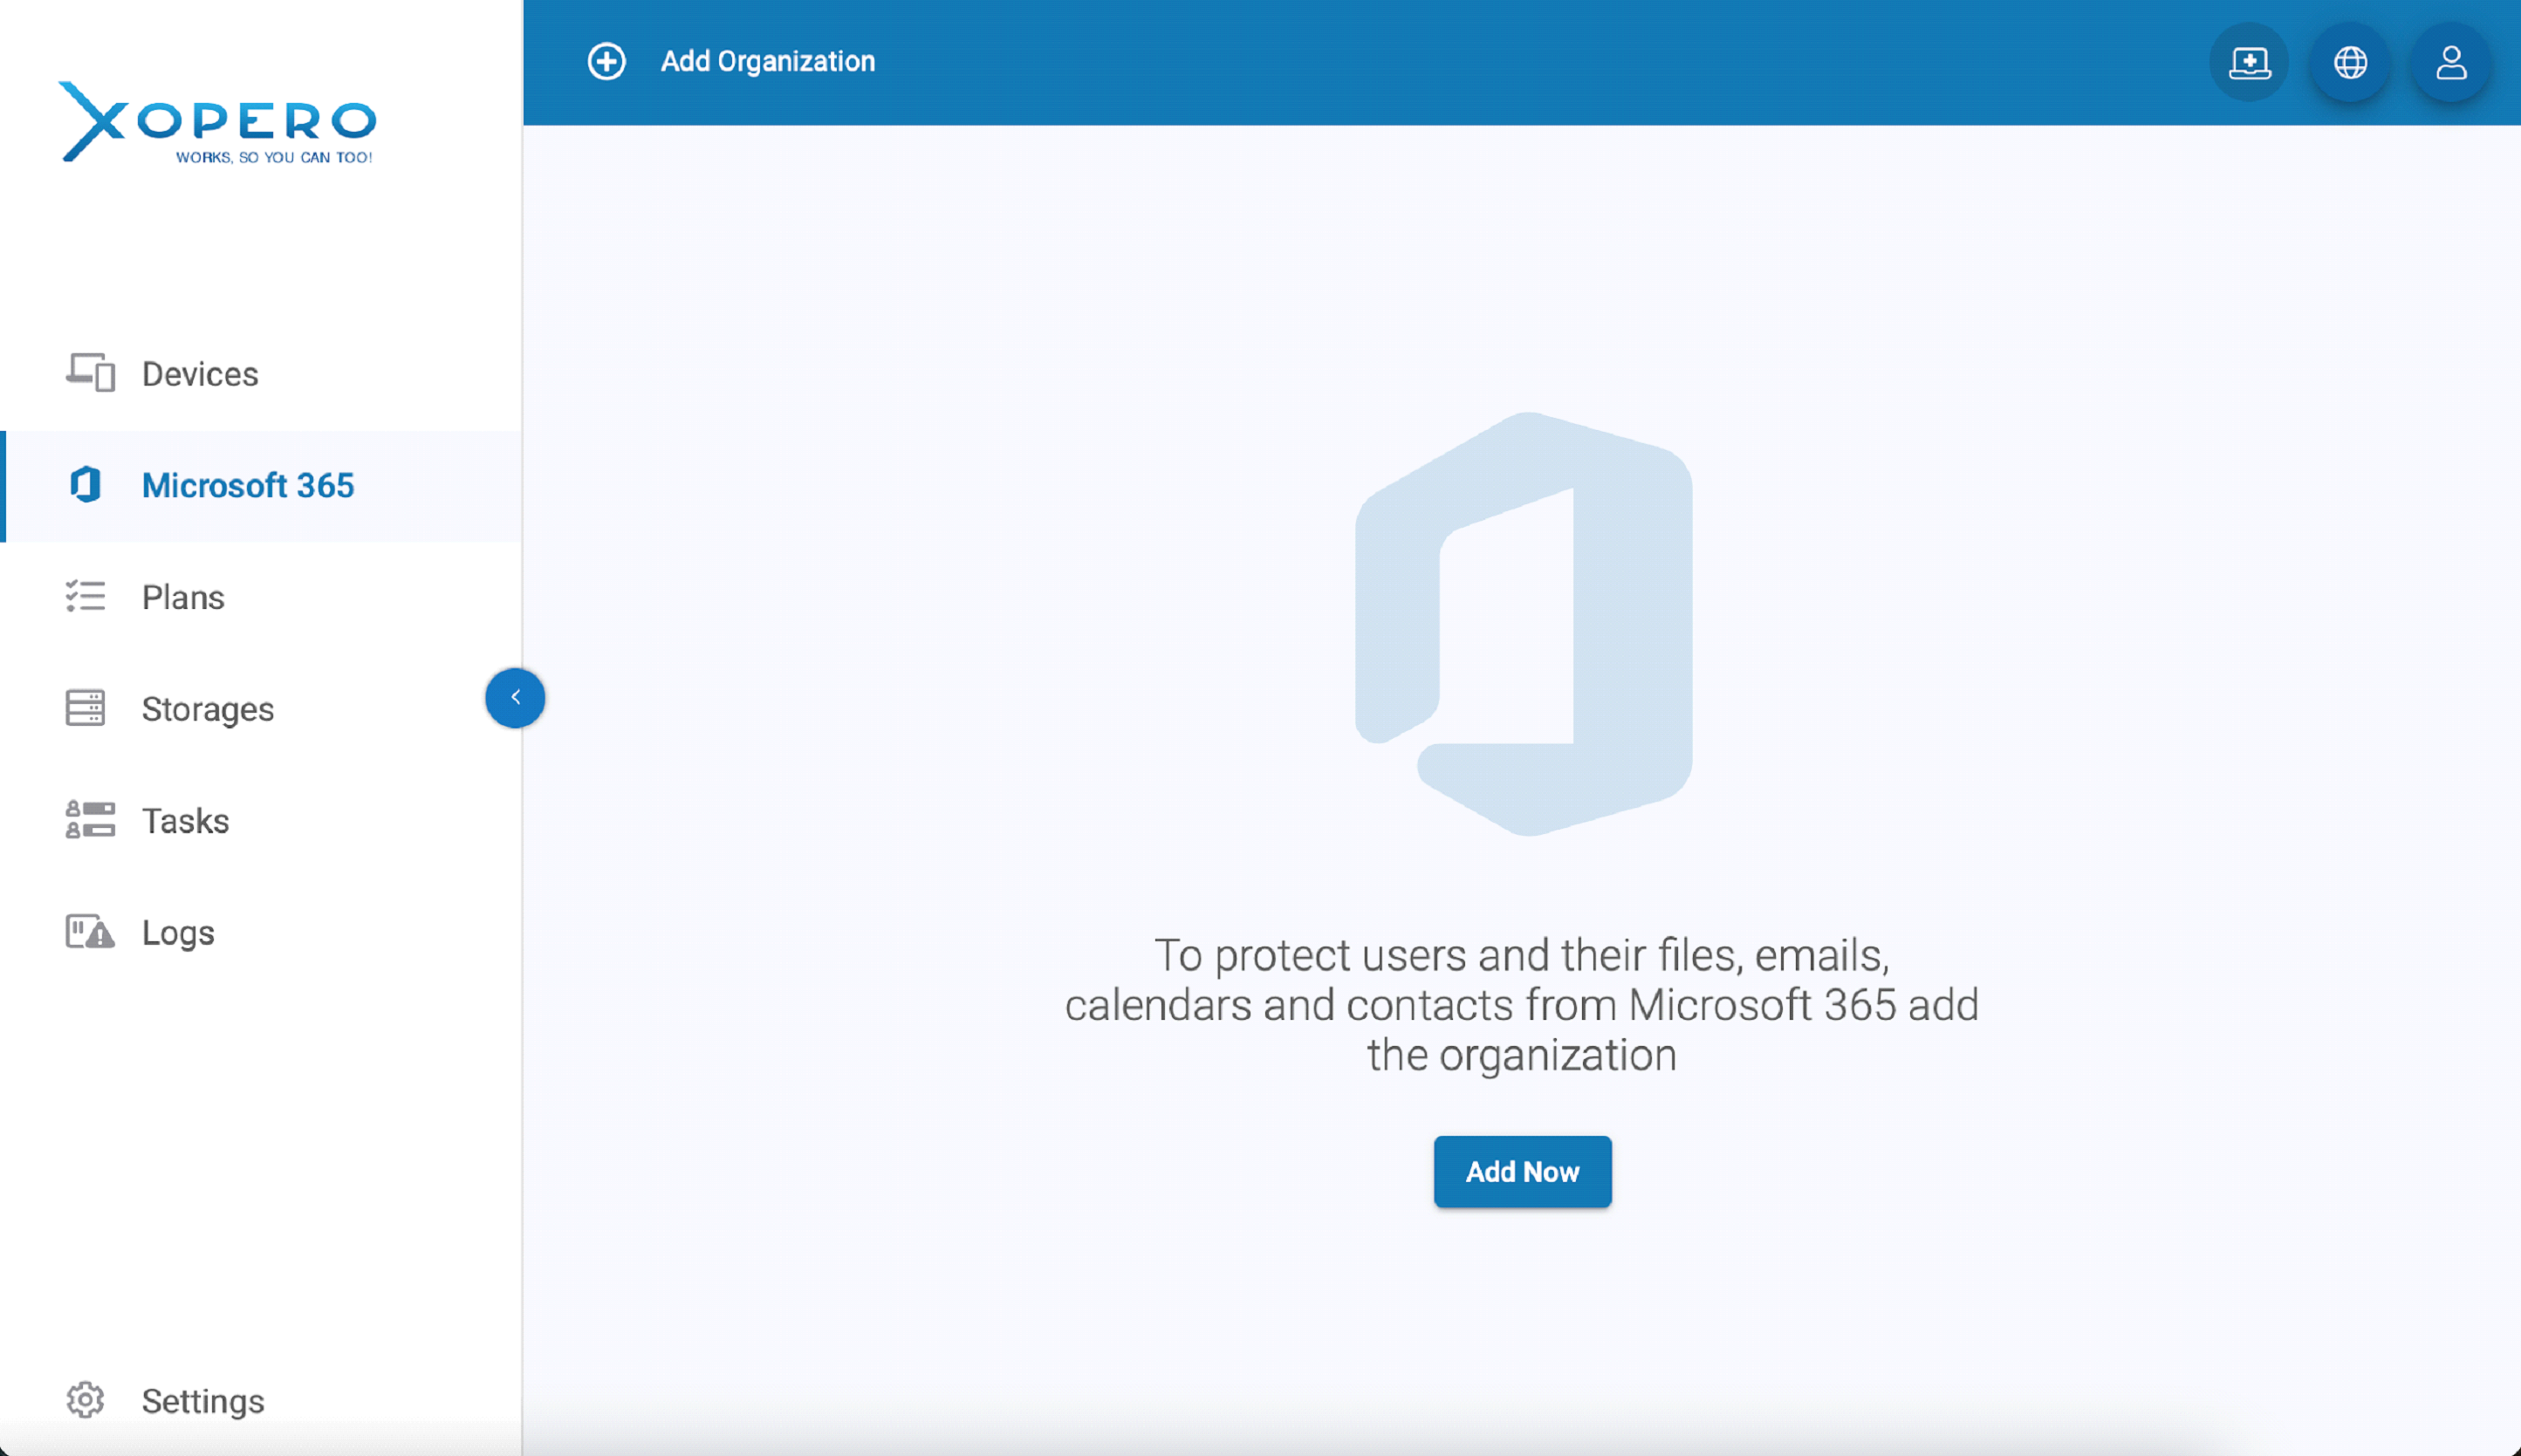
The First step you need to take is to add your organization to the Xopero ONE. As an Xopero ONE administrator, you can add as many organizations as you wish. As long as your license allows you to protect additional users. To add an organization just go to the Microsoft 365 section in the menu and click Add now.
A new form will pop up with information that you need to authorize yourself on the Microsoft site. Adequate buttons will lead you to sites, where all you need to do is to follow instructions.
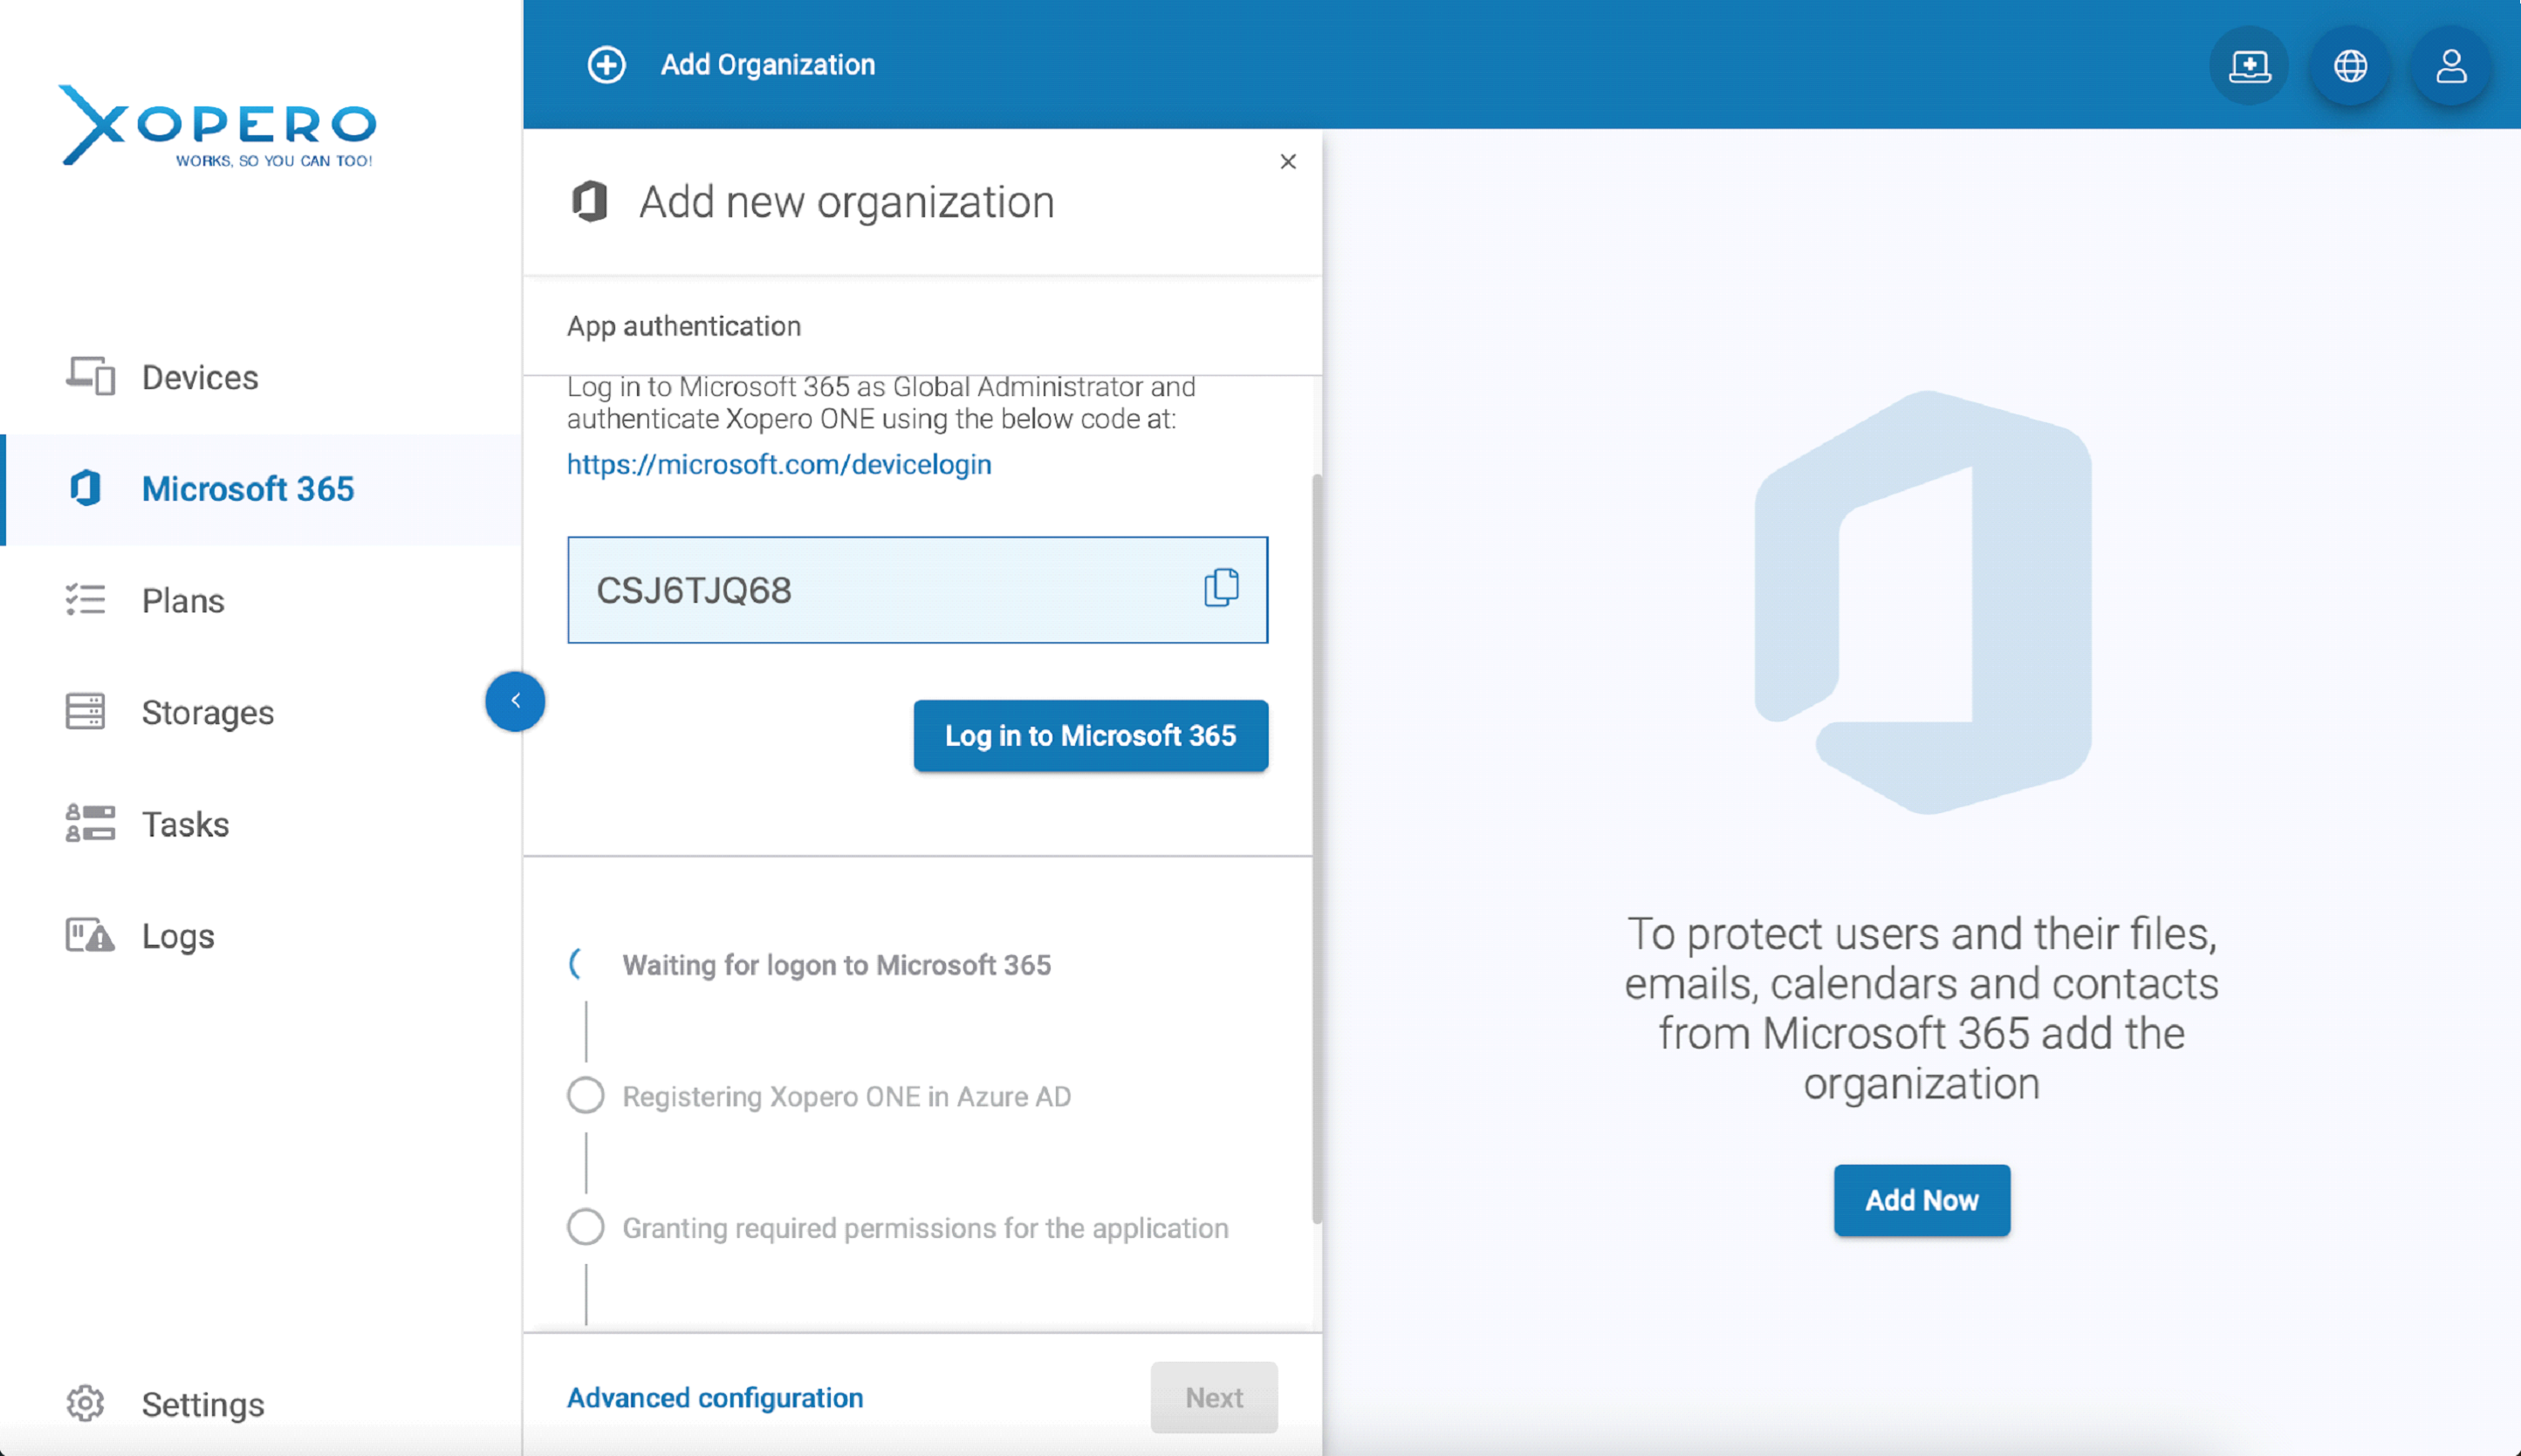
If you want to specify more information for your Microsoft 365 organization click Advanced configuration, at the bottom of the site. A new window will pop up, where you’ll have an option to change up some information. That information includes:
- Deciding if you want to automatically apply a license to users
- Default organization device – the device that will have control over the organization e.g. refreshing user lists, and will perform backup
- Frequency of refreshing – interval of time in which lists of users will be checked.
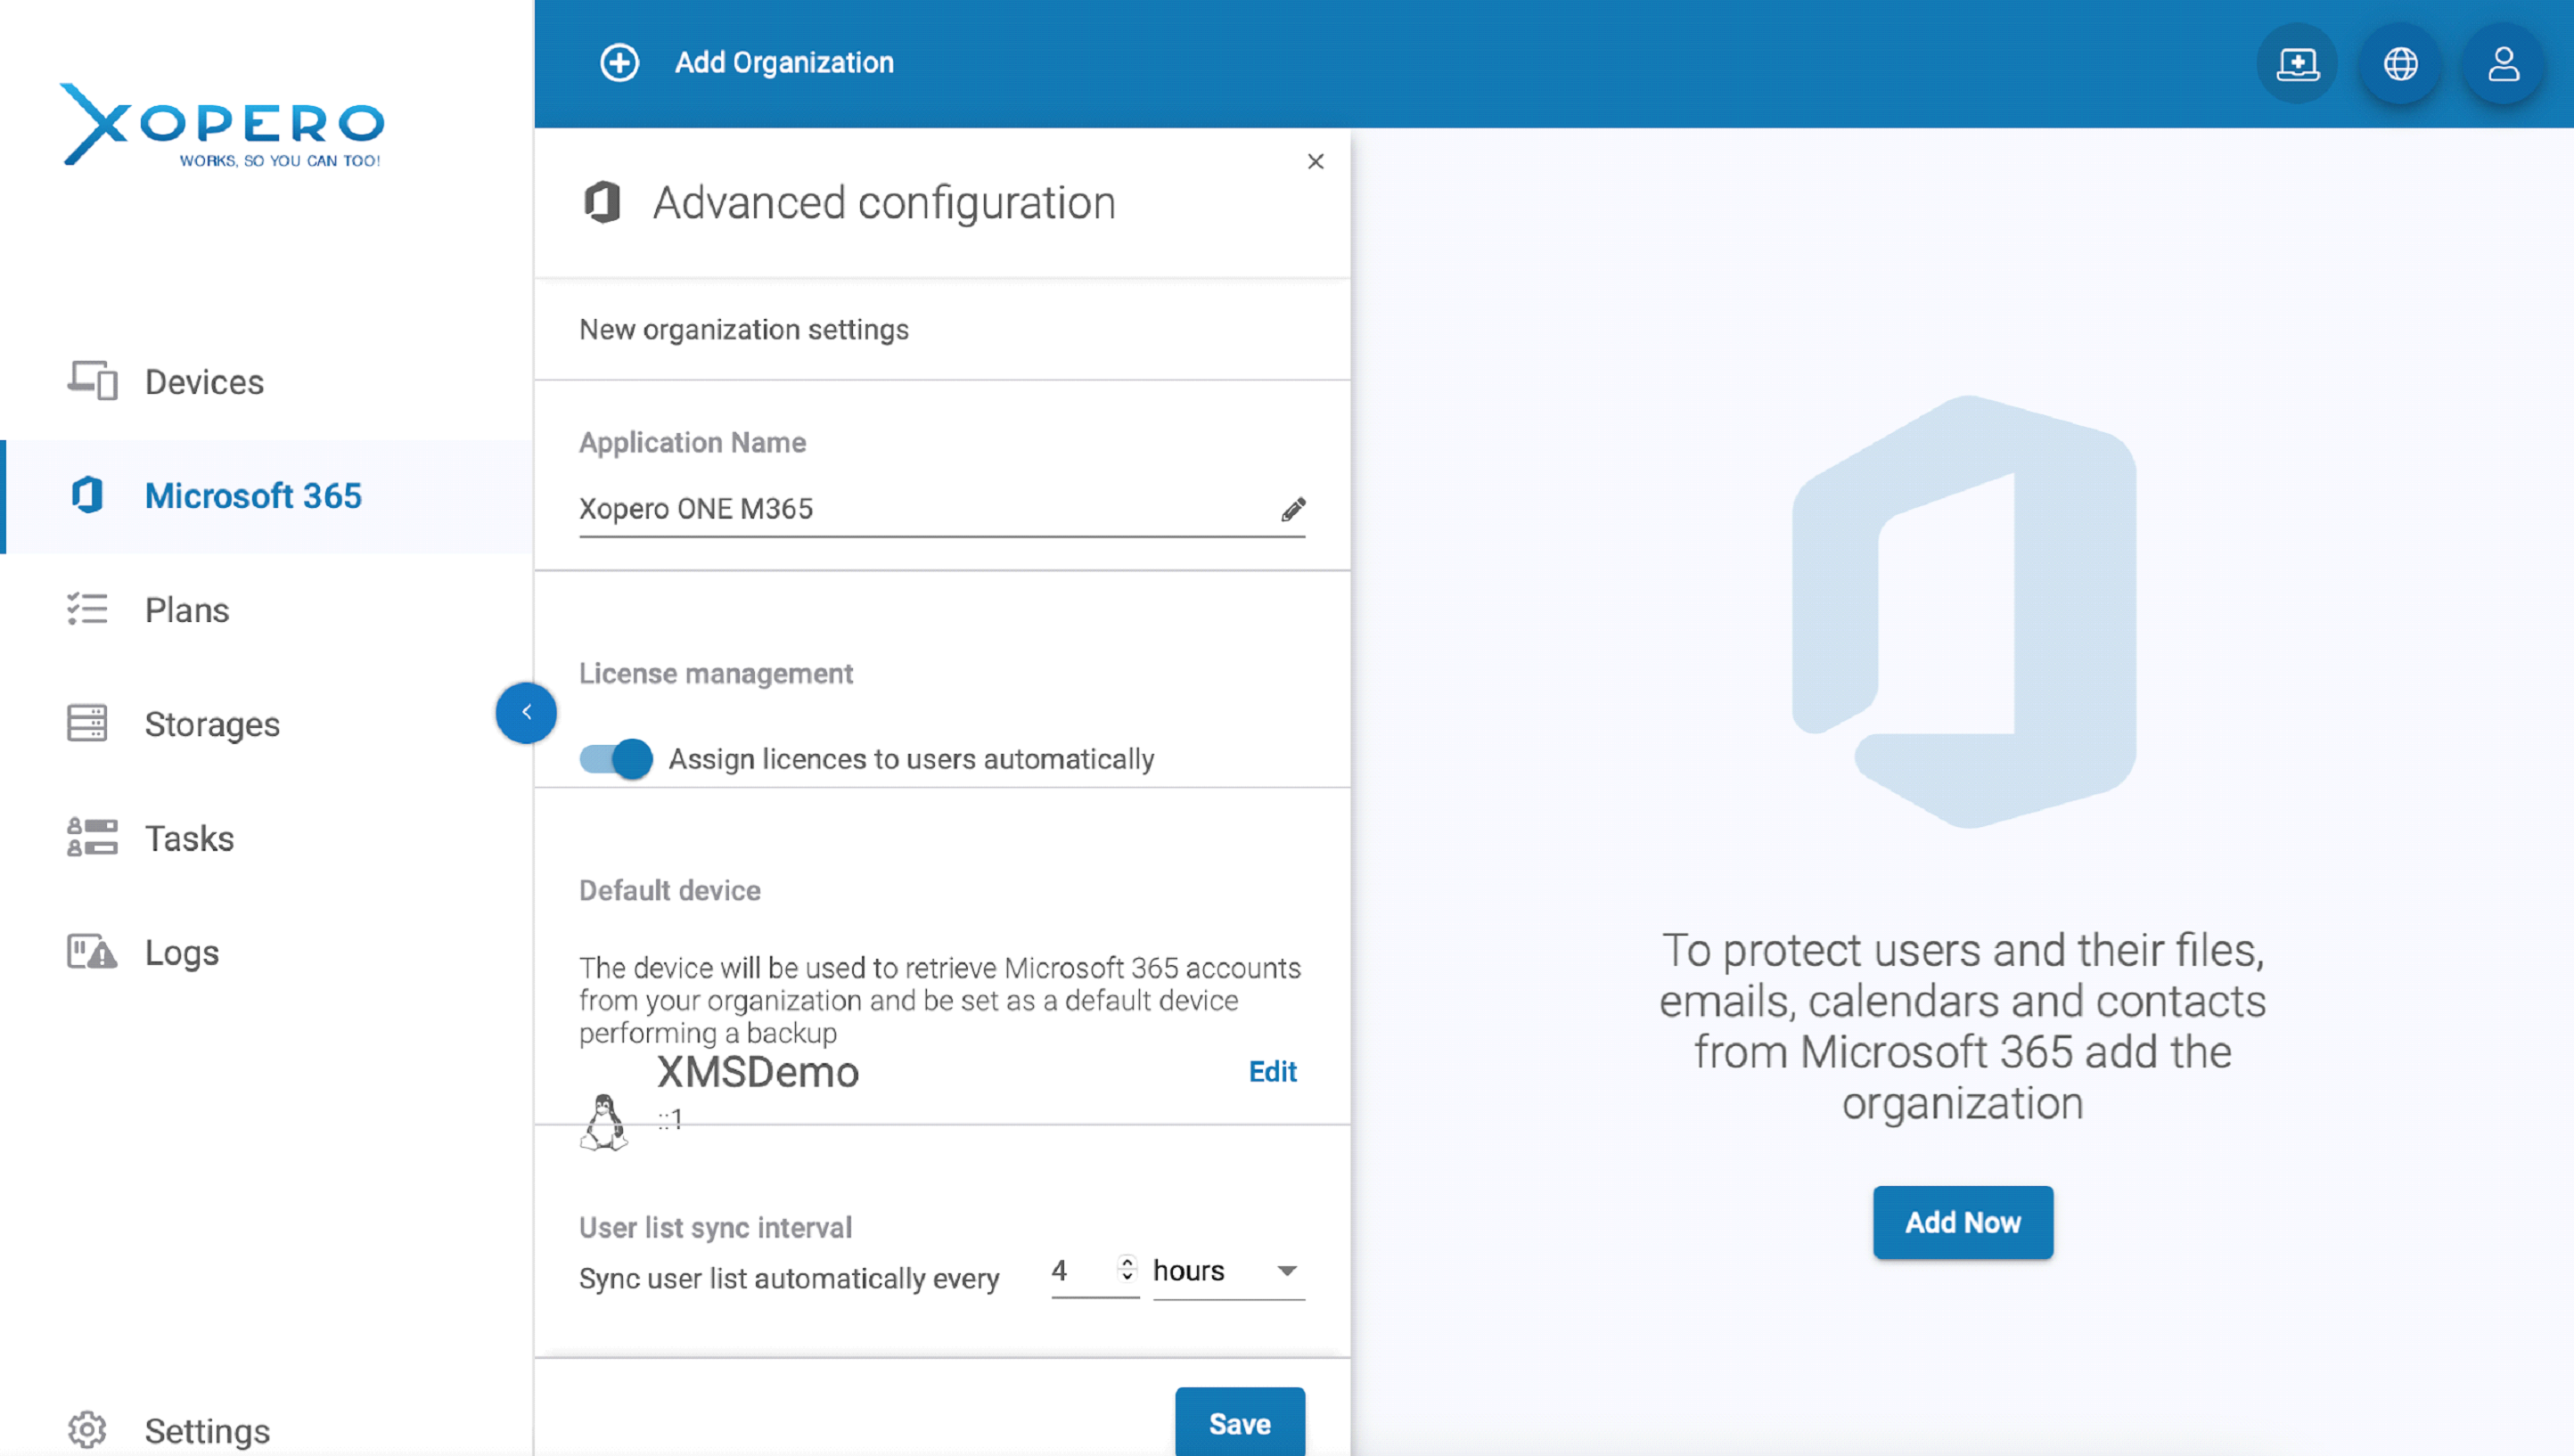
When you fill-up all that information, click the Save/Next button at the bottom of the screen
And after you’re done with that, your Microsoft 365 organization is successfully added to the Xopero ONE, next step is to start adding backup plans to protect your data.

Adding a predefined Microsoft 365 backup plan
After you add your Microsoft 365 organization, you will see a dashboard with a view of your organization. To start protecting your data immediately, we prepared a few predefined backup plans for you to use. Of course, you can also customize your own to fit your needs. We will get back to the part of customizing your plan later. But now let’s go with the quickest way to ensure your Microsoft 365 backup is in place.
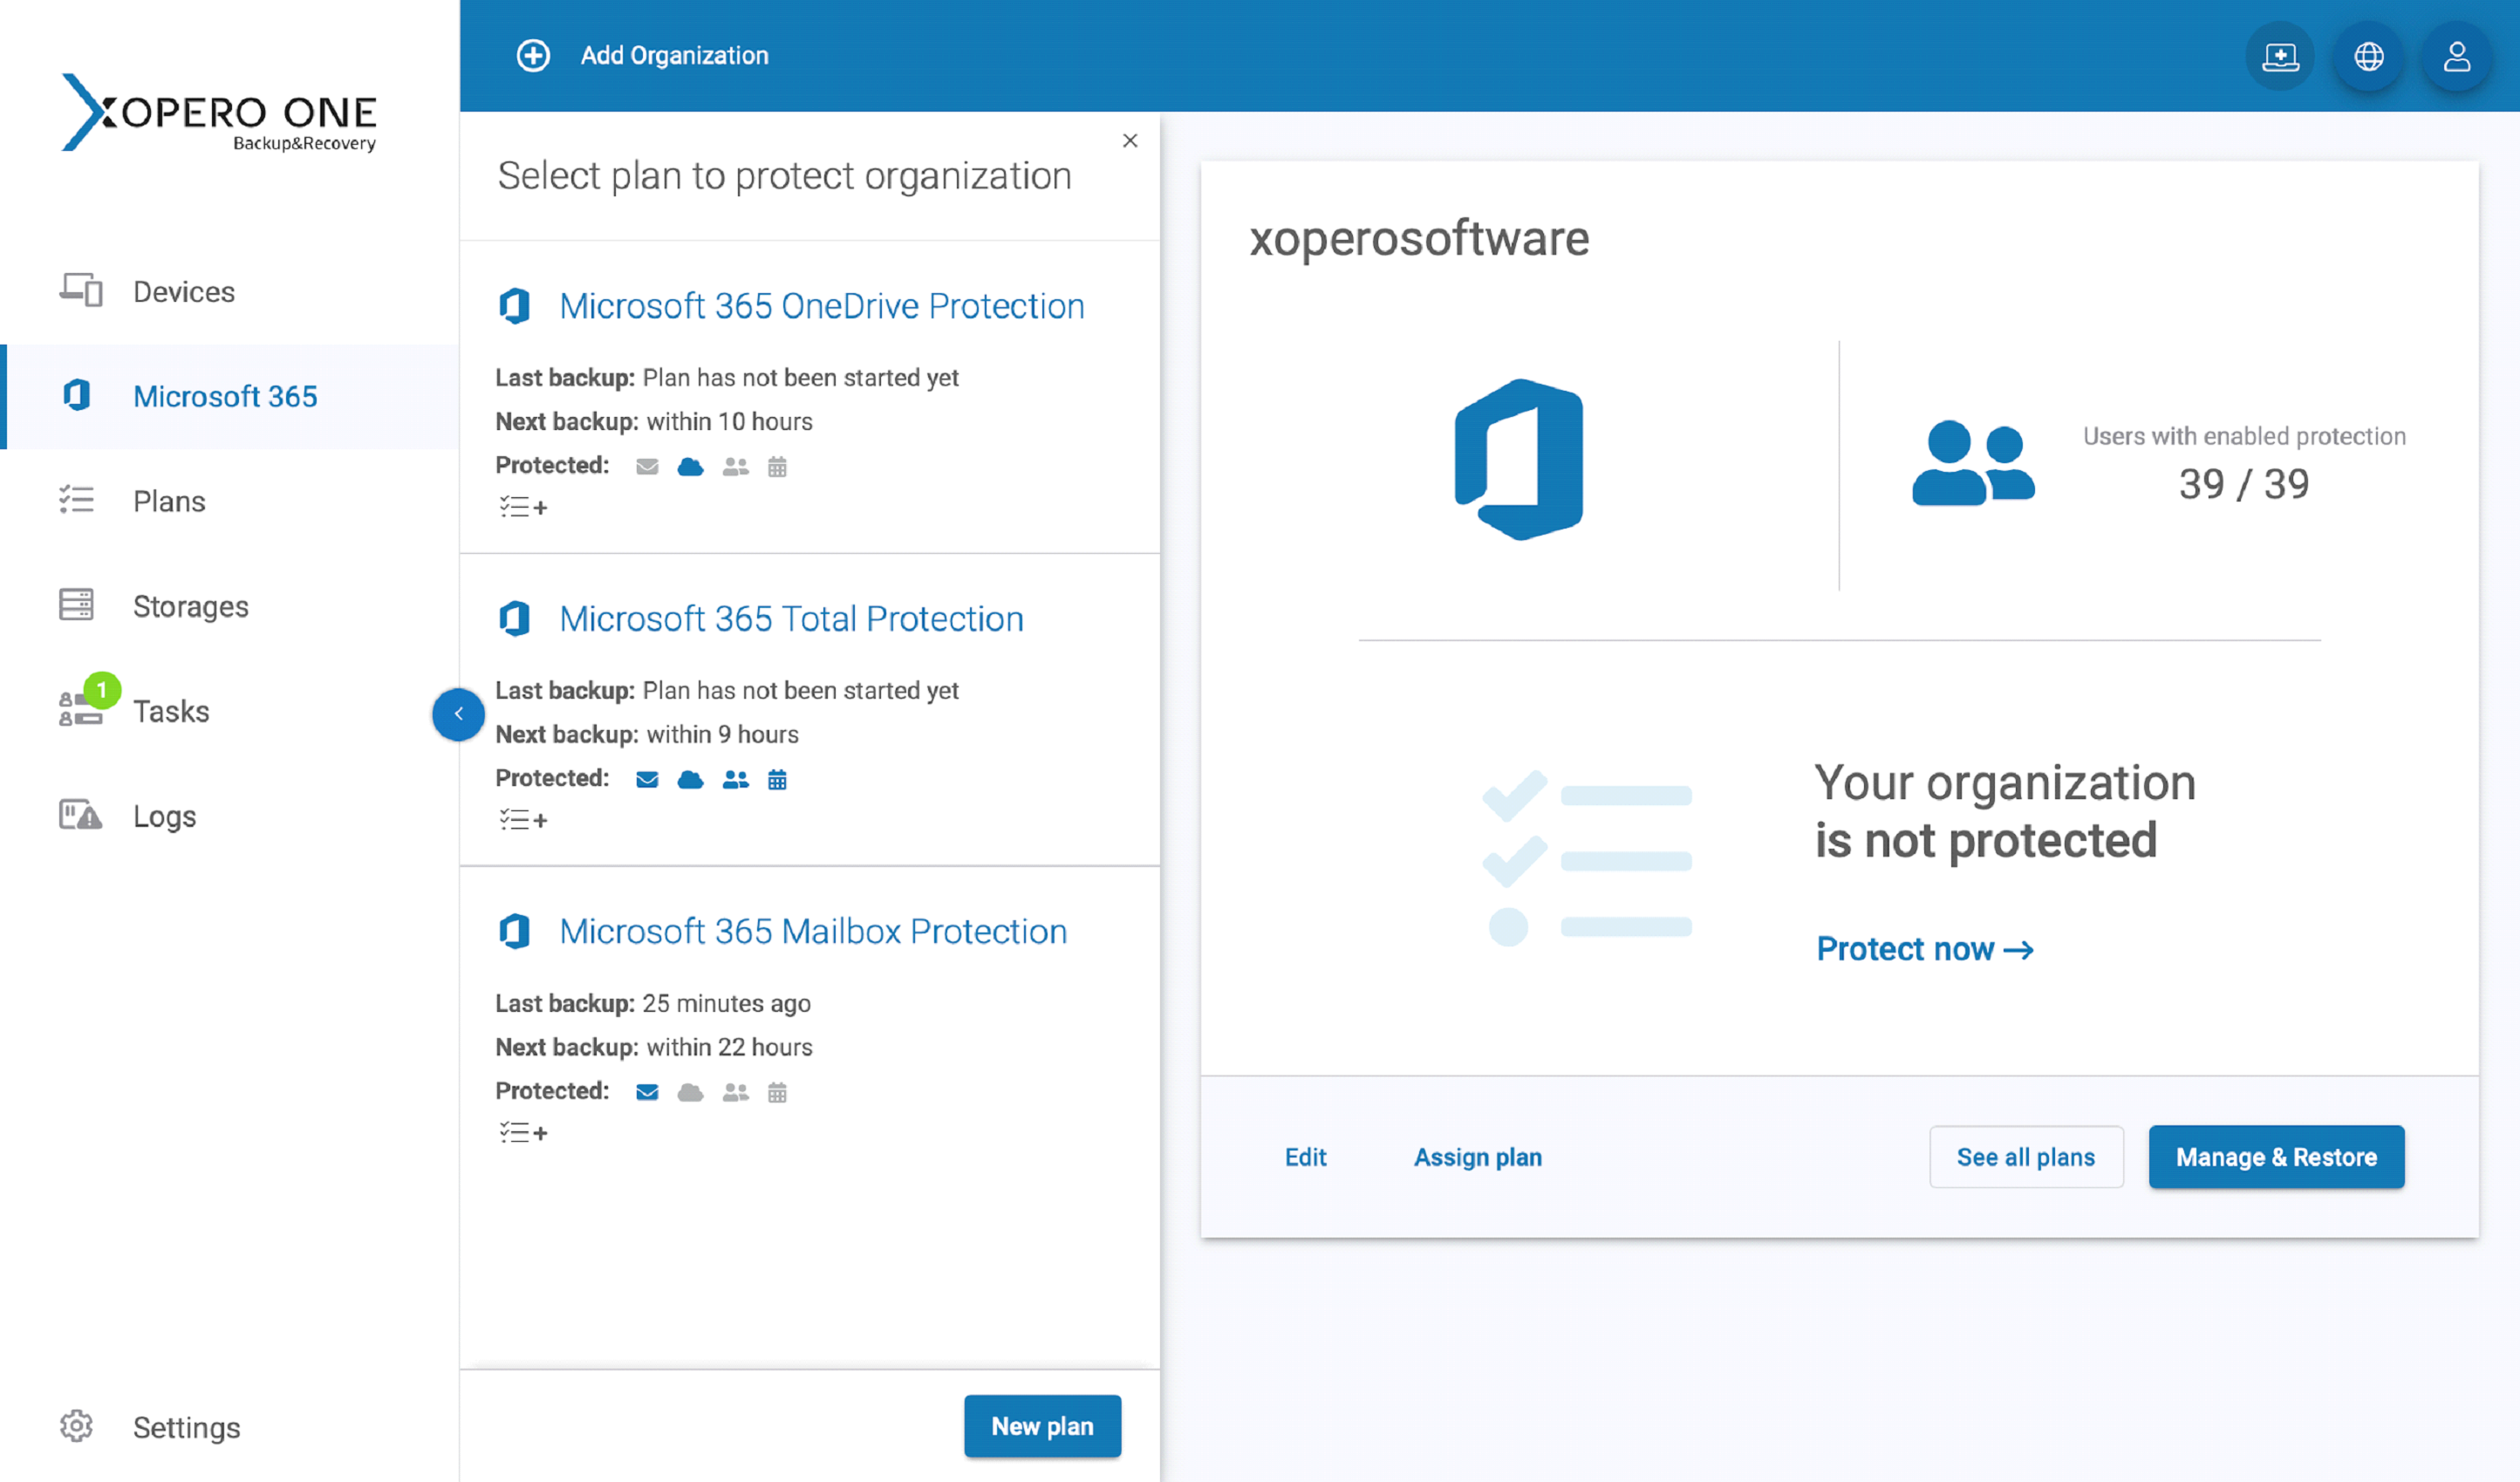
All you need to do is click Protect now on your organization dashboard, and choose one of the predefined backup plans. After you pick a plan you want to perform, you need to decide what storage you want to keep your copies on. If you have set up the default storage during the process of creating your Xopero ONE administrator account, you don’t have to worry about that part. We will talk about storage in more detail in the next paragraph.
If you have your storage already assigned, click Start now and your Microsoft 365 backup is in place running and protecting your data.
Adding storage
If you want to protect any data, you need to have a place where you can store created copies. It doesn’t matter if you prefer to store that data on-premise, or in the cloud, Xopero ONE offers support for many kinds of storage. Including SMB network shares, local disk resources, Xopero Cloud, Amazon AWS S3, public S3 clouds as well as hybrid and multi-cloud infrastructures. So you don’t even need to invest in additional IT infrastructure and make use of what you already have.
To manage available storages or add new ones, go to the Storage tab on the left menu.
If you want to add a new storage click Add storage at the top.
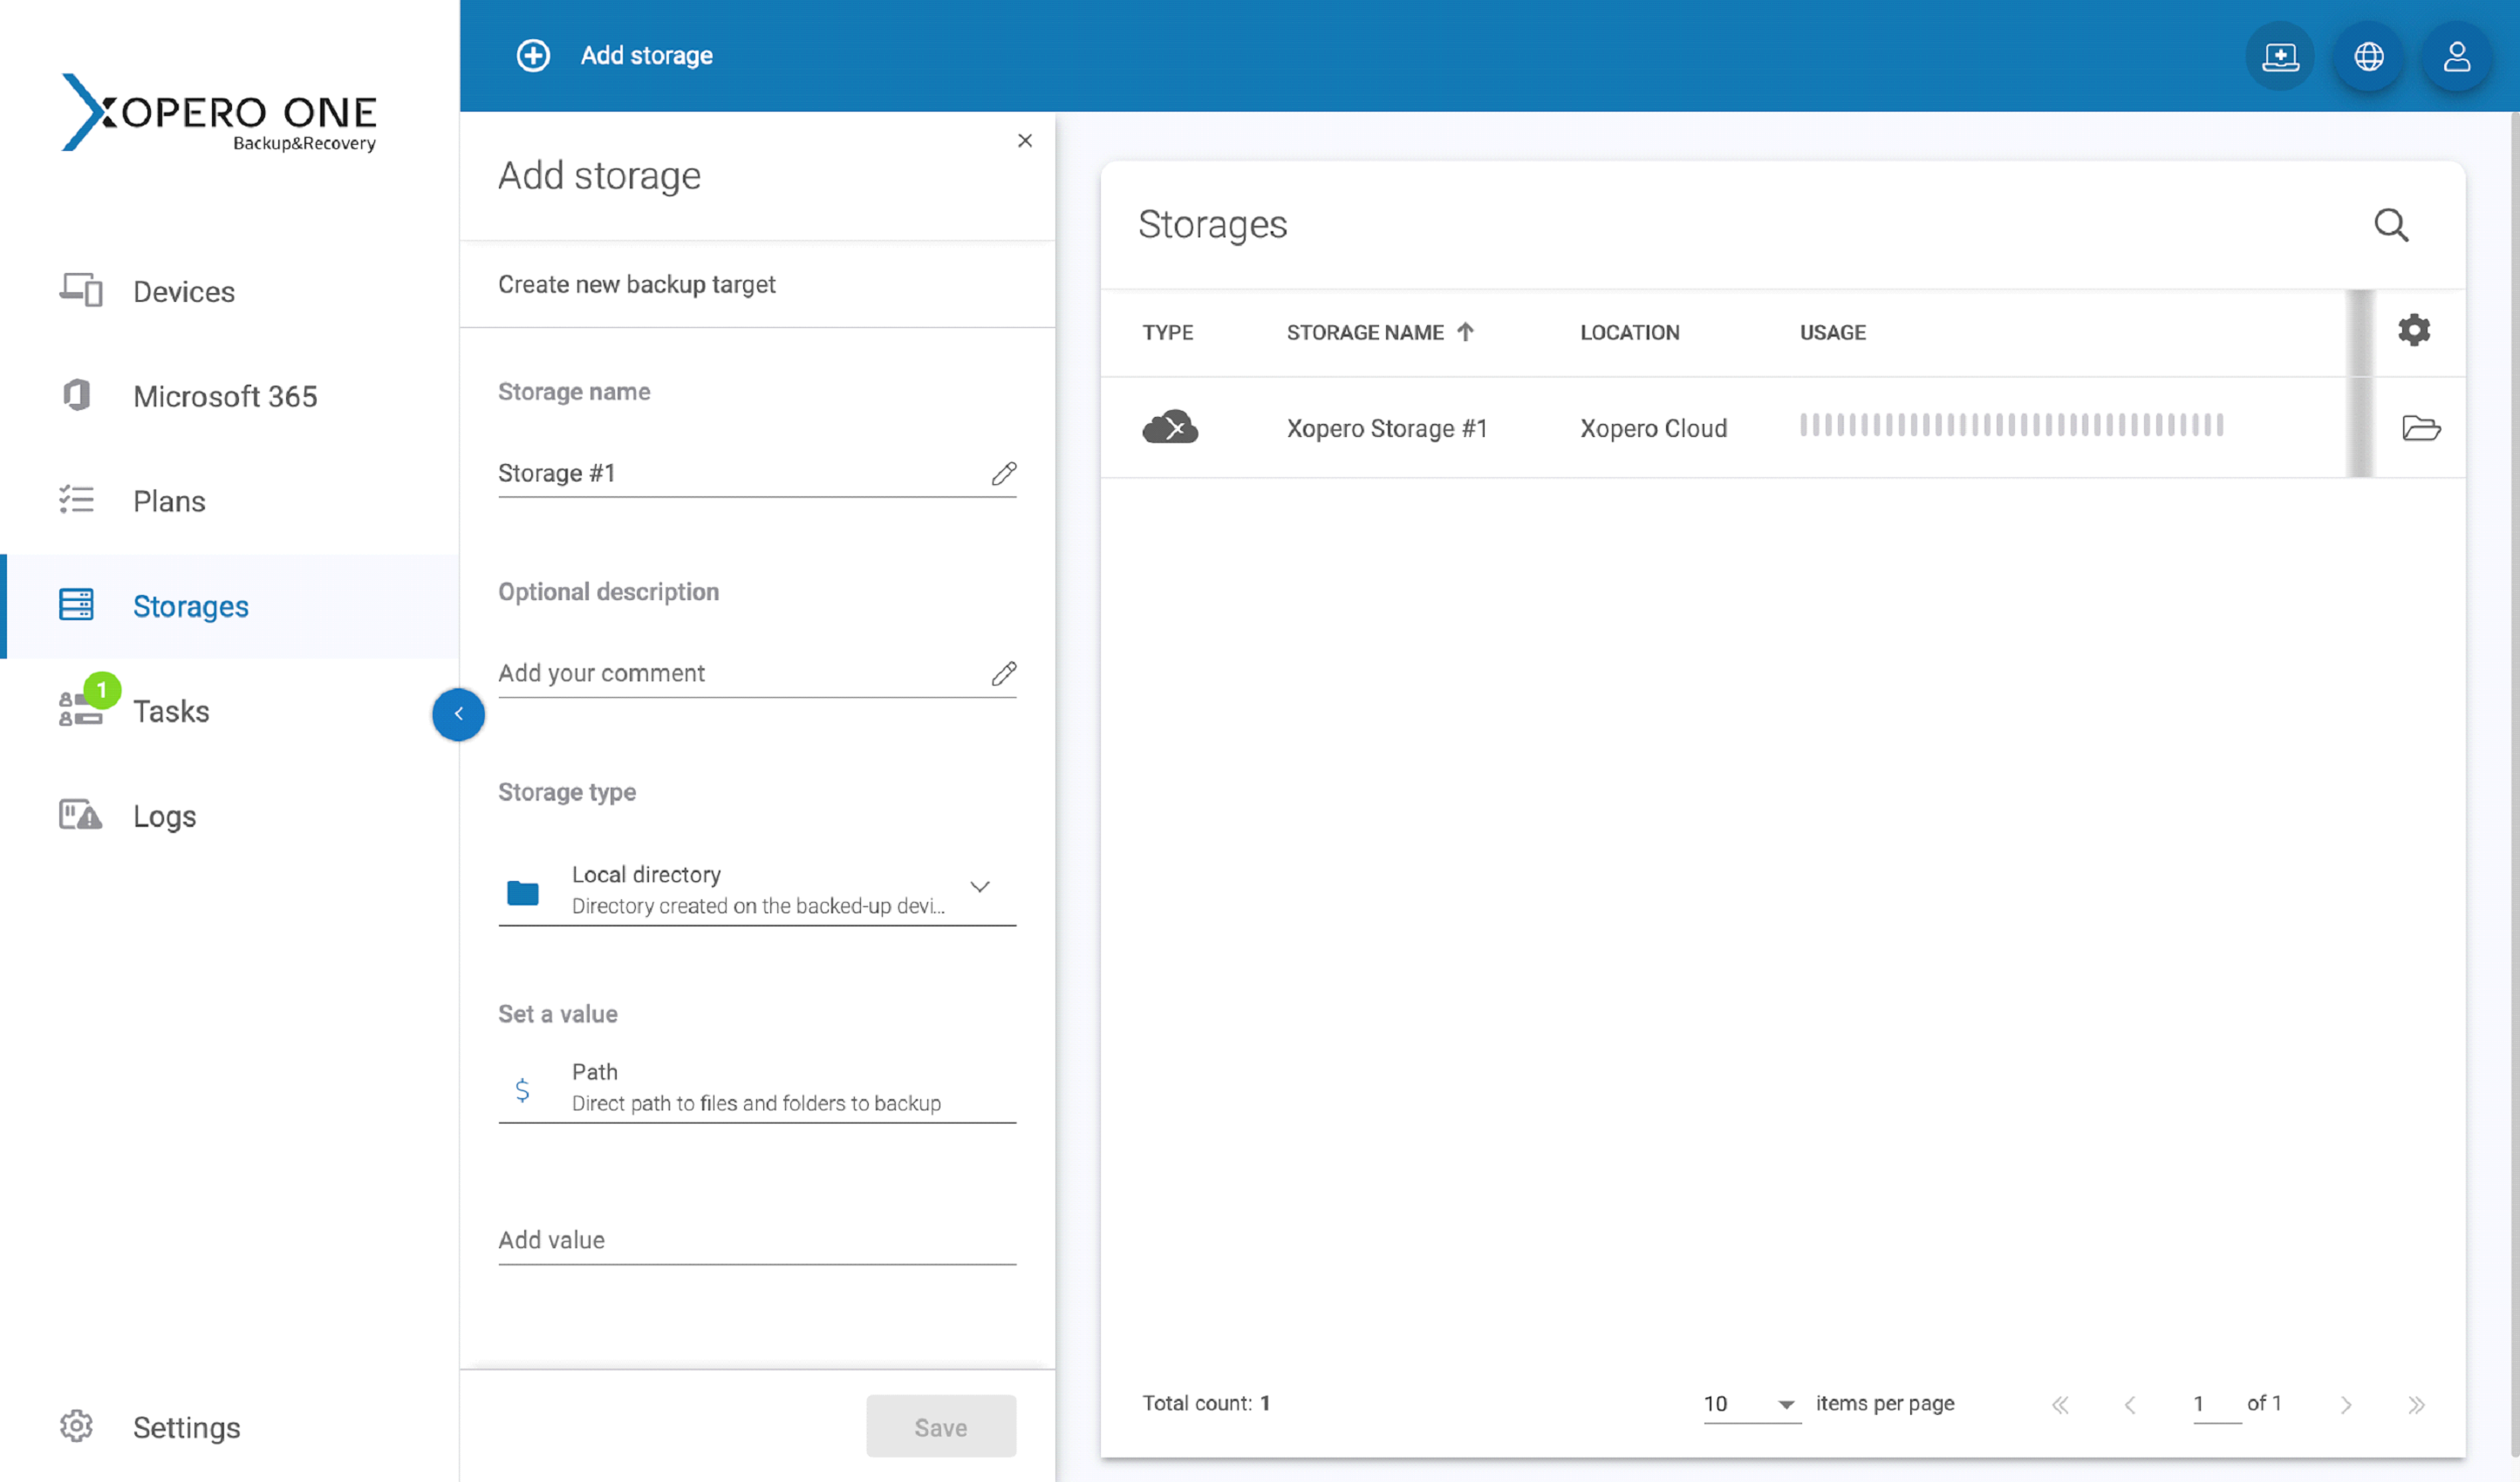
On the aside that will pop up, you can set up storage settings. Set up the name for it, add an optional description, choose the storage type. As for now, you can choose between:
- Local Storage
- Network Storage
- Xopero Cloud
- AWS Storage
- S3 Storage
When you have chosen what type of storage you want to add, just follow the steps on the panel (for example to add AWS Storage you would need to log into your Amazon Web Services account) or check it on our Knowledge Base section.
Advanced Microsoft 365 backup plan configuration
So far, we’ve been talking about predefined plans as the fastest way to set up Microsoft 365 backup policy. But Xopero ONE allows you to define your own backup plan fitting every need you might have – you have control on every possible detail of Microsoft 365 backup policy. Let us show you how to set up one right now.
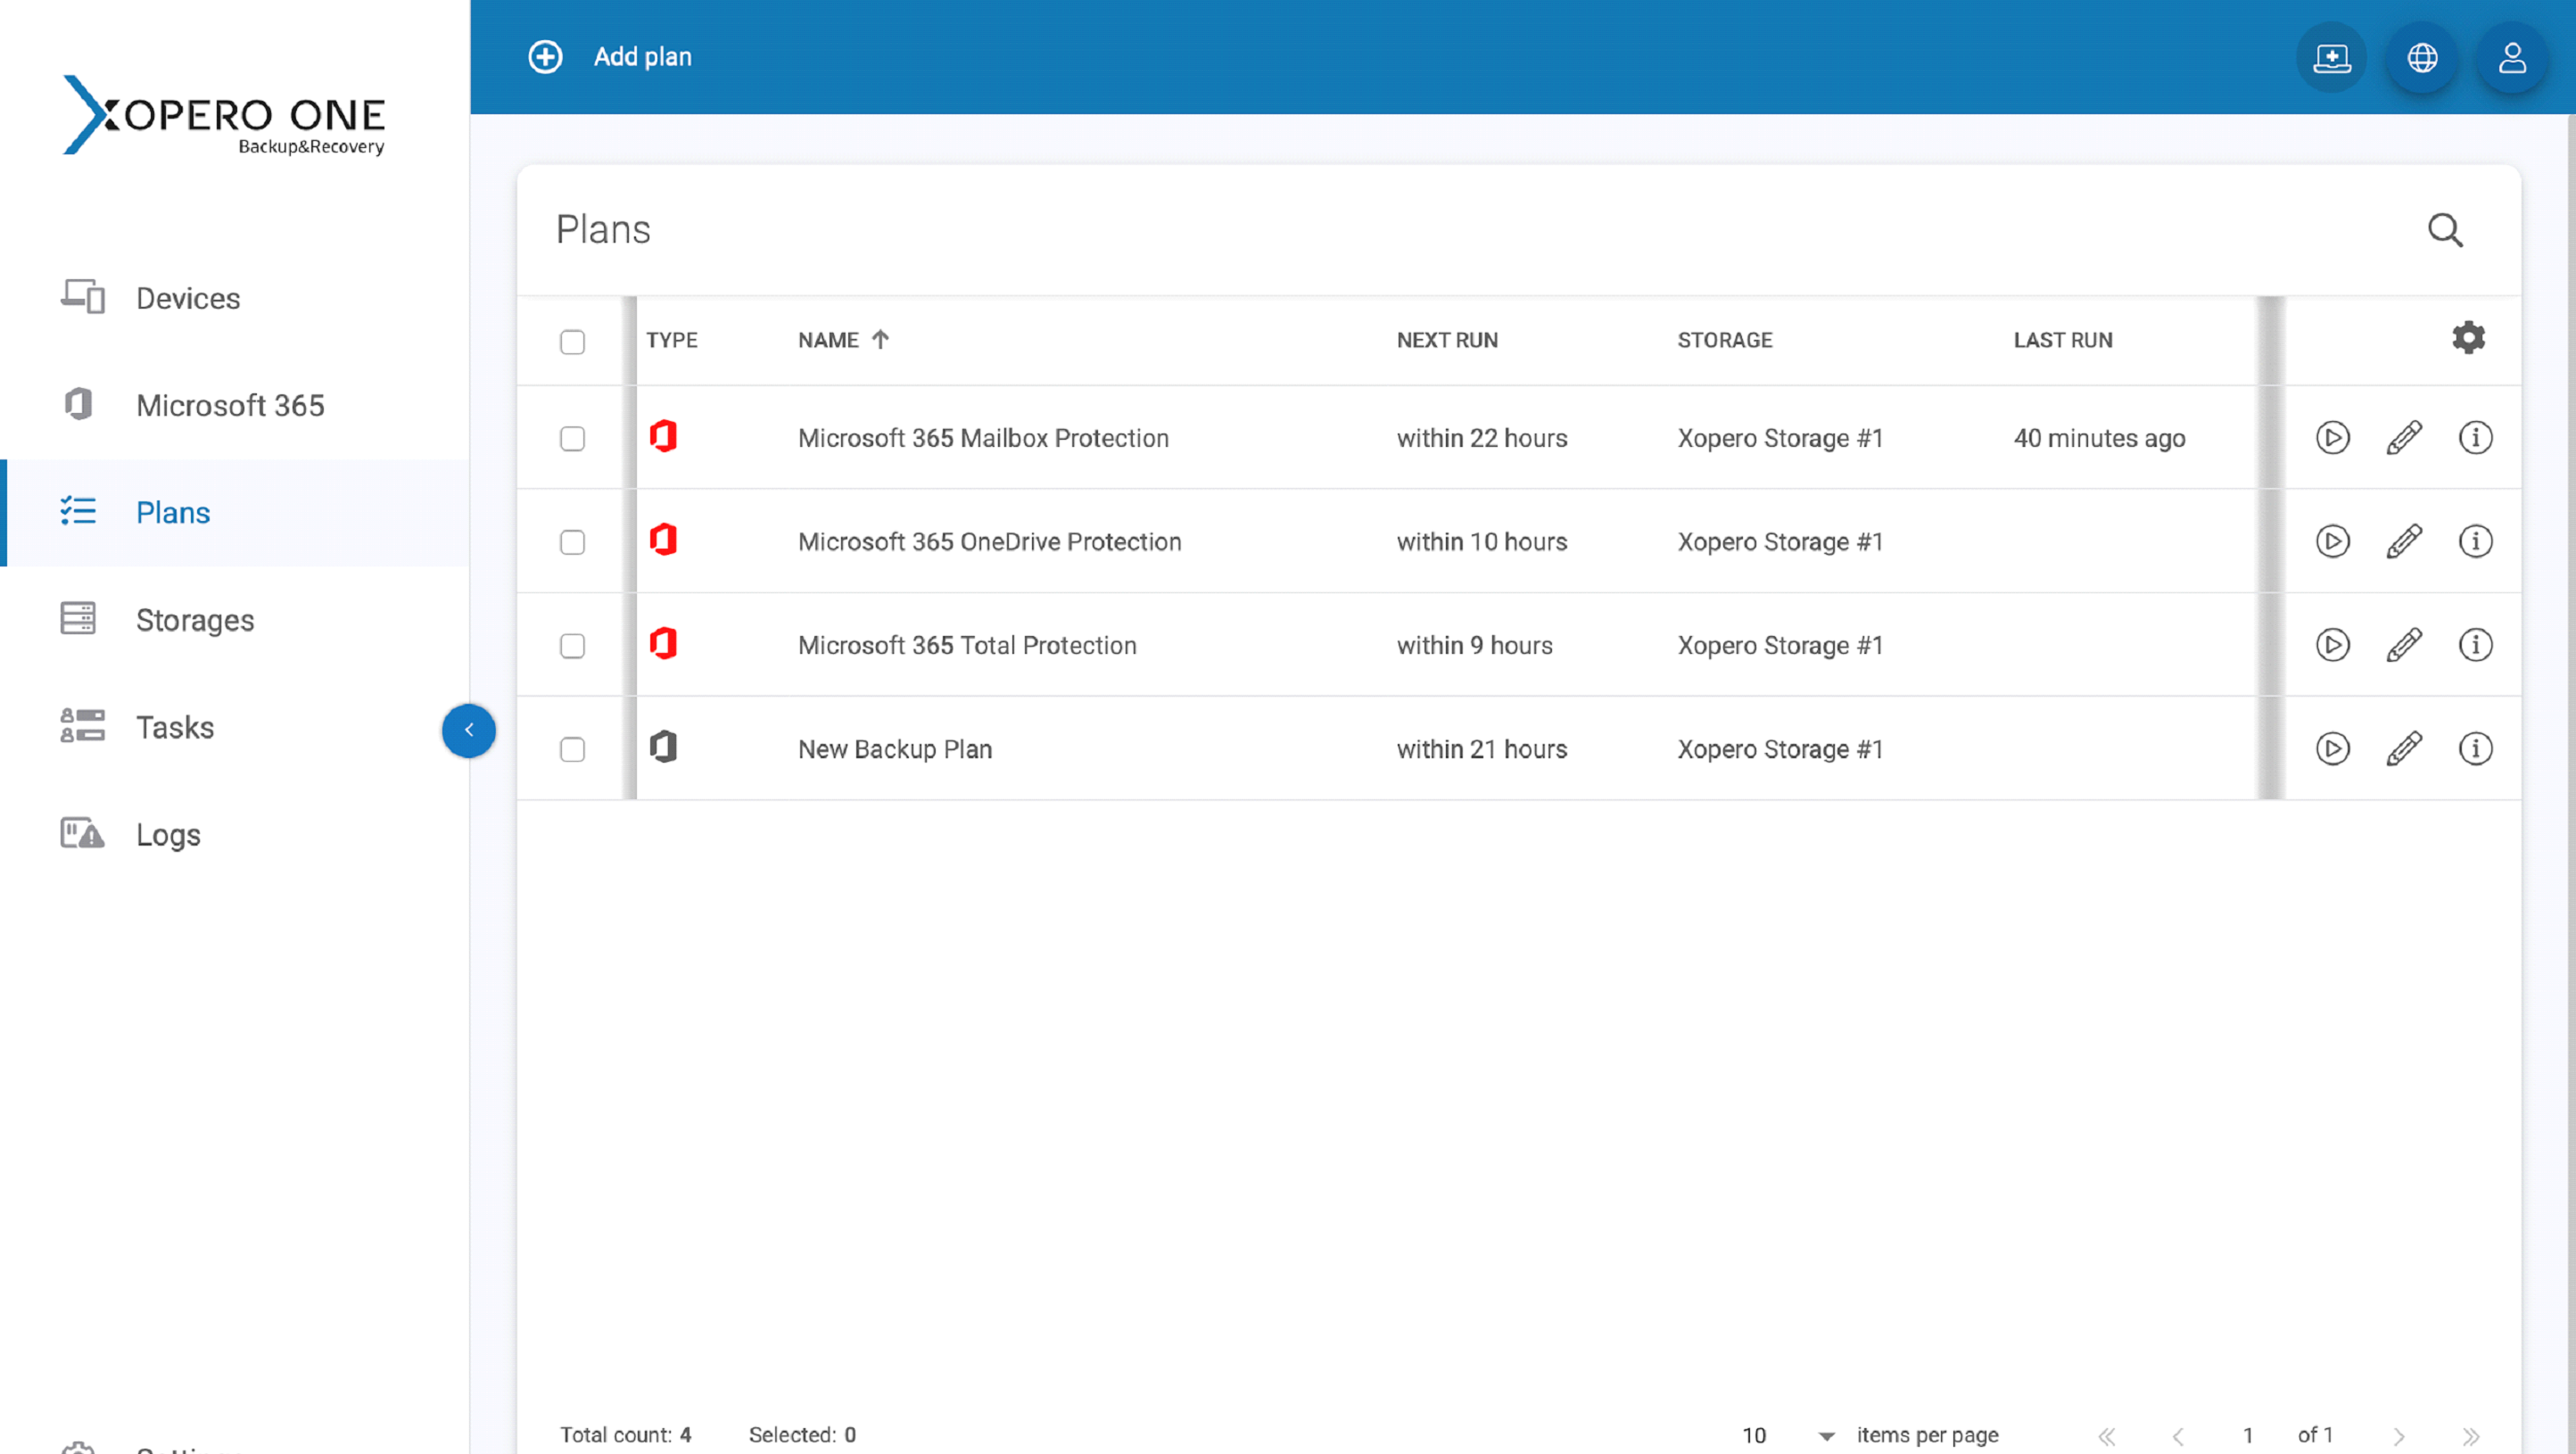
On the left menu, find Plans, and on the upper left side of the screen, you’ll find an Add plan button. By clicking on it you’ll be able to create your own backup plan. Ready? Let the magic begin.
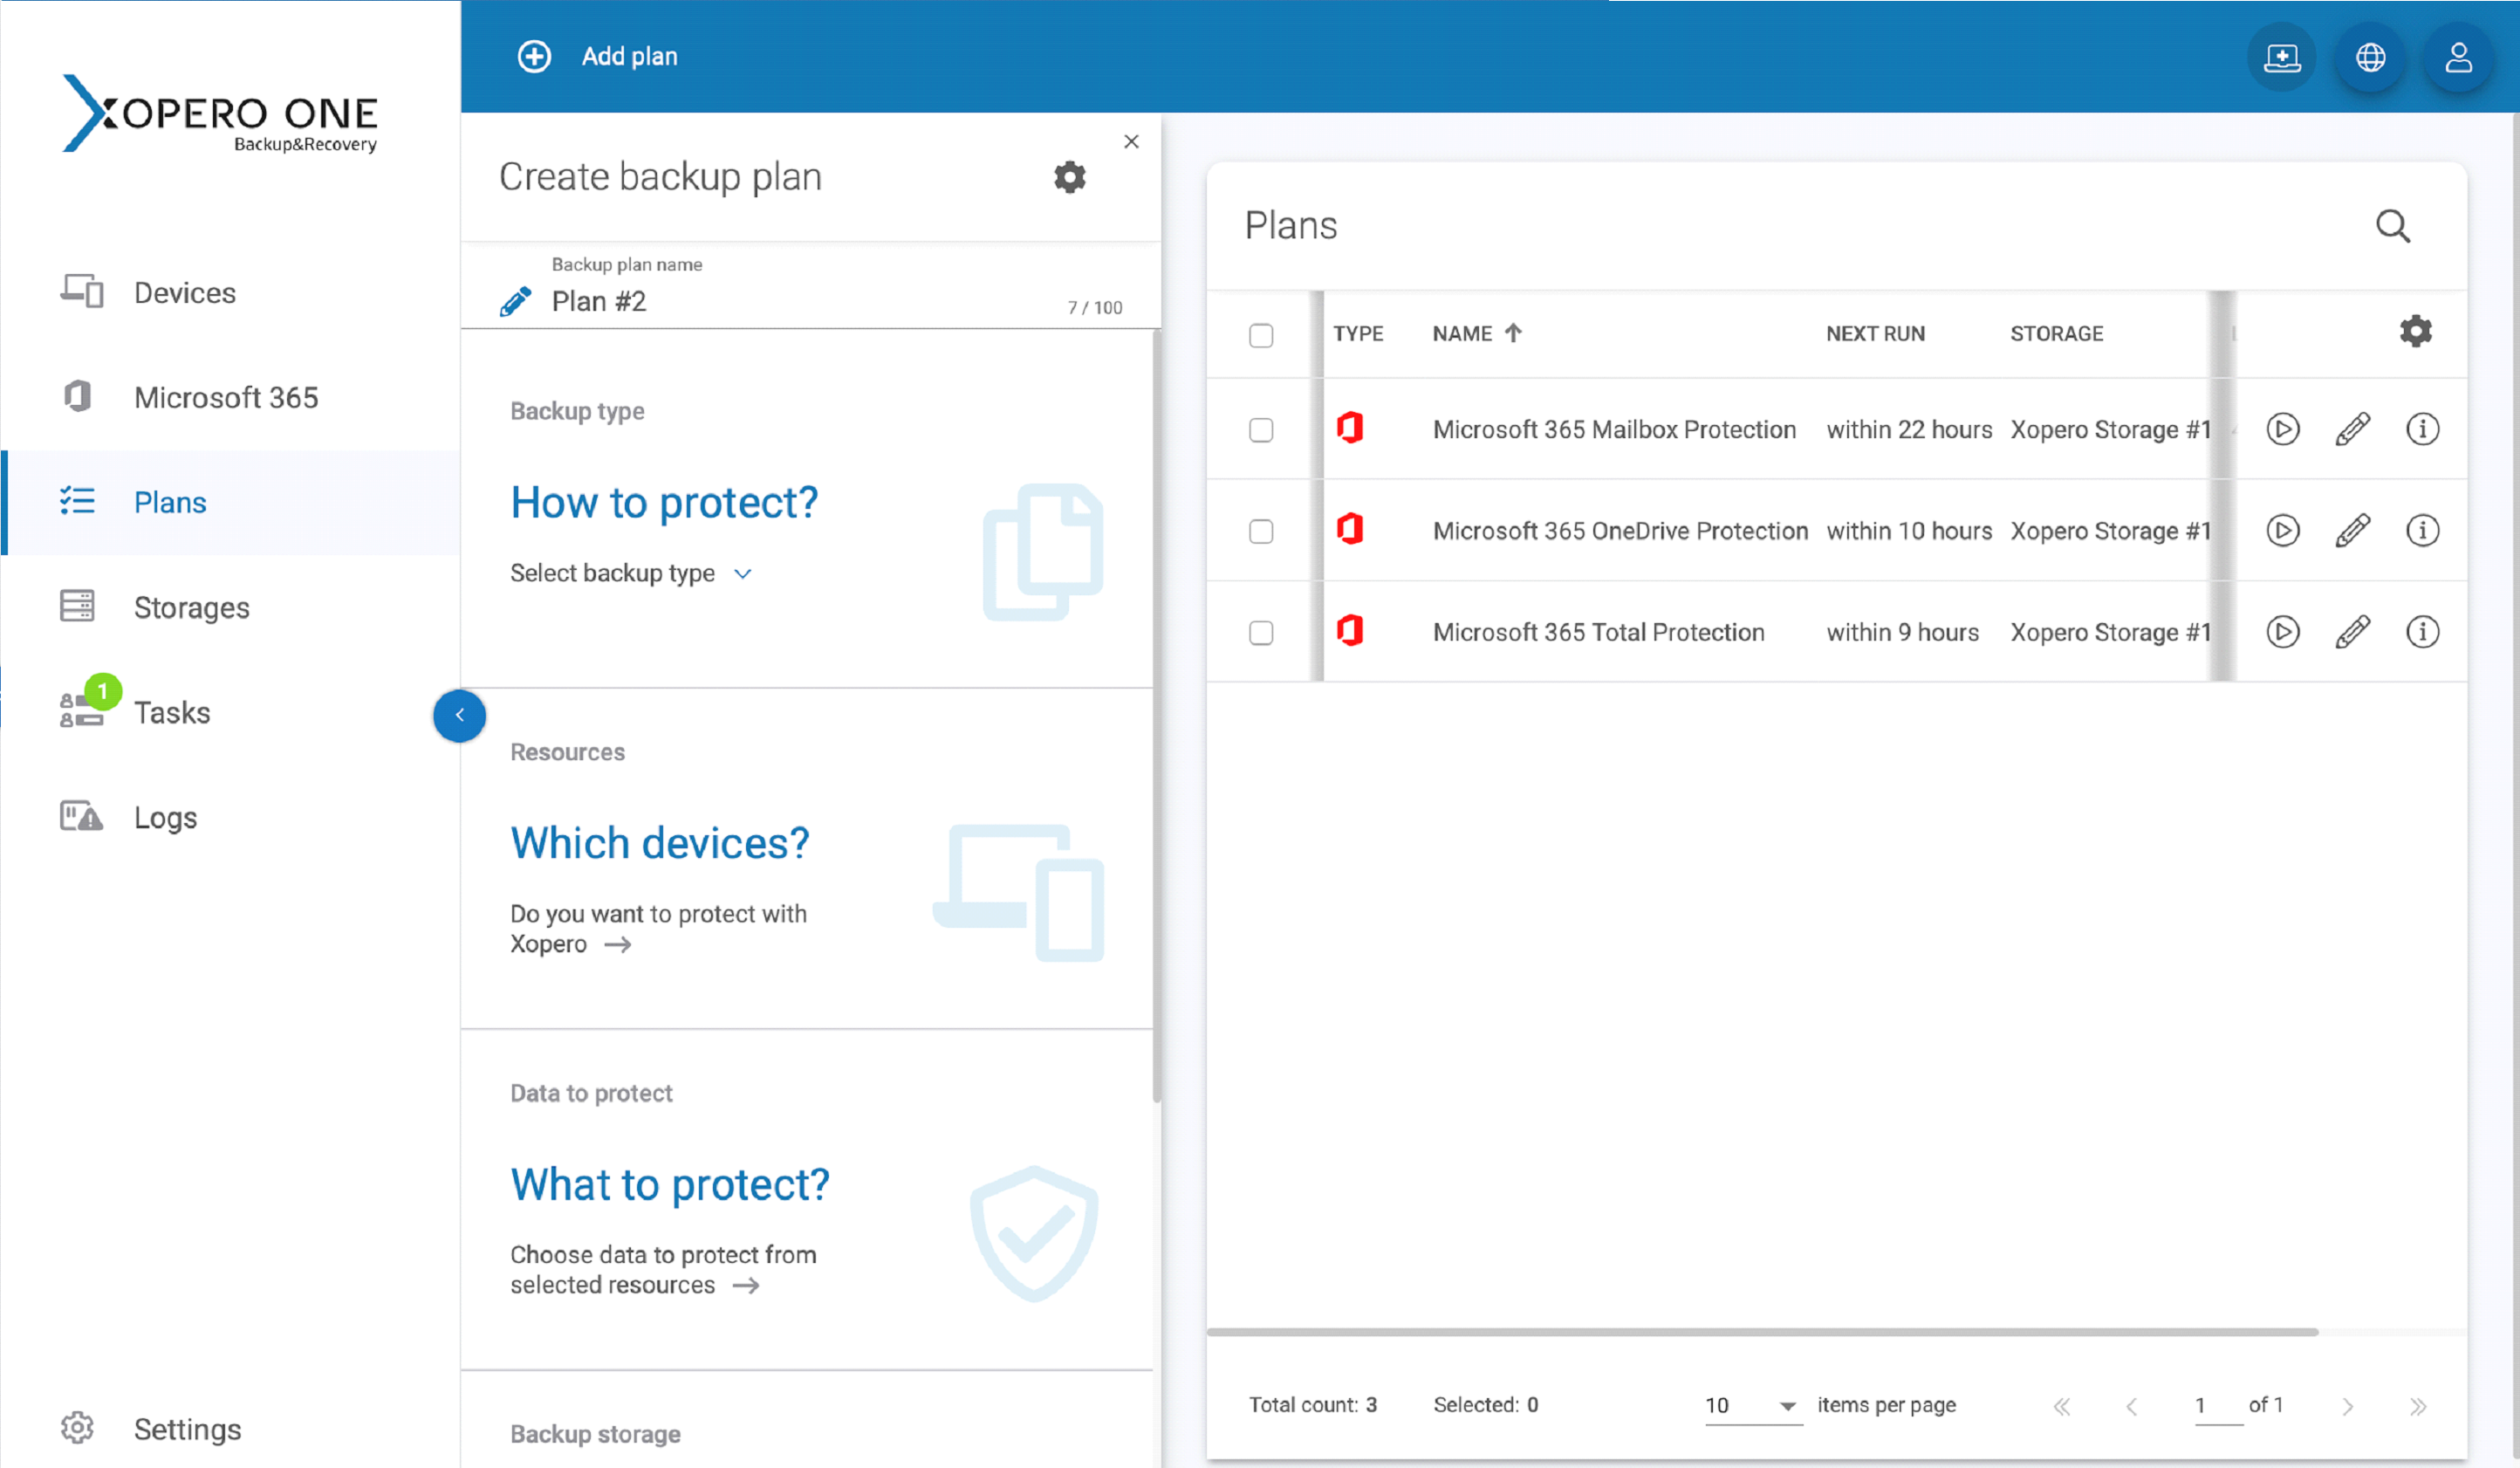
The first step is to choose How to protect? – you need to select the type of backup you want to perform. In our case, it will be Microsoft 365 backup – it’s pretty obvious.
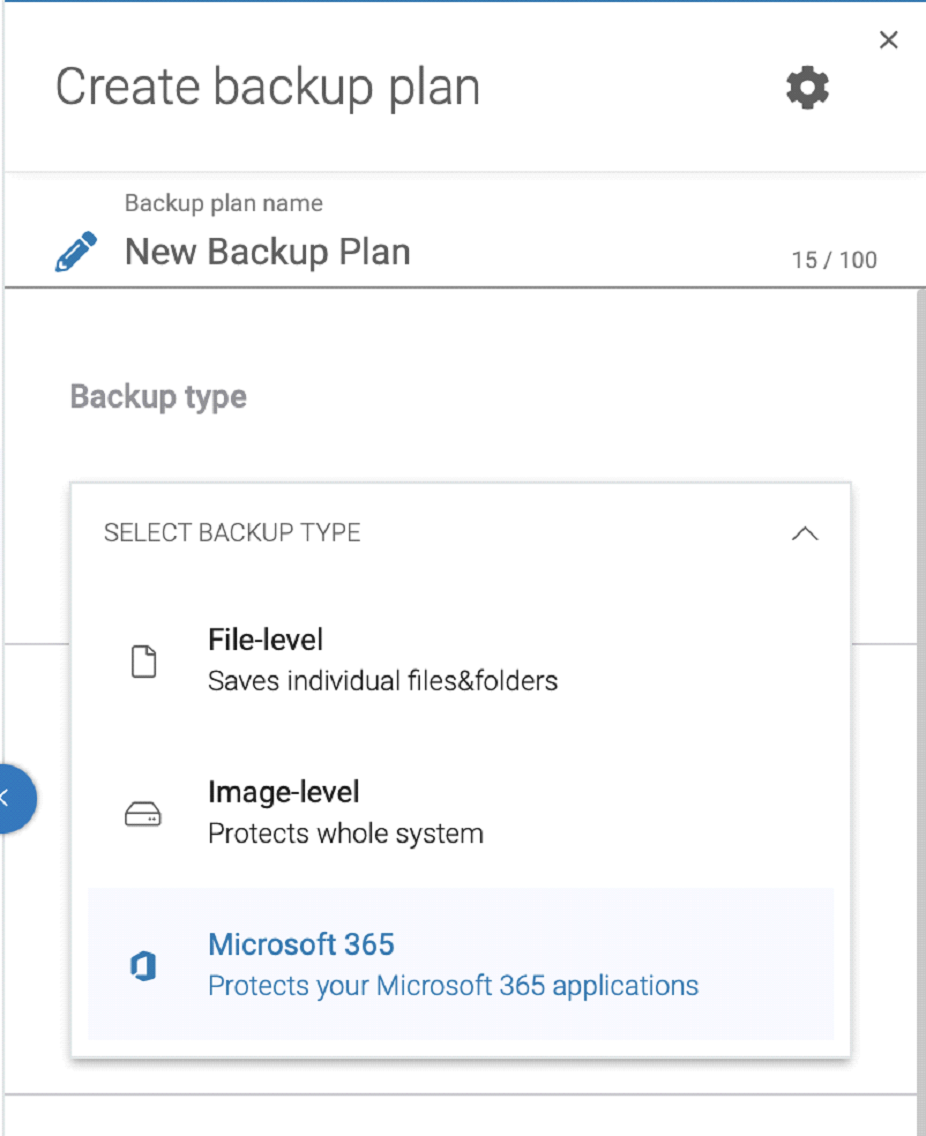
Then we will ask you to define your backup plan name. Pro tip: better don’t use random names – the name should be pretty clear and you should know what exactly it protects, how, and where.
The next step is to choose Which users? – you will need to decide whether you want to protect all users in the organization or just the chosen ones. To protect the entire organization click Protect all. If you want to choose specific users click on Manage users.
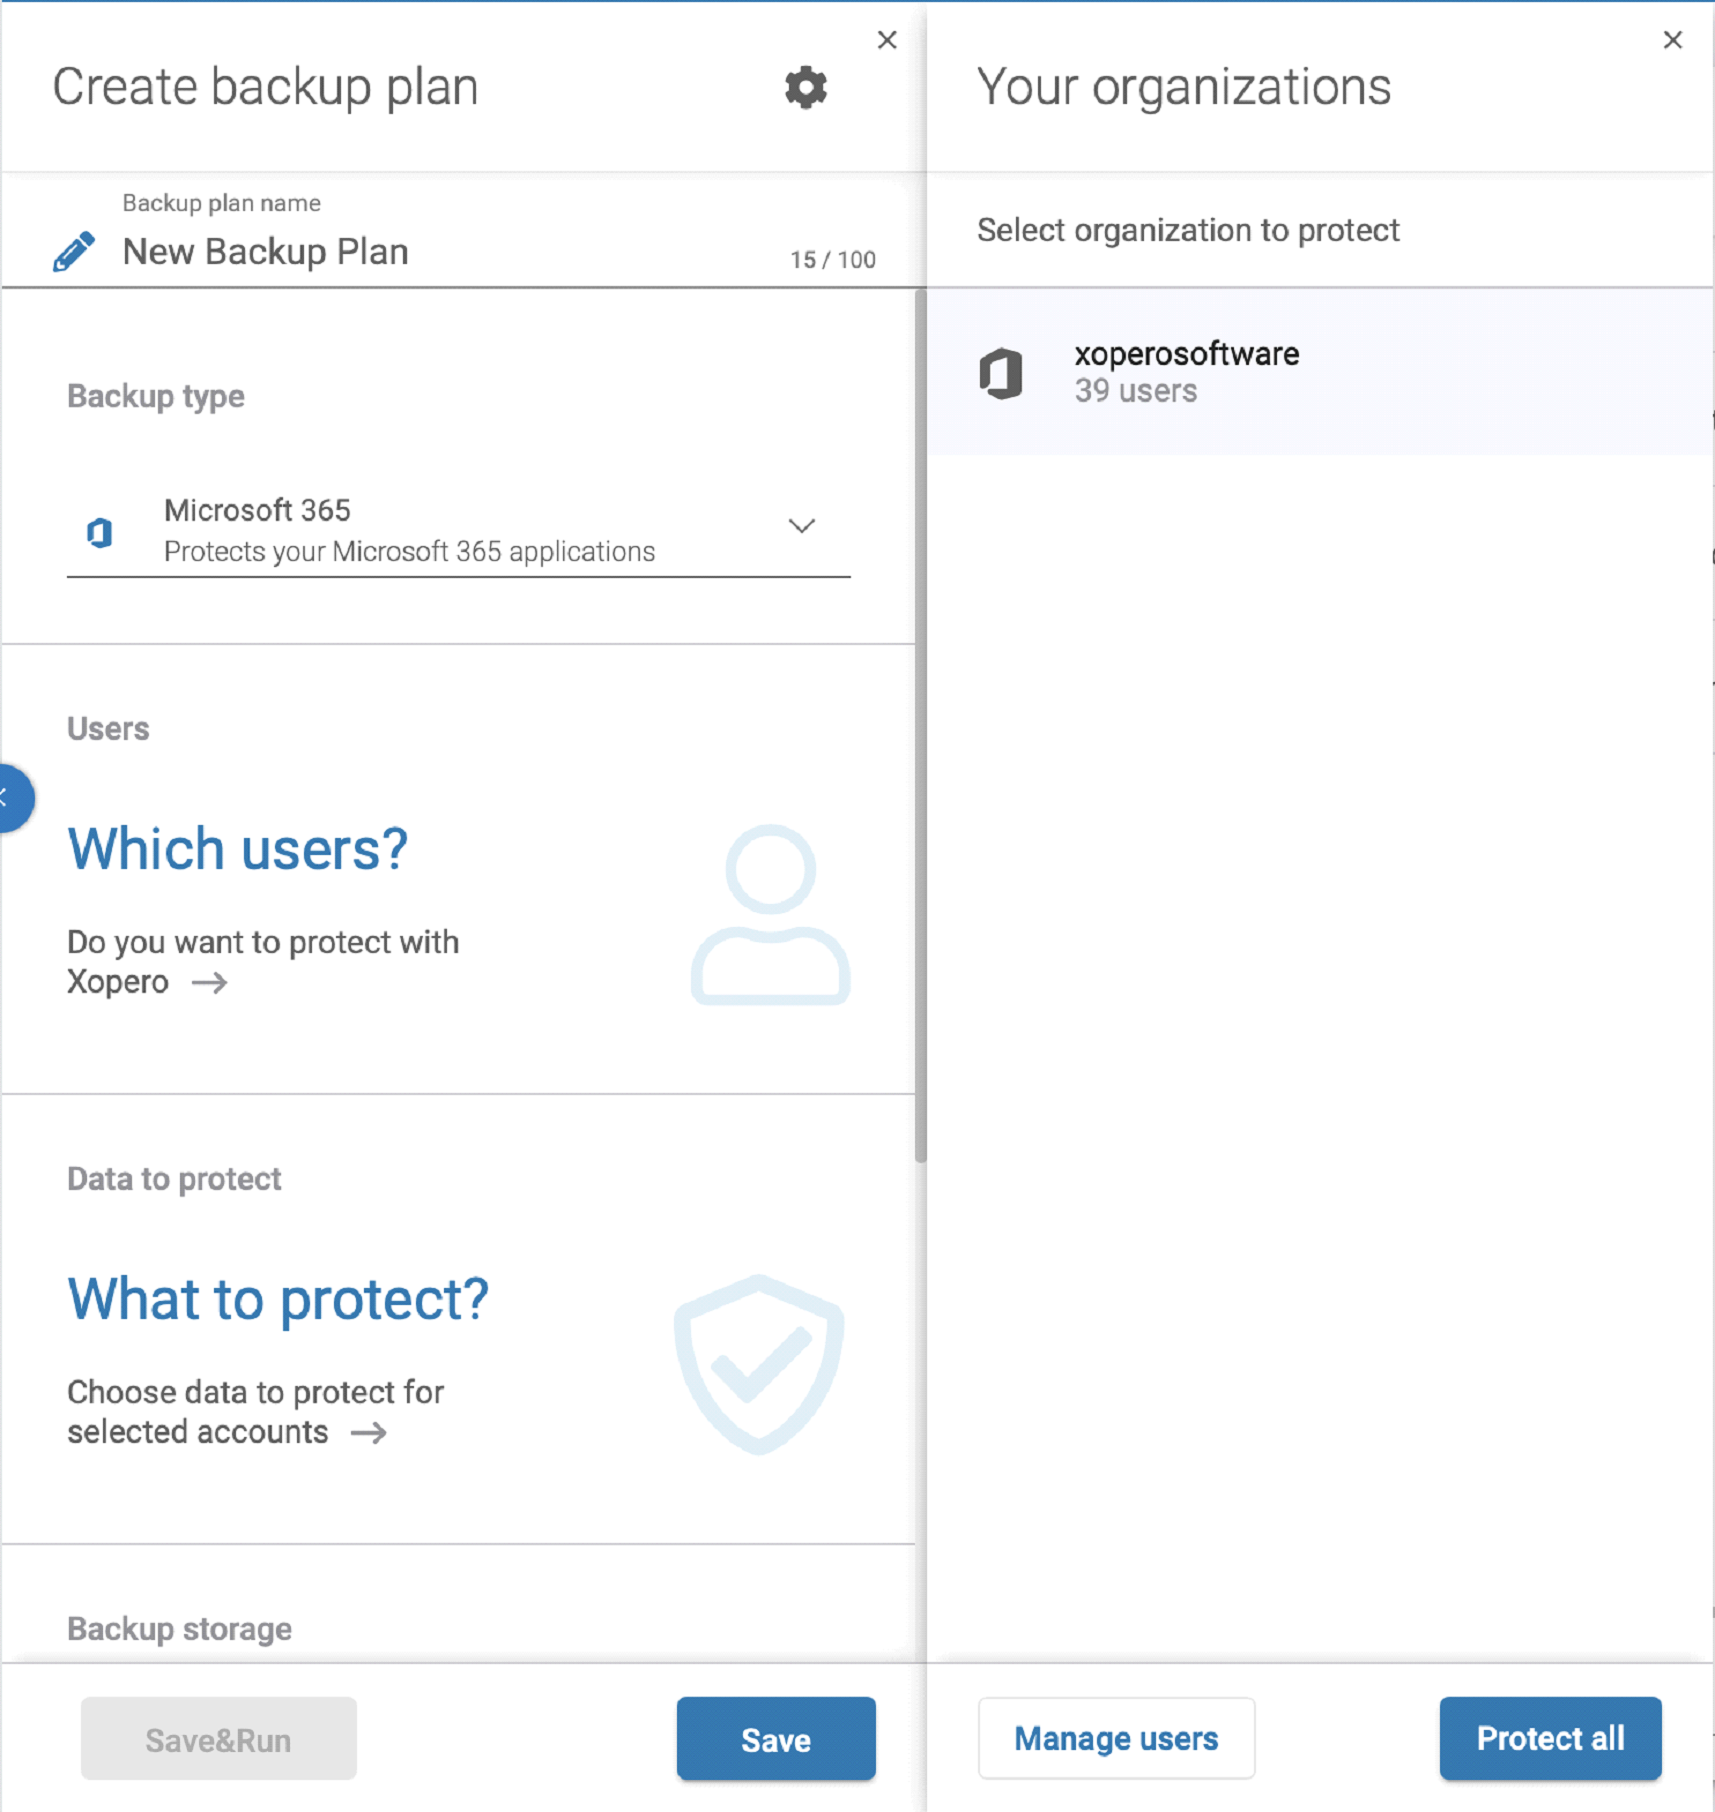
If you have chosen what users to protect, let’s take another step.
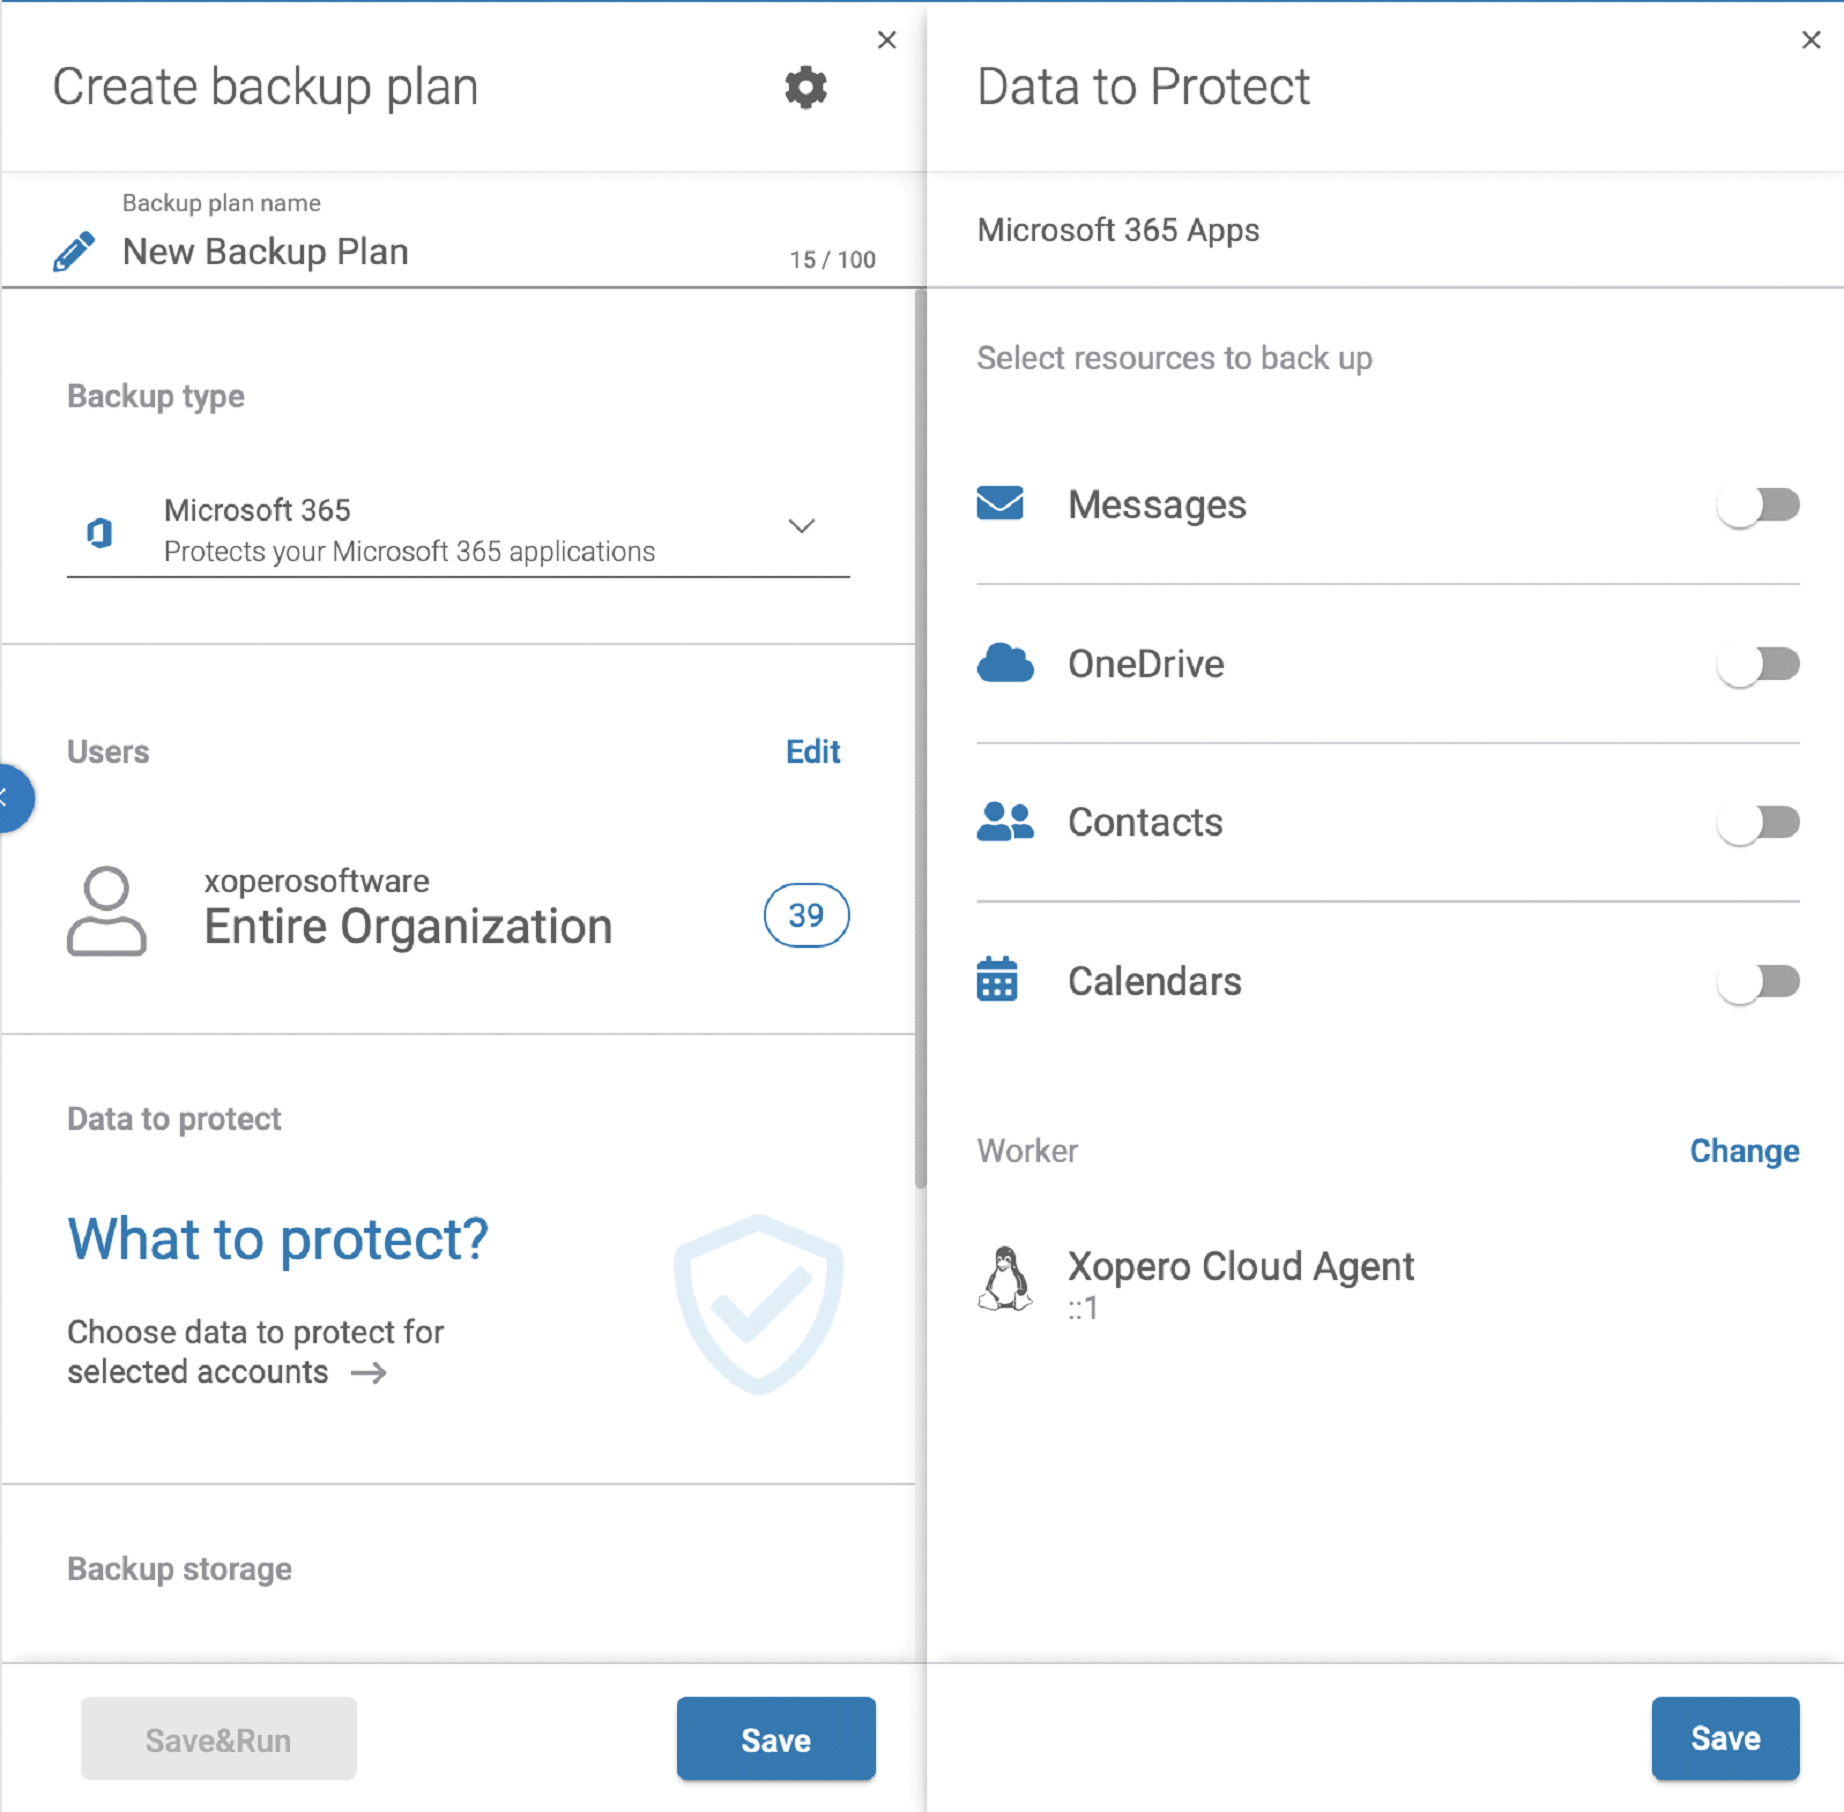
Go to the part named – What to protect? where you will define data to be protected.In the case of M365 you will have an option to choose among Mailboxes, Contacts, Calendars, and OneDrive (SharePoint and Teams options are coming). In here you will have an option to change a worker performing a backup if needed.
The next step is choosing Where to store? your data. In short: on which storage (as you can have multiple) you want to keep copies performed according to this specific backup plan.

Another important question is to set a time when the backup should be executed – for example you might want to perform backup once your company is closed and employees are out of the office. No problem!
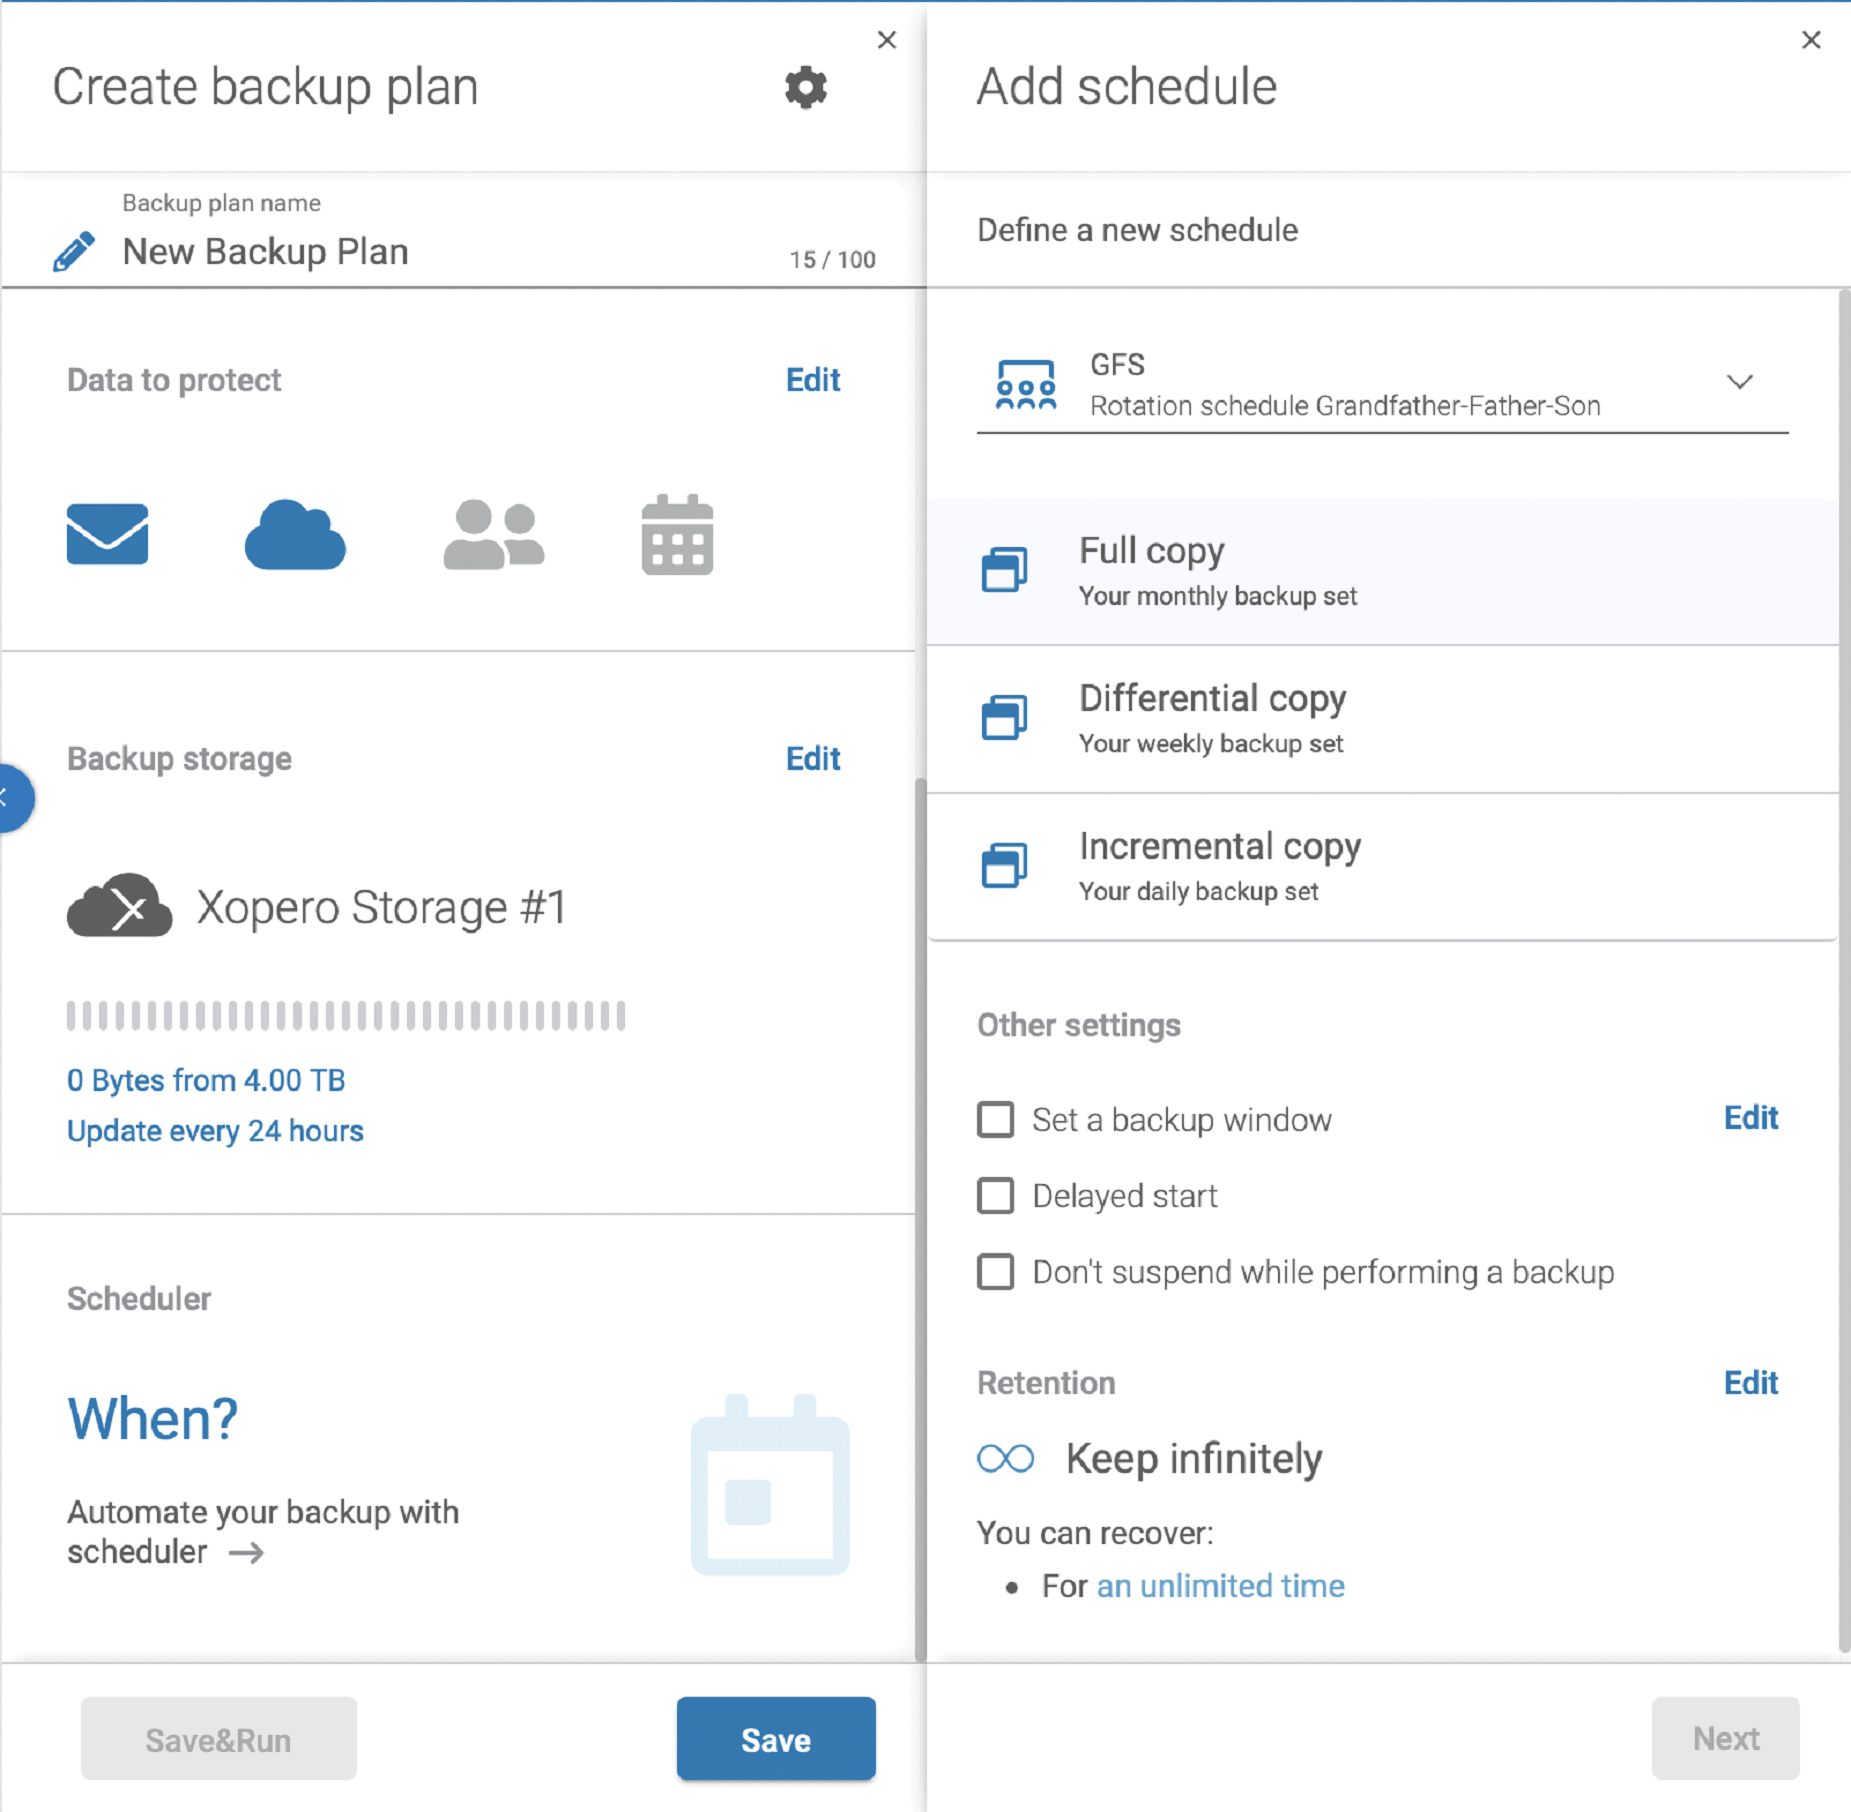
Let’s go to the When? section. Here you are able to specify a schedule according to which your backup plan will be performed. You can also choose a specific rotation scheme – basic (which is actually First-in-First-out scheme) or more advanced and recommended one – GFS (Grandfather-father-son) which allows you to manage the copies over a long period of time, save storage capacity and recover faster. In this article you can read more about FIFO and GFS backup strategies.
Another option here is to set up a backup window – the exact time range (days and hours) when backup can be performed and this time cannot be exceeded. It gives you as administrator full control over bandwidth and performance.
You can also delay the start of the plan. It means you can spread the backup in time – just set the maximum time interval within the backup of all users should start and let our system calculate regular periods between backup start for them. It will let you manage huge IT infrastructures, optimize backup, storage capacity, and bandwidth.
Need something more? If you want to see more advanced backup features provided with our software click on the gear icon at the top right of the Create backup plan aside.
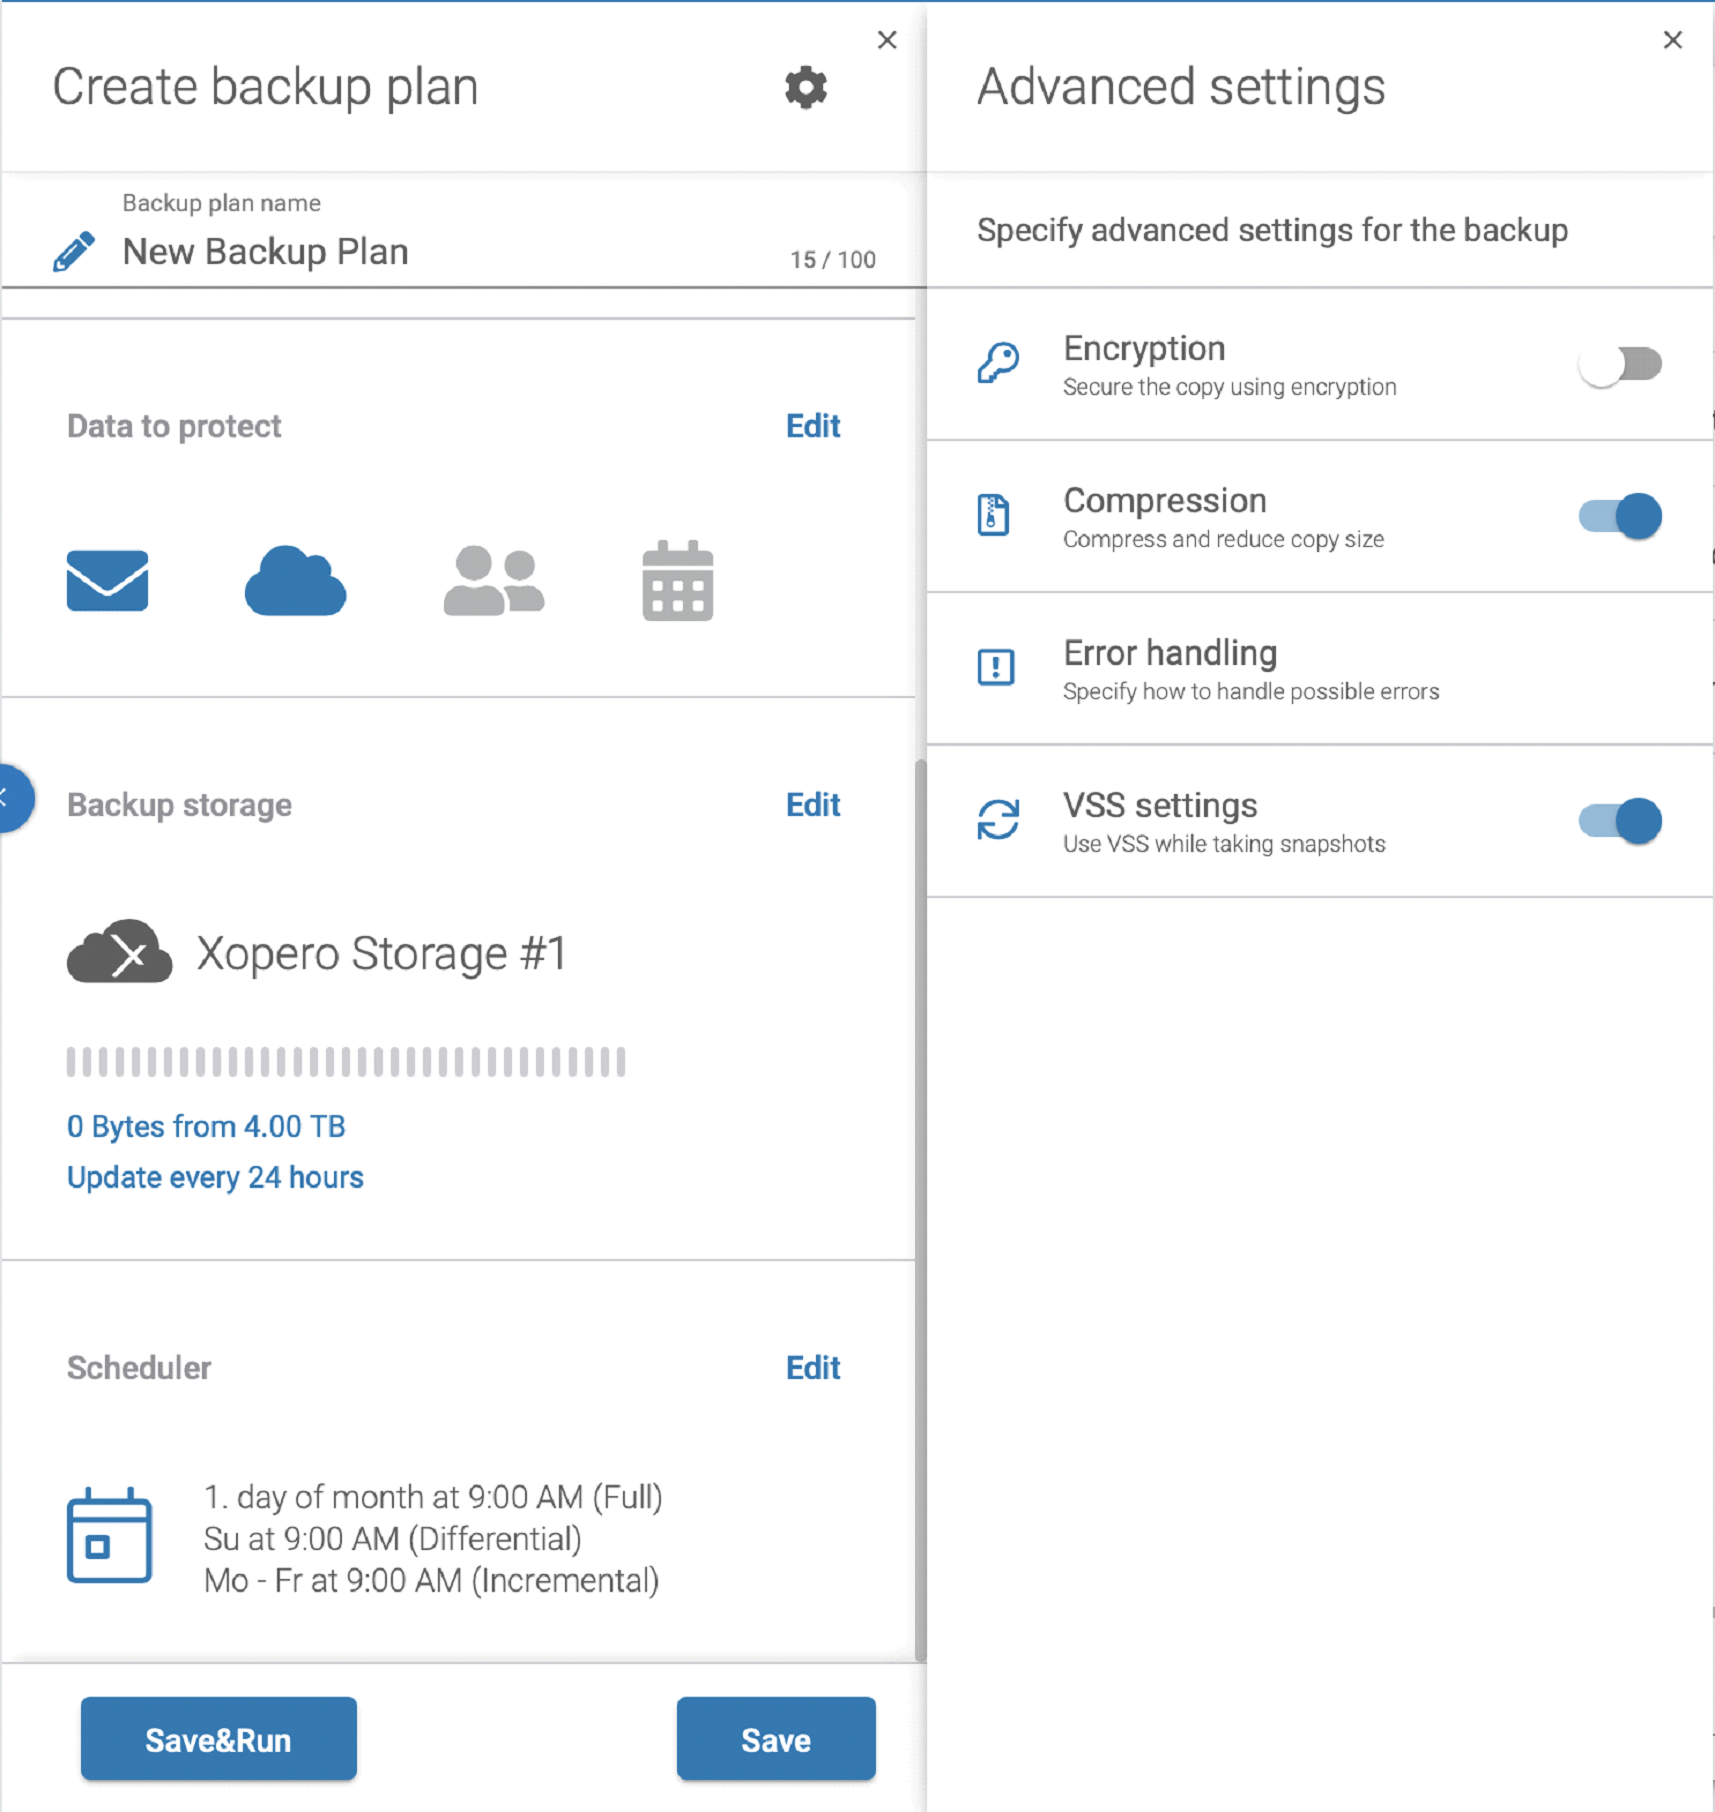
Here you will find more advanced features that you can set up for your backup plan. As you can see you have control over Encryption and Compression levels, error handling and VSS setting.
Done? Save&Run so it will start performing right here, right now. Or just Save if you want to keep it for future reference and do not perform immediately.
Congratulations, you have successfully configured your own Microsoft 365 backup plan with Xopero ONE!
Microsoft 365 backup with Xopero ONE – conclusion
As you can see, Xopero ONE gives you a full range of backup plan administration – you can start from predefined backup plans to start protecting your data immediately or if you have more sophisticated needs – create your own policy where you can control nearly every aspect of it and adjust the configuration to your organization needs. We believe that every business has different expectations but with Xopero ONE we are sure we can fulfill them all. Even easily, right?