In your company you probably use one of the two most popular SaaS (software-as-a-service) platforms to increase productivity. You use their email, work productivity tools, storage and many more. Do you already know what services we are talking about? Yes, Google G Suite and Microsoft Office 365.
Each of them provides your organization with essential tools, you might need for your team to work efficiently. As usual, there are advantages and disadvantages of each solution. And depending on your needs you can migrate your organization from one to another.
In this article, I will focus on migration from G Suite to Microsoft Office 365.
Why you might want to migrate from G Suite to Microsoft Office 365
When it comes to migrating from either G Suite to Office 365 or Office 365 to G Suite, you need to know the differences between those two SaaS products. I will briefly go through them, so you might have a better understanding on what are the advantages and disadvantages of each one.
Starting with probably one of the most important differences – the cost of the service. In most cases G Suite will offer a lower price than Office 365. But if you want more detailed information, you might want to compare prices on official websites of Microsoft and Google. Another way to check the price is to send a request to the sales department of each corporation, for more detailed pricing information.
Another thing to have in mind is that there is a variance in how cloud storage works. There is a distinction on the maximum file size supported, on the maximum number of items on shared resources, on file-sharing possibilities and on few more things.
Depending on whether your company uses Office 365 apps or Google Docs, you probably already have chosen your designated platform. But if you didn’t you might be asking which service is better. There is no clear answer to that question. You need to answer that yourself, because it really depends on your business needs and preferences.
Microsoft provides you with a broad spectrum of productivity applications, including online apps of Office 365. Offering great compatibility with other Microsoft applications developed over the years. But so does Google with its Google Docs, the main difference is that Google Docs is an only online solution for work productivity, while Office 365 can be used both on-premise or in the cloud.
In this article I will walk you through the steps of migrating your organization from G Suite to Office 365
Transferring data from Google Drive to OneDrive
When your company was working on Google Docs data was probably saved using Google’s file extensions. Those extensions differ from the ones used by Microsoft. Using the example of word type documents, Google Docs saves files in .gdoc format, while Microsoft’s Word in .docx format. When you want to transfer files, you’ll need to select needed ones, and click download so an archive with selected files will be created. This way you’ll download all files with its original file extension. If you need to change the extensions, you will have to download each file individually using file > save as and selecting desired format.
As we are in the topic of transferring data, you might be asking – which data should I transfer from G Suite to Office 365 during the migration process?
You should migrate:
- All documents and files from Google Drive should be migrated to OneDrive
- User accounts/email accounts from Gmail to Office 365 Outlook
- Contacts
- Calendars
- Meetings
Fortunately for you Microsoft provides built in tools to help you migrate user accounts (email accounts, contacts, calendars) from G Suite to Office 365.
Migration from G Suite to Office 365 – steps you need to take
This list of steps you need to follow, to migrate from G Suite to Office 365 will help you in the process of migration.
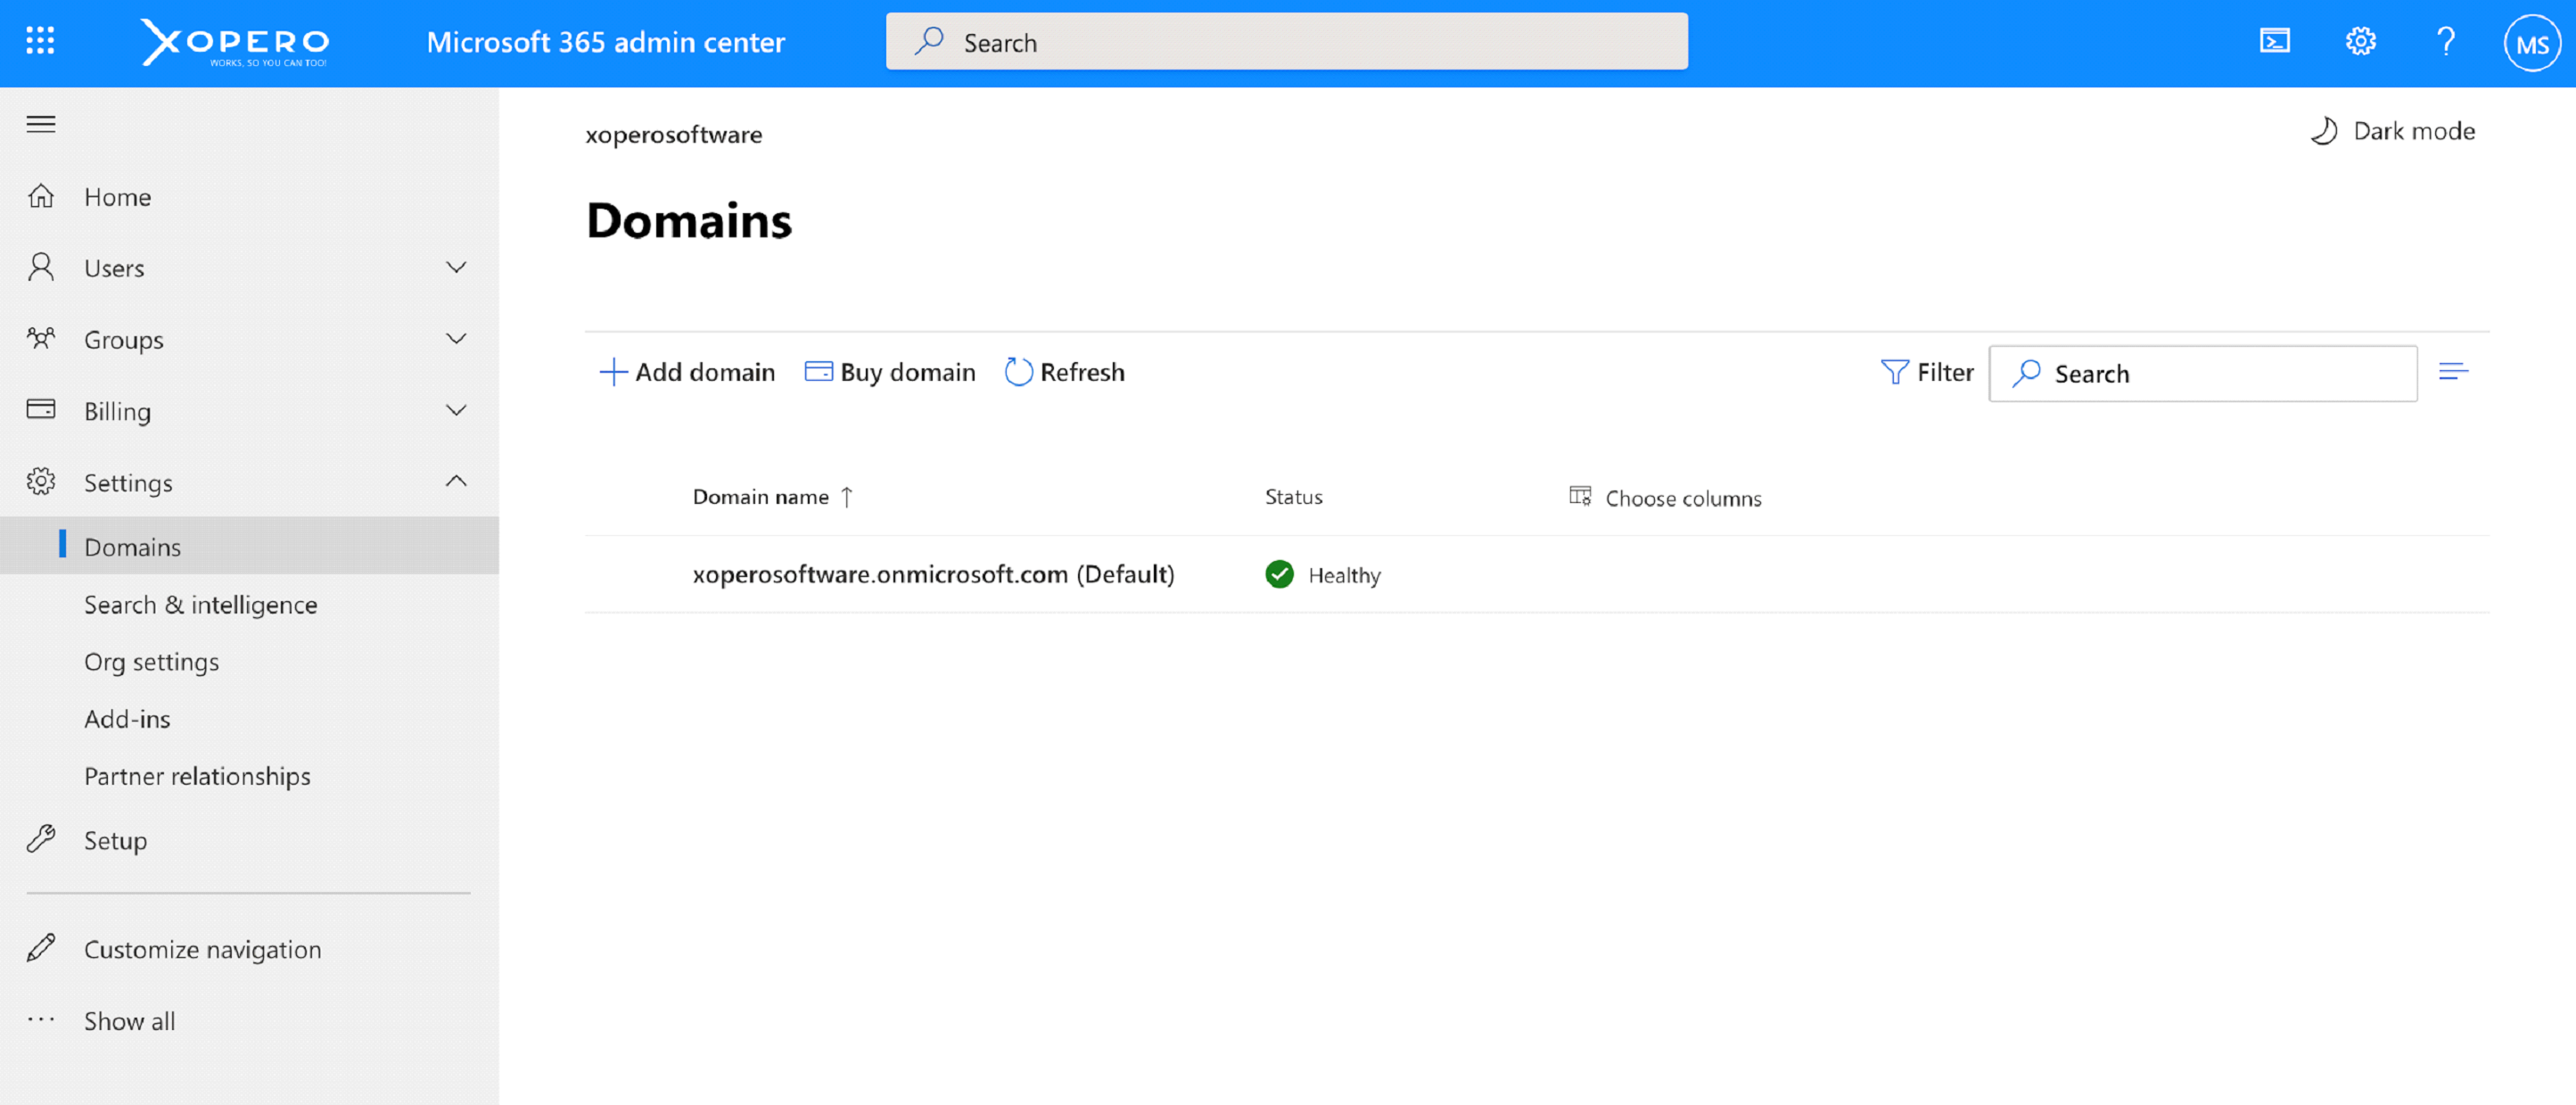
Verifying your Domain
The first step you need to take is verifying in Office 365 that you own a domain used by you in G Suite accounts. Verification process is performed during setting up Office 365. During setup, setup wizard provides you with a TXT record where you can add your domain host provider.
Another option is to use a domain provided by Microsoft instead of using your own custom one. Microsoft’s domain name looks like this: your_company_name.onmicrosoft.com. Using this option simplifies the process of verifying a domain.
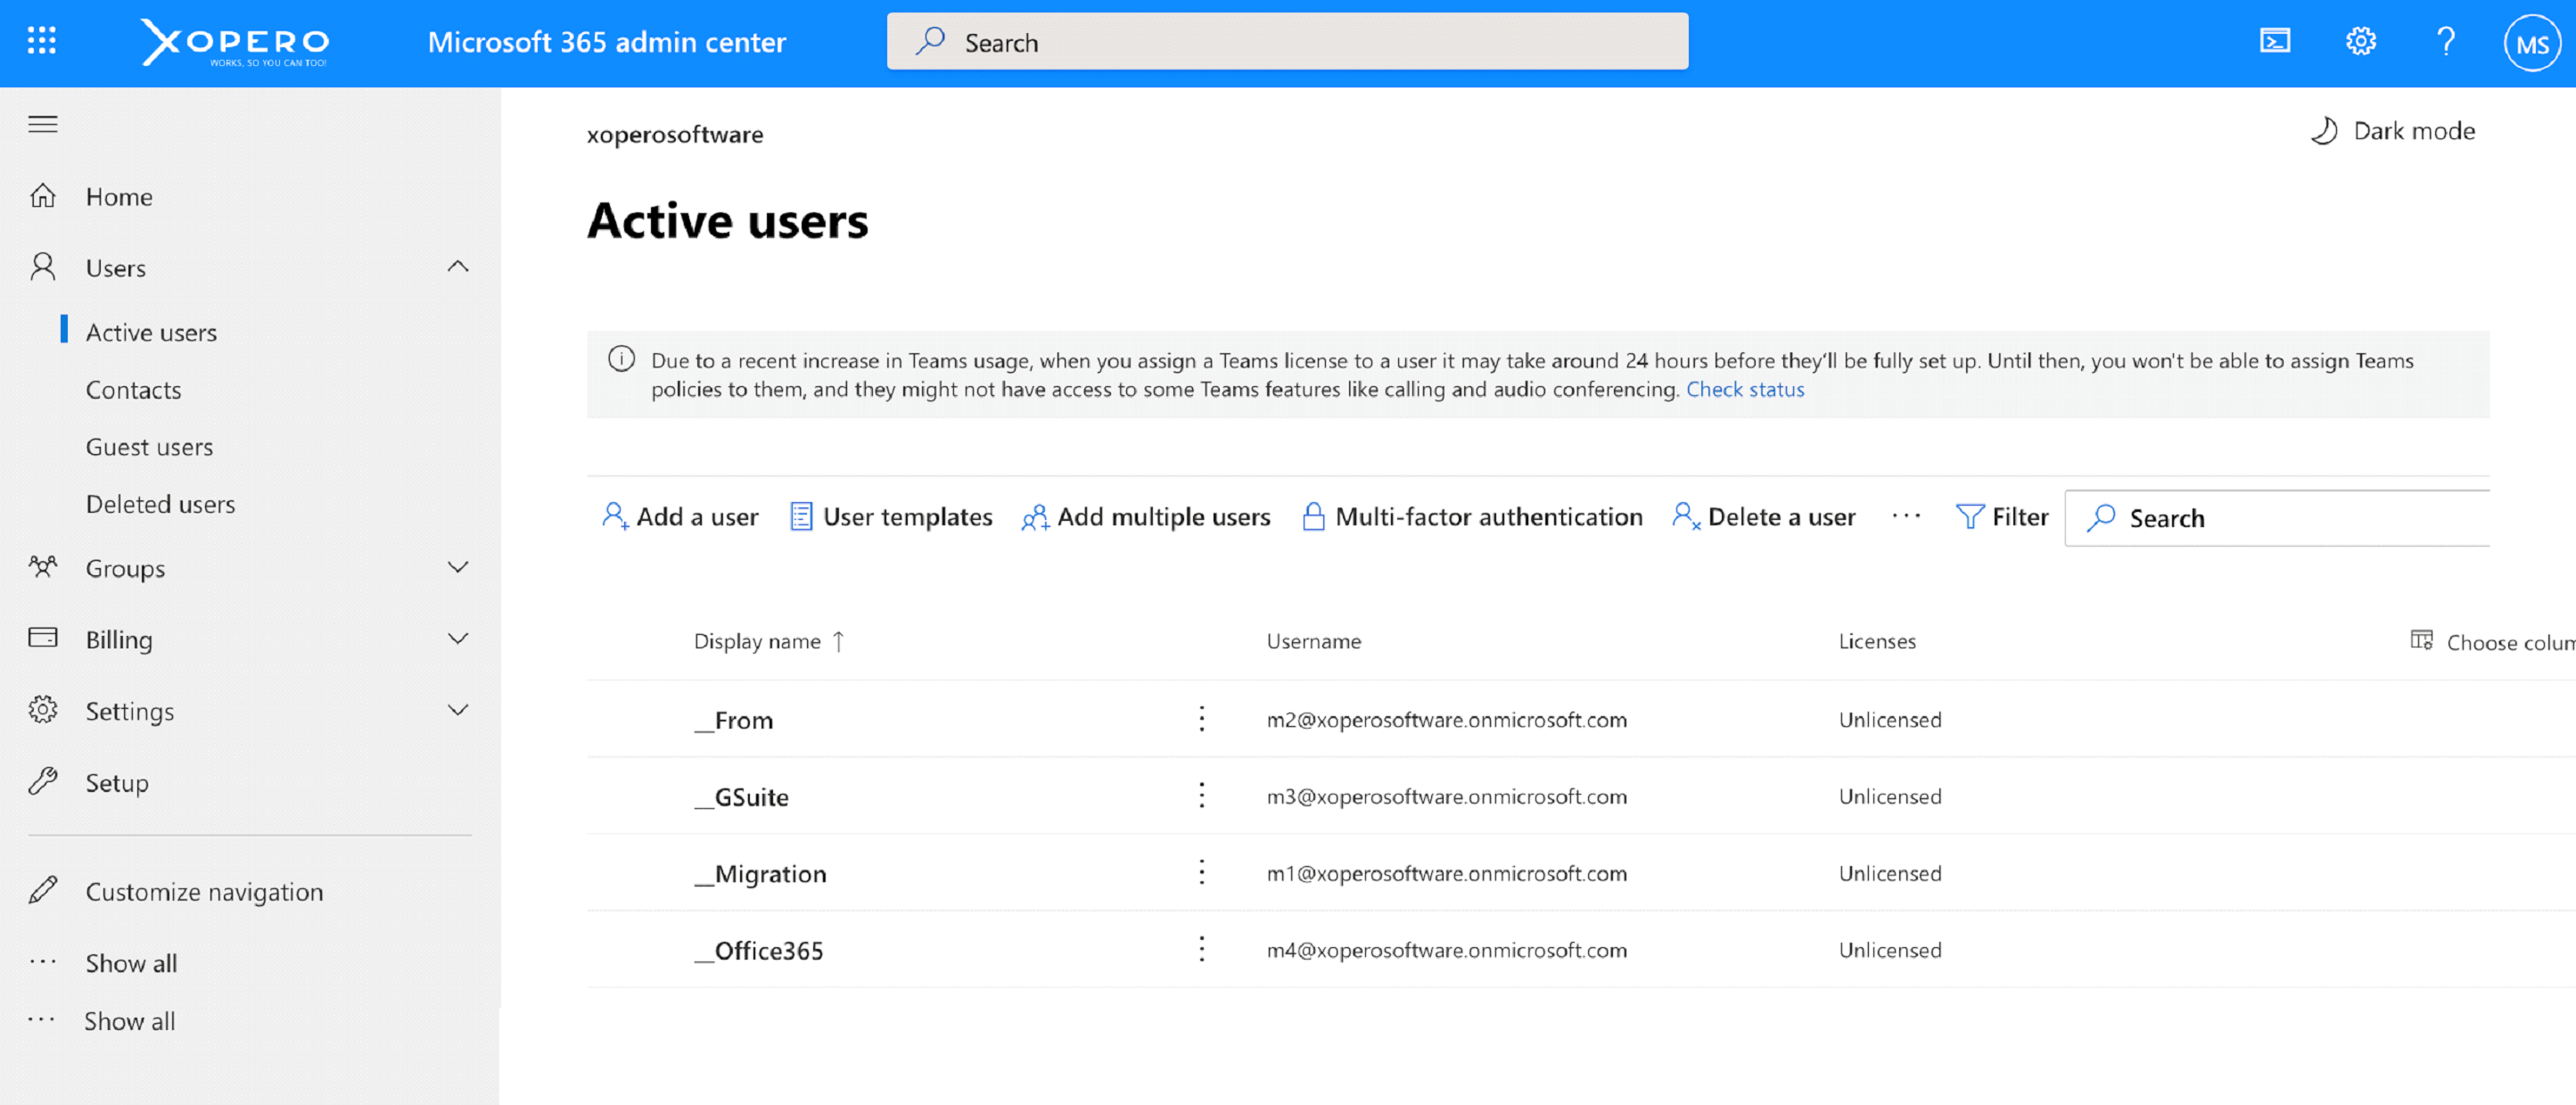
Adding users to Microsoft Office 365 Organization
Next thing on the list is adding users to your Office 365 organization. In Microsoft’s platform you must pay for every user’s licence before it will be available to activate. In addition every user must have a designated mailbox before you can migrate from G Suite to Office 365. While creating accounts in Office 365 there is one thing you might want to keep in mind. Consider using similar usernames to those used in G Suite, this way you might avoid confusion.
Creating a list of email addresses from Gmail
In this step you need to create a migration file that contains a list of accounts you want to migrate from G Suite to Office 365. The easiest way to do it, is to use Microsoft Excel (well, that’s btw another reason to use Office 365).
When you create that migration file, you’ll need to know the passwords for those Gmail accounts you want to migrate. You can work around it with resetting passwords for each user, and after migration is complete, telling your users to set new passwords. This way you are not risking compromising your user’s credentials. There is one requirement, you need to be an administrator in G Suite.
Let’s now create that migration file. In the first column (Column A), you need to put email addresses that you created in Office 365.
In the second column, you need to put adequate users from Gmail mailboxes.
And in the third column you need to put a password for that Gmail account that will be replaced in the further process. Look, how it is recommended by Microsoft
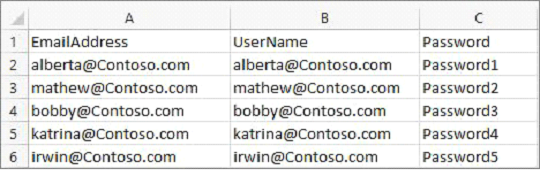
In each row, you want to have, from left, Office 365 mailbox, Gmail mailbox, password for Gmail account. Every item should be for the one’s user mailbox.
After you write down all users you want to migrate, save the file as .CSV.
Creating migration endpoints
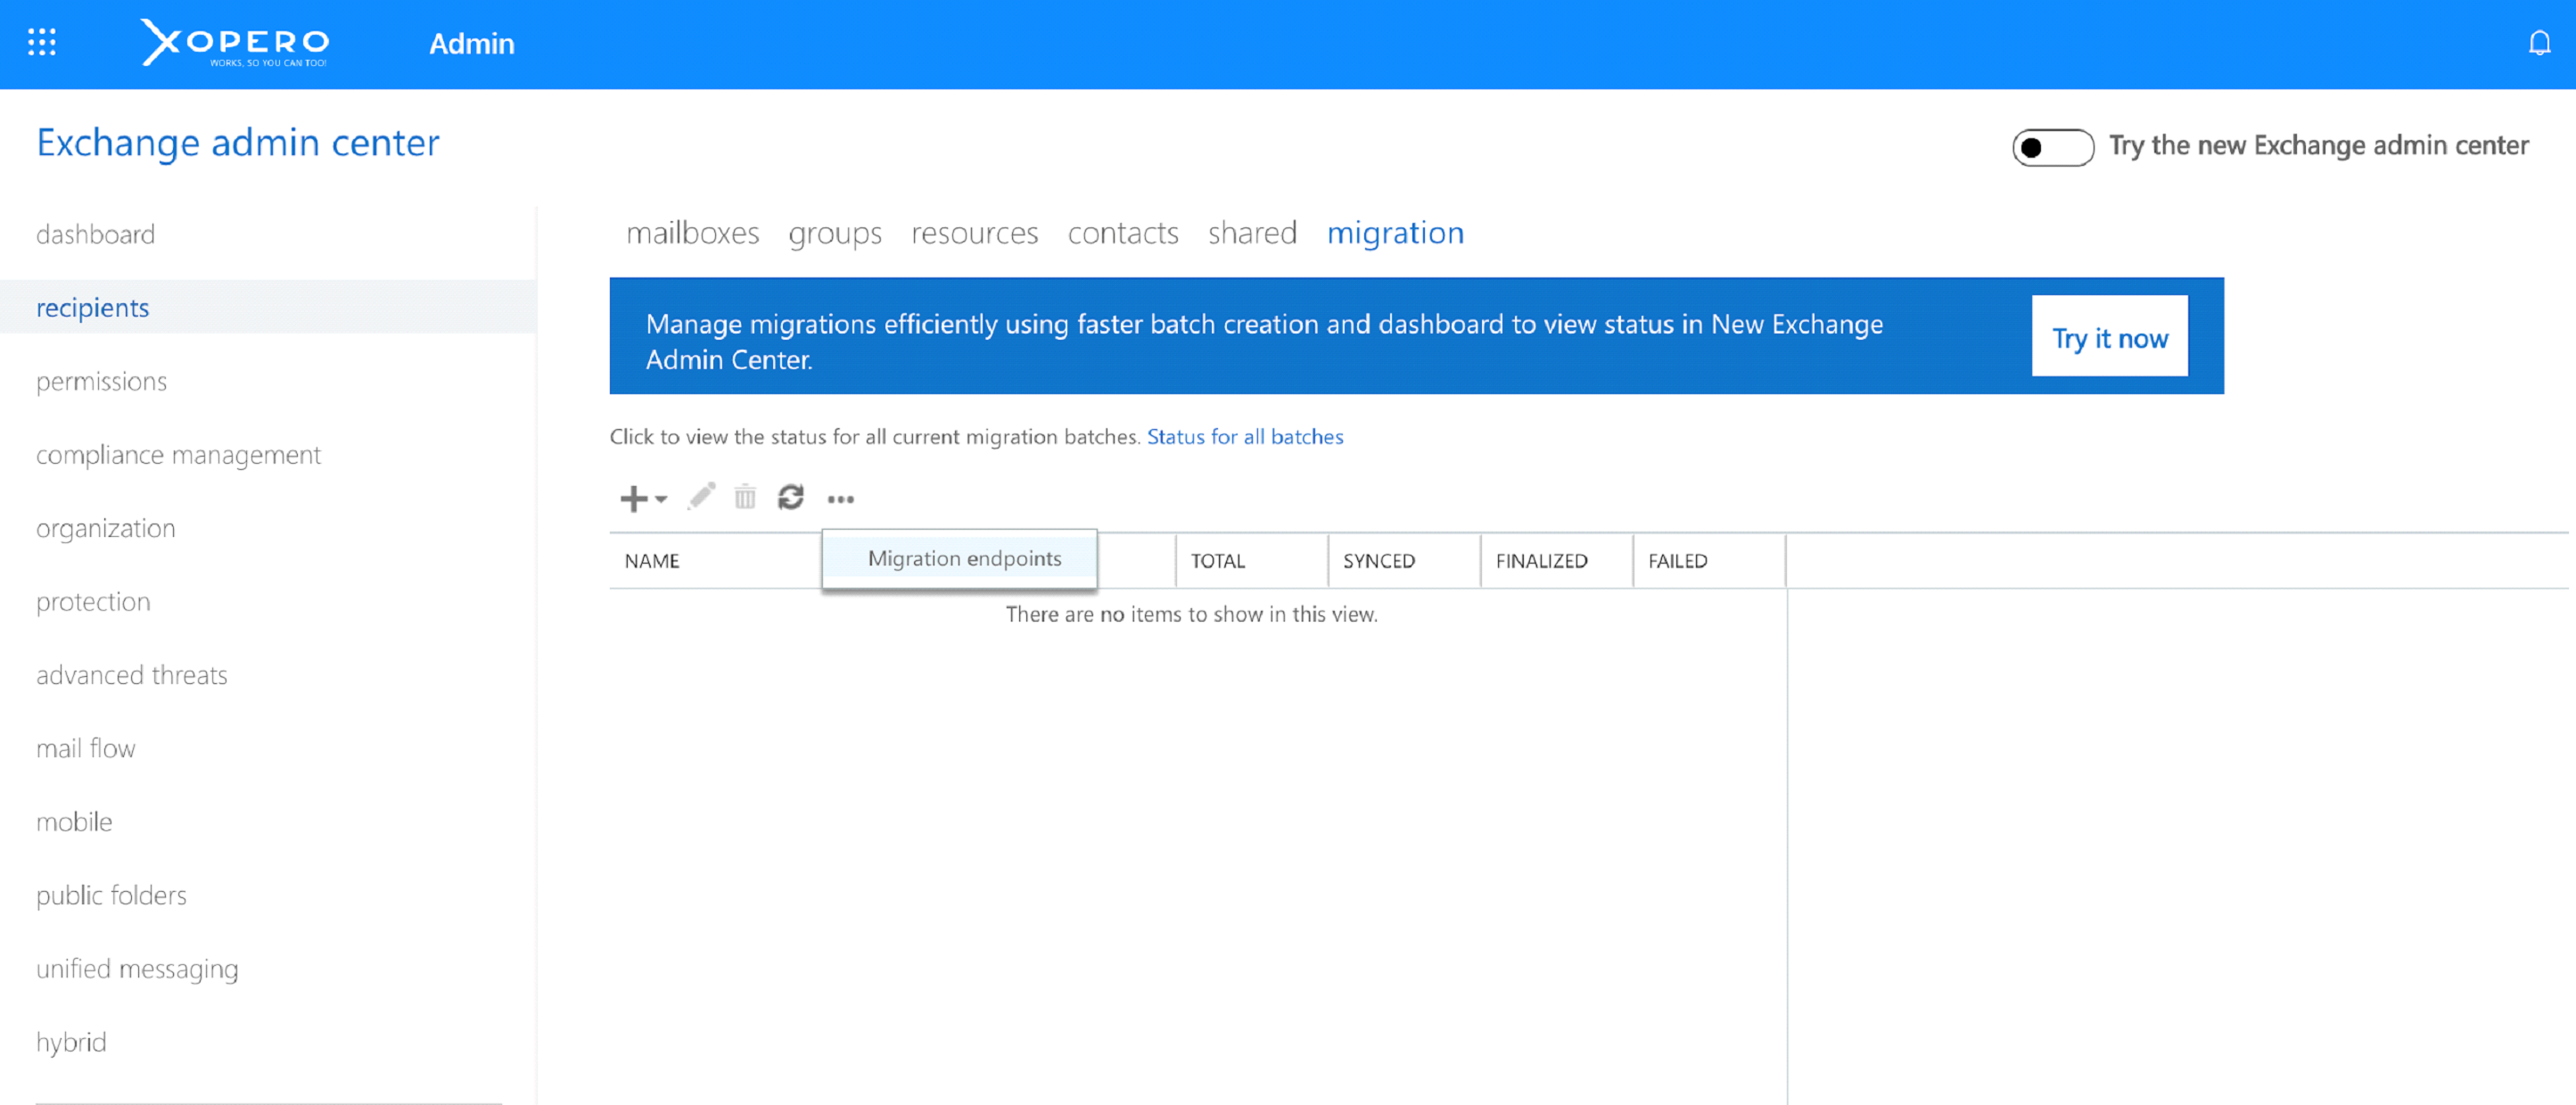
To successfully migrate from G Suite to Office 365, Microsoft’s software needs to connect to Google’s one. To do this, Office 365 uses a migration endpoint. To create one go to Exchange Admin Center > Recipients > Migration. Then click on the three dots, and then Migration endpoints. New window will open.
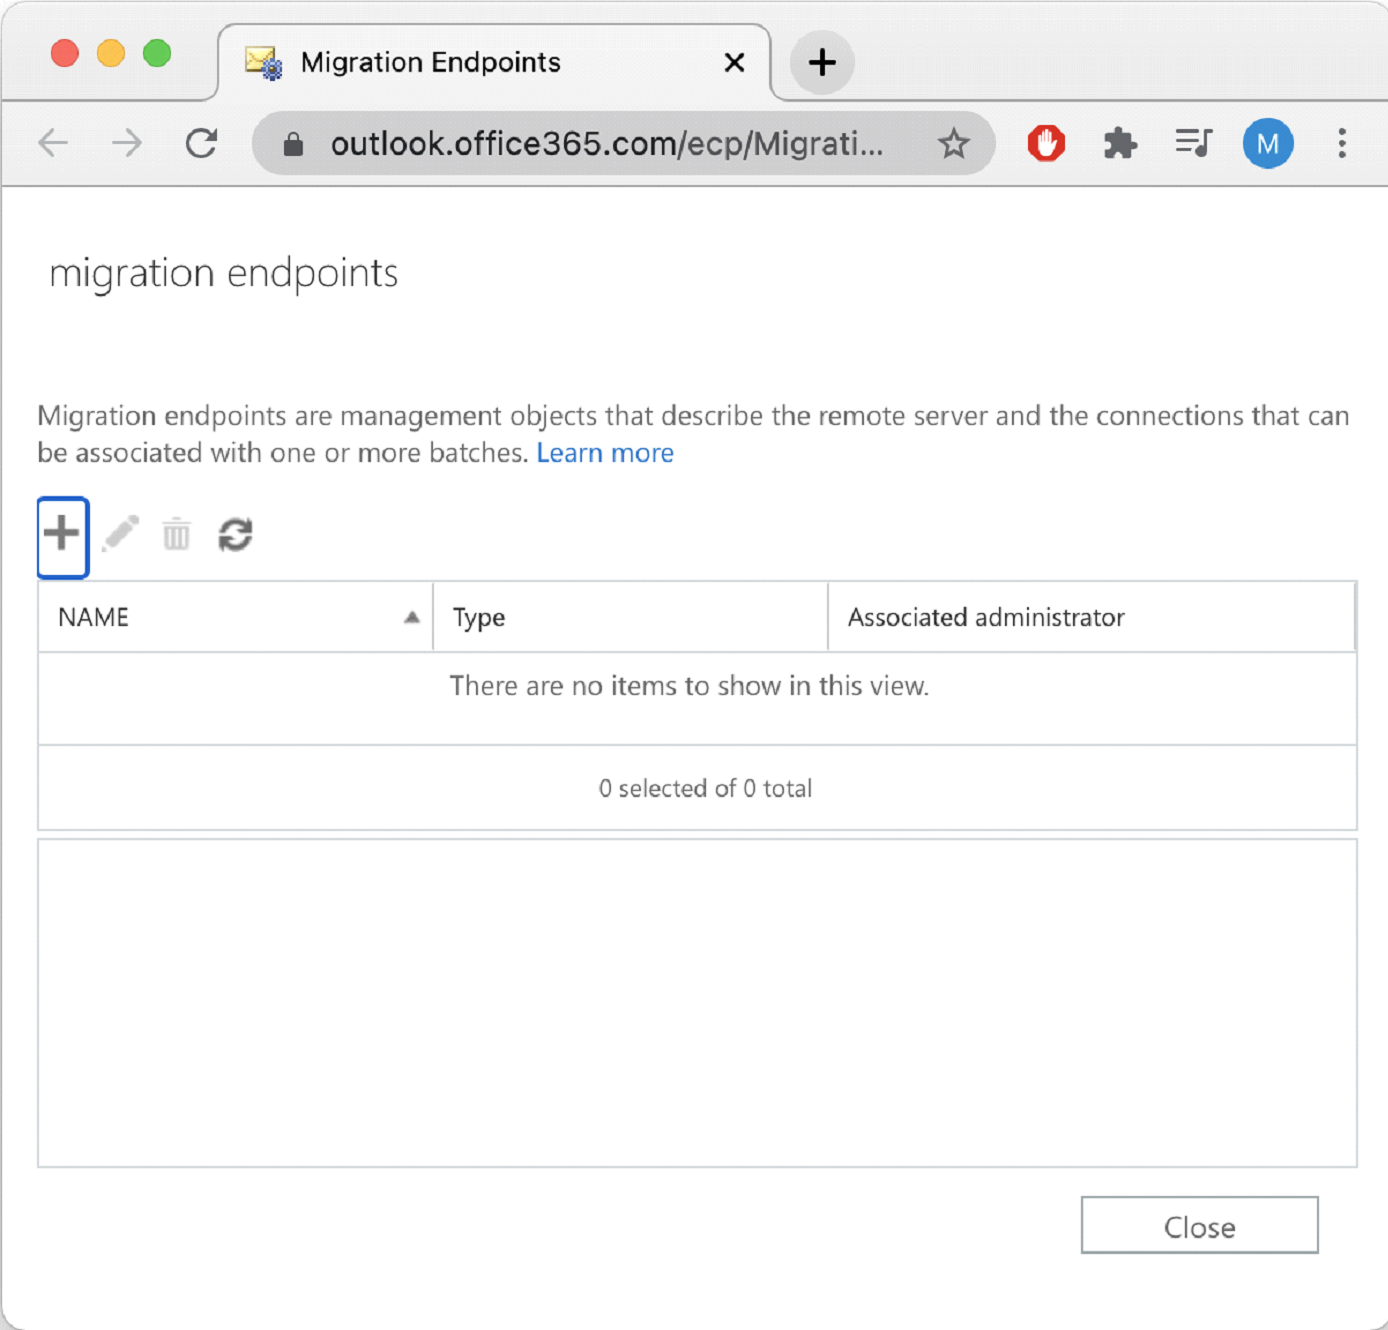
In this new window, click the plus icon, to add a new migration endpoint.
Select IMAP as a desired migration endpoint type. Click next.
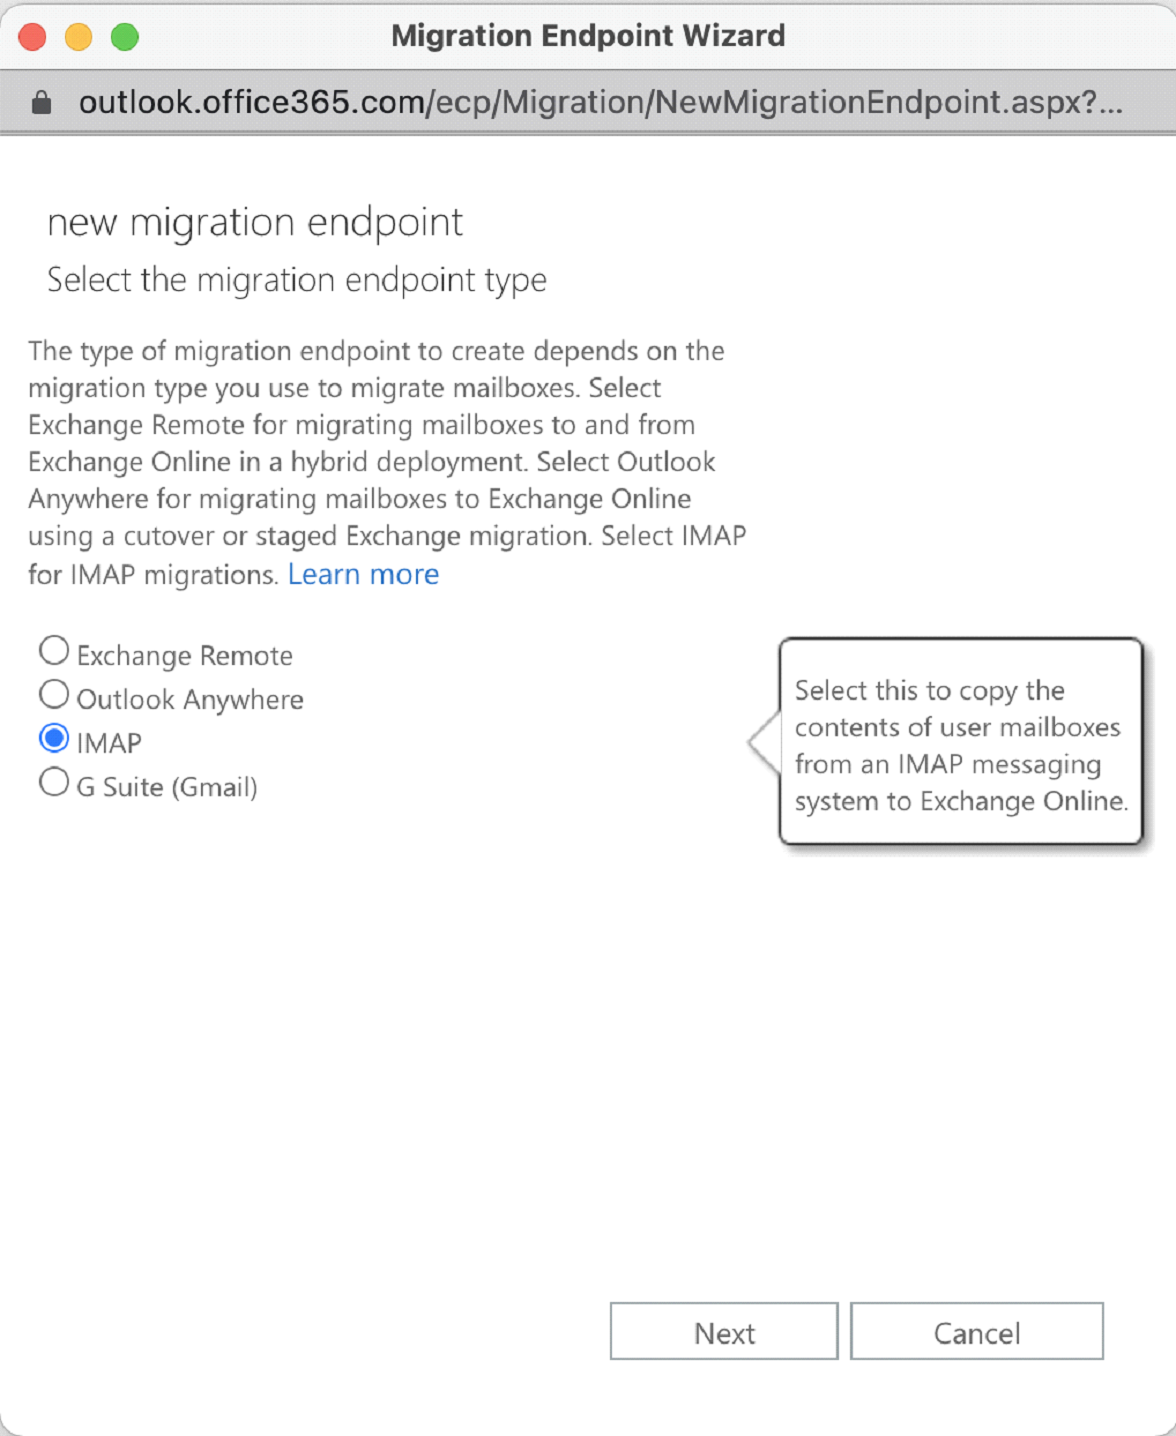
You have to configure the needed settings for this migration endpoint. IMAP server should be imap.gmail.com. Keep default settings intact.
Creating batches of mailboxes to migrate
Microsoft provides you with a possibility of migrating mailboxes in groups, called migration batches. To create those migration batches go to Exchange Admin Center > Recipients > Migration. Click the plus icon, and choose Migrate to Exchange Online.
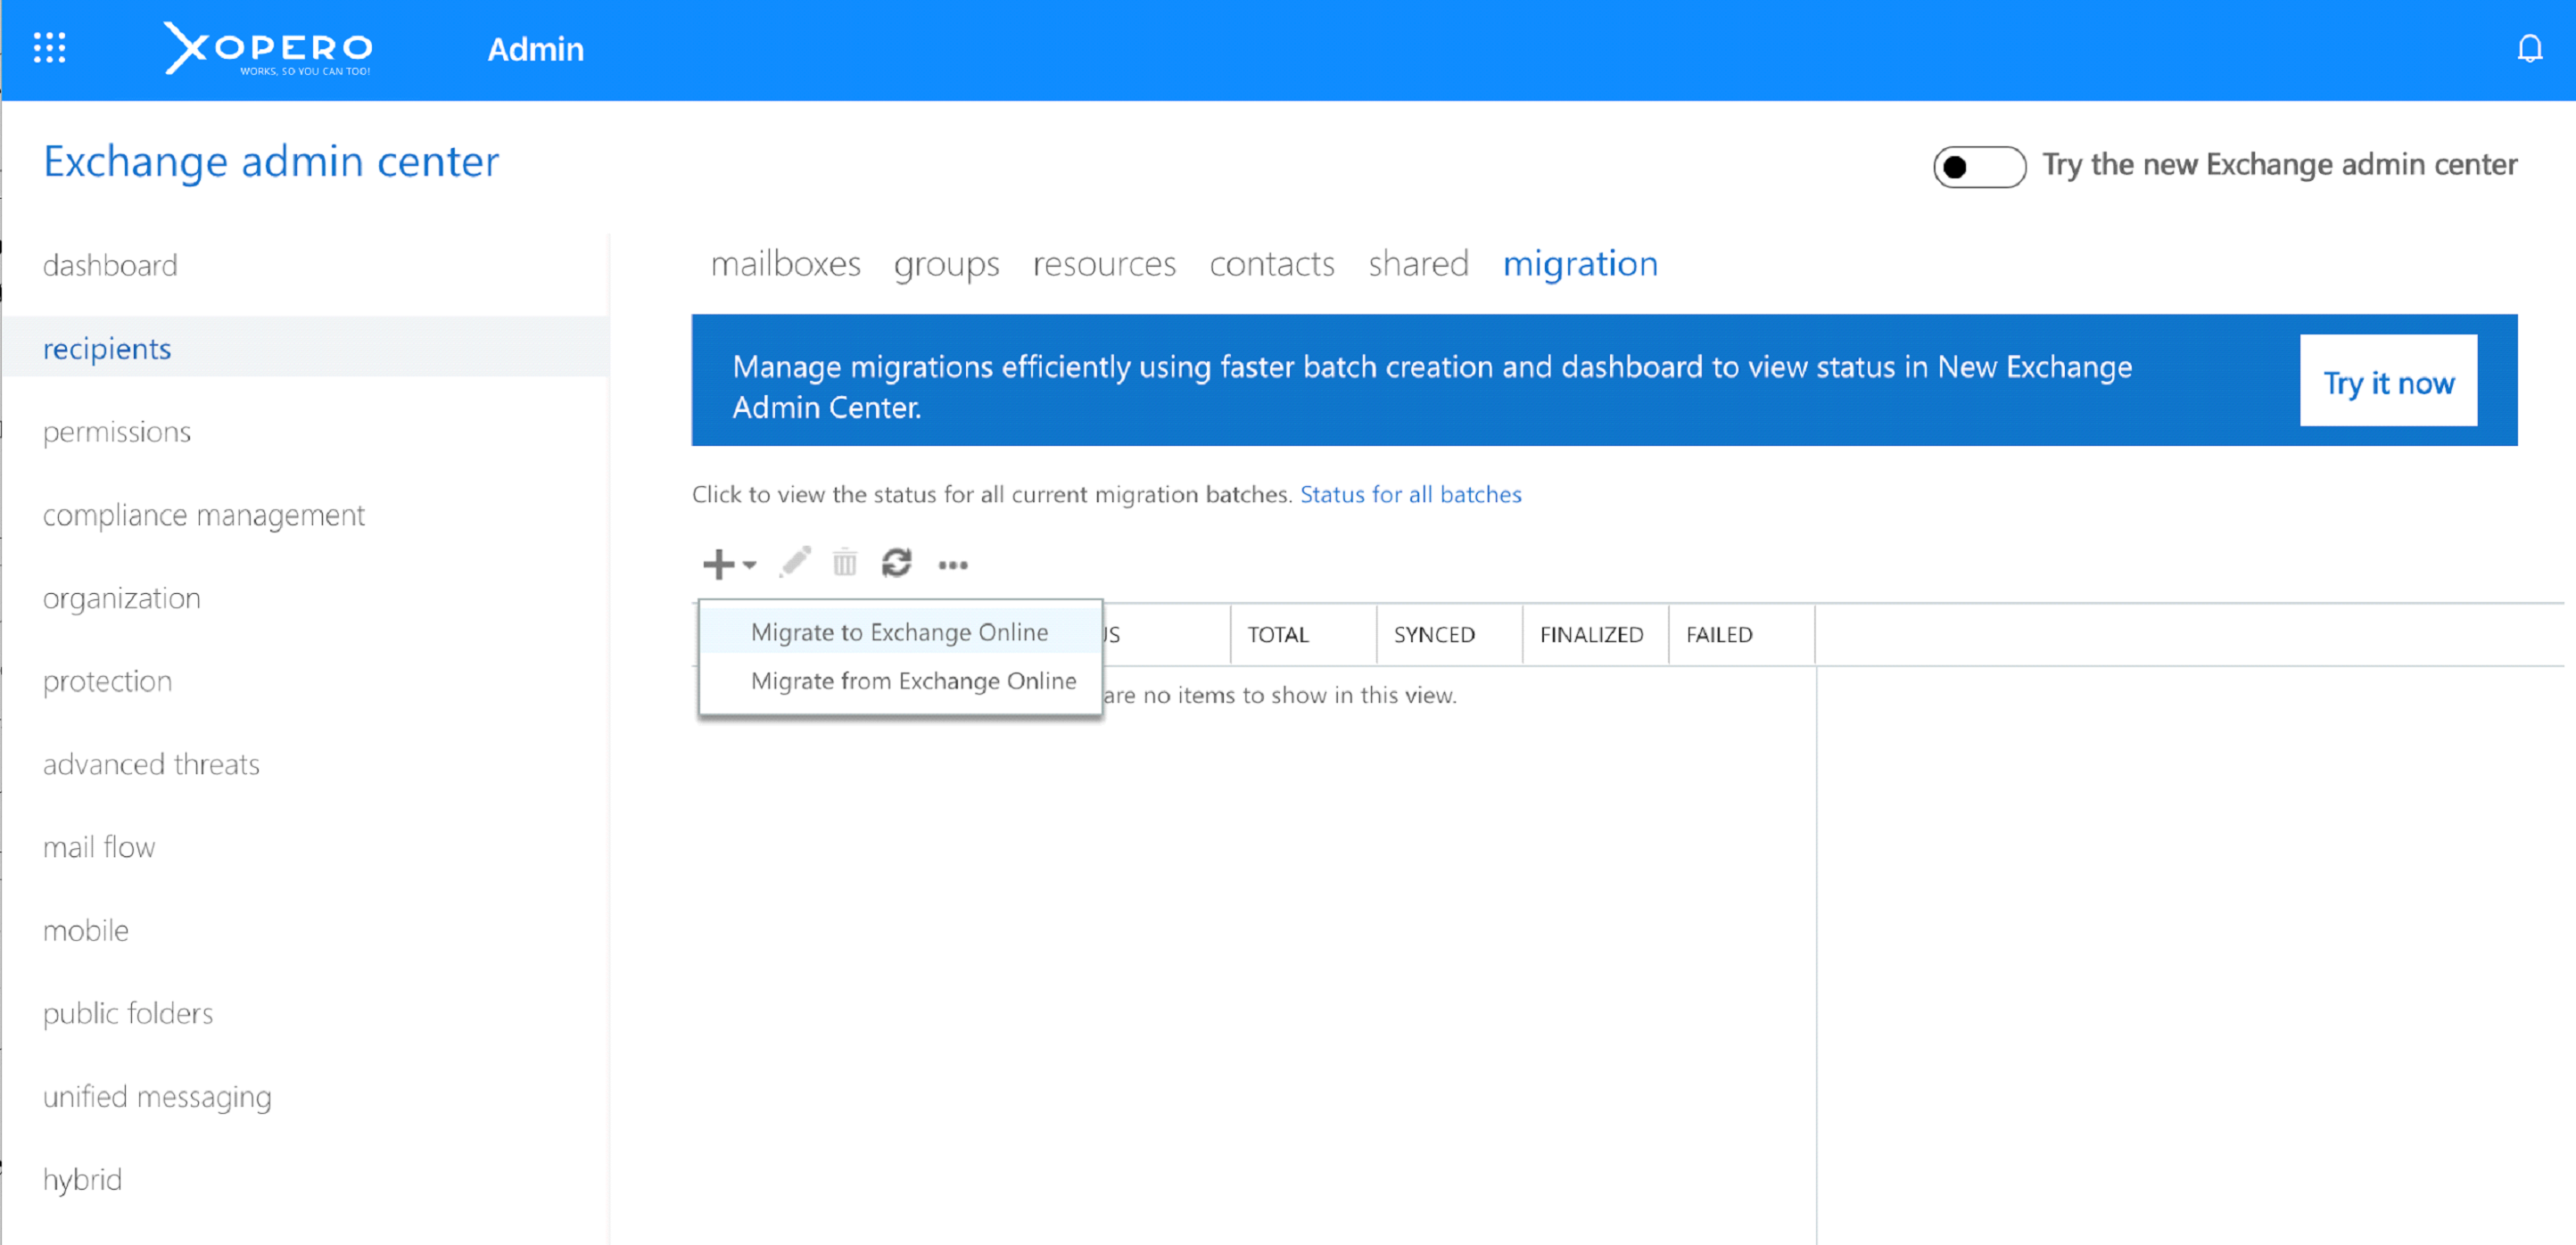
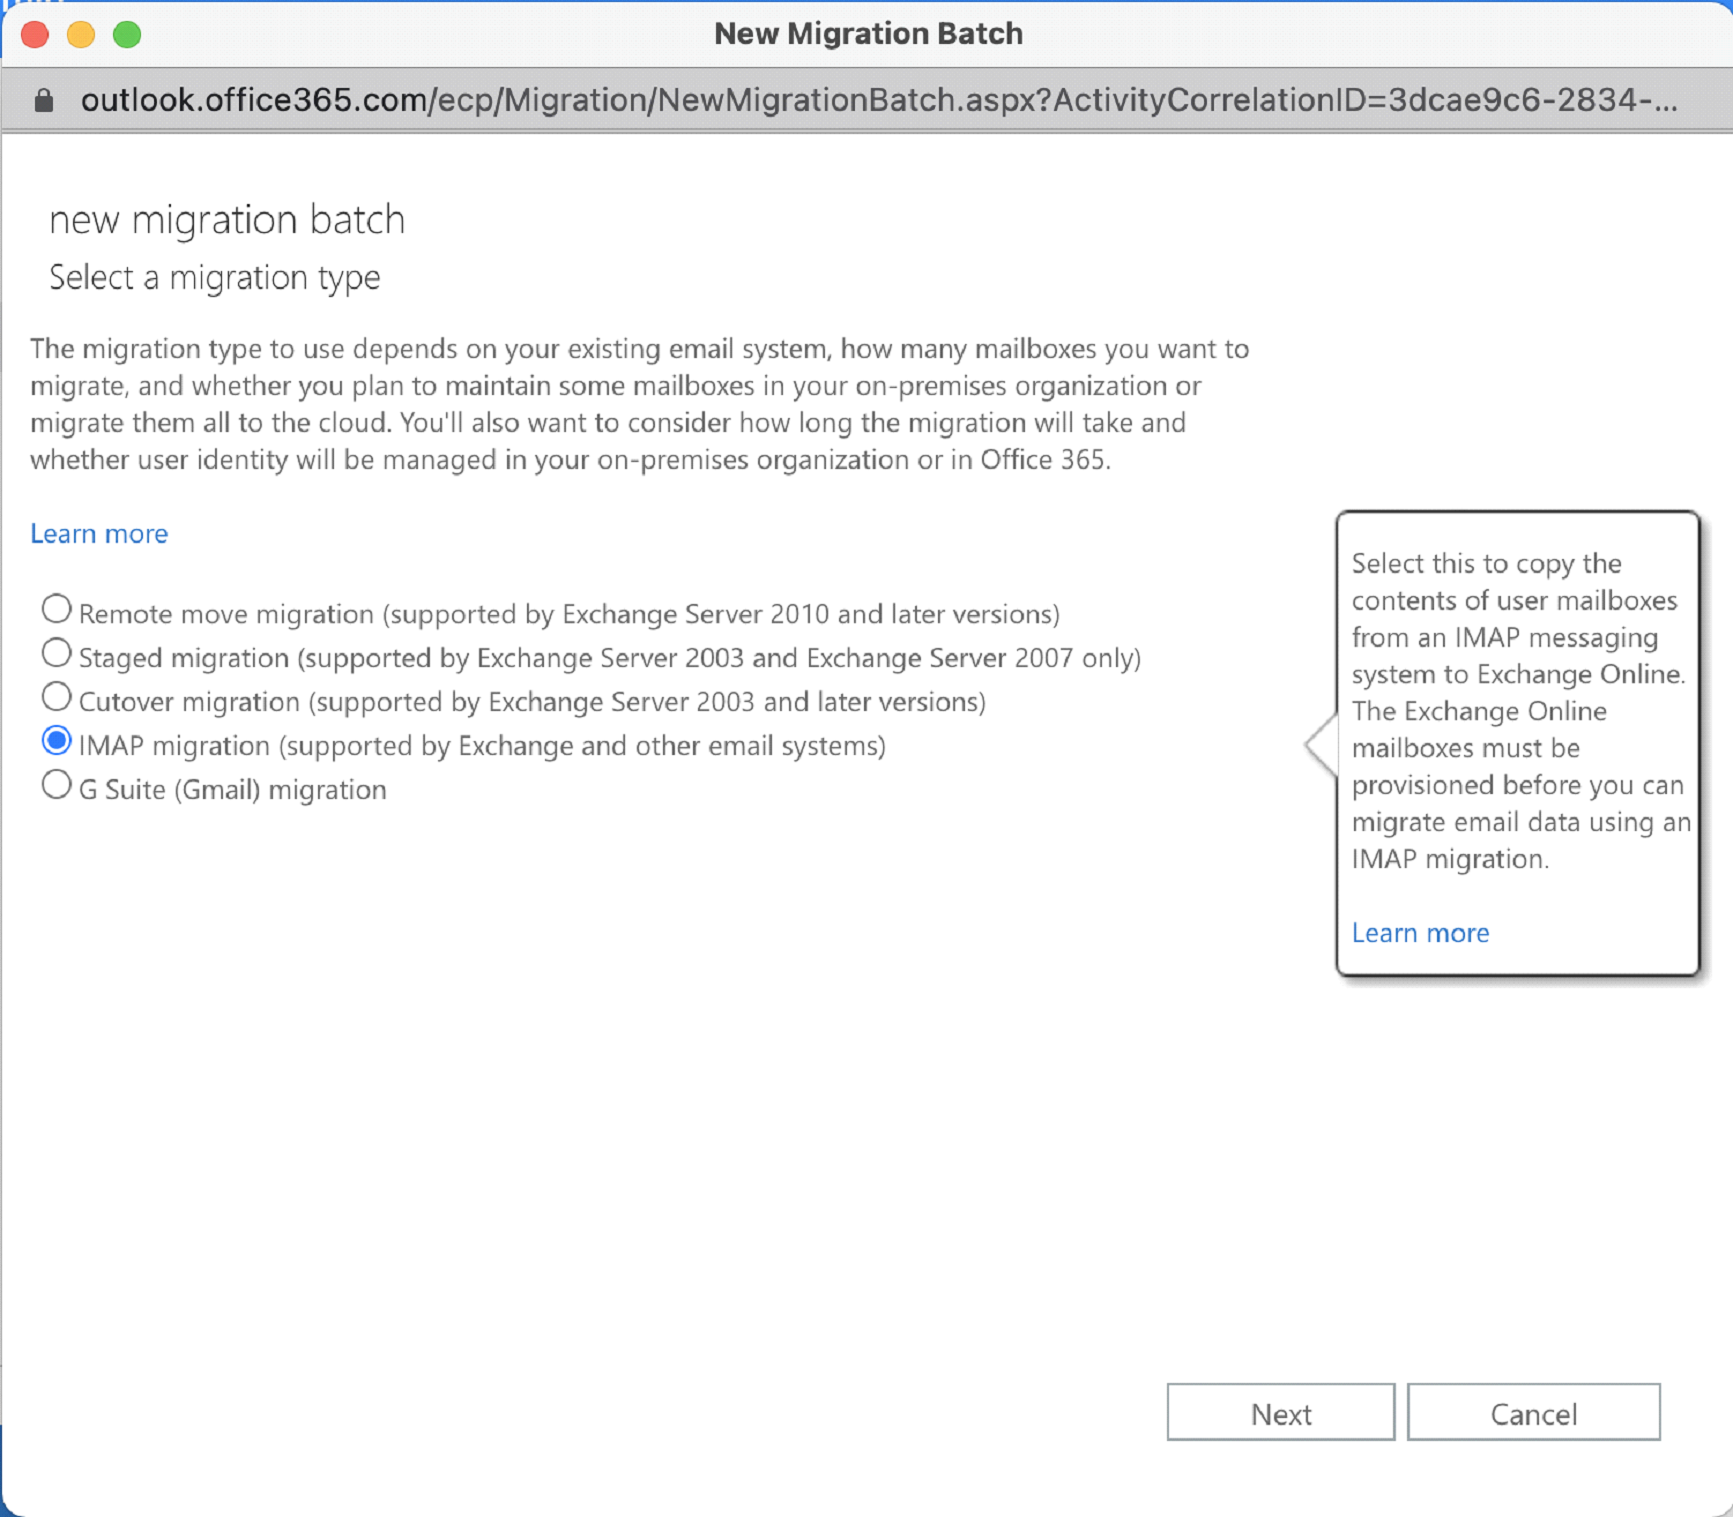
Then choose IMAP migration.
Then on the Select Users page, click Browse to specify the migration file you created in step number 3. The amount of users to migrate will display, when the file is loaded.
On the Set the migration endpoint page, choose the migration endpoint you have already created.
On the IMAP migration configuration page, accept the default values.
Enter the name for this migration batch. If there are any folders you want to exclude from a migration you can do it, by entering a name of one and clicking on the plus icon.
On the Start the batch page choose Automatically start the batch > new. Migration process starts with the status Syncing.
Note: If the Syncing status is showing for a long time, you might be experiencing bandwidth limits set by Google, slowing down the process.
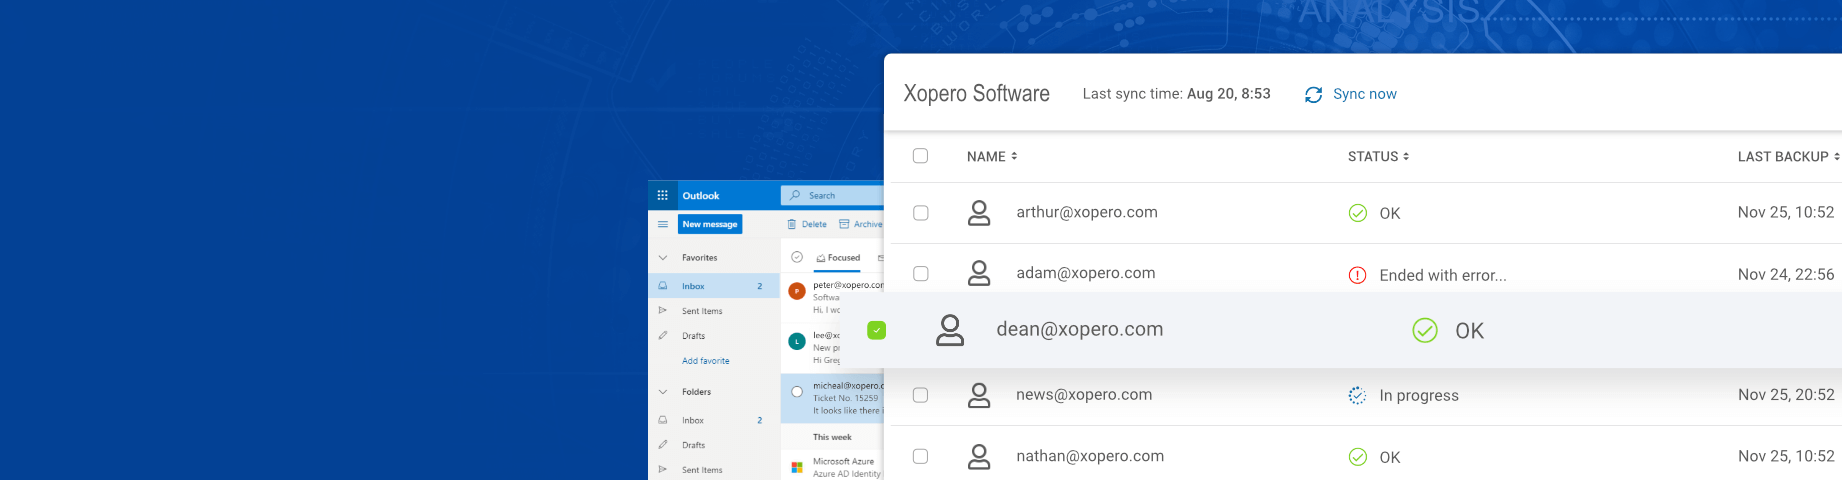
Verifying completion of migration process
Migration process ends when the status changes to Synced. You can view the status in the migration dashboard in Exchange Admin Center > Recipients > Migration. If something went wrong during the migration process, the error messages will be displayed allowing you to inspect and attempt to resolve the issue.
Checking MX records
When the data migration process is completed, you need to check MX records for your domain. You might need to edit those records to set email servers for sending emails to Microsoft Exchange Servers, not the old Gmail ones. The time it takes to update that information in DNS servers is up to 72 hours.
After that time has passed, make sure all needed data is transferred, and you can turn off synchronization with Gmail. Don’t forget to tell users to change their passwords, to keep their accounts secure.
Importing Contacts and Calendar to Microsoft Office 365
After you complete migration of mailboxes from G Suite to Office 365, you can import calendars and contacts from Gmail as well. I will show you how to do it.
Importing Calendar
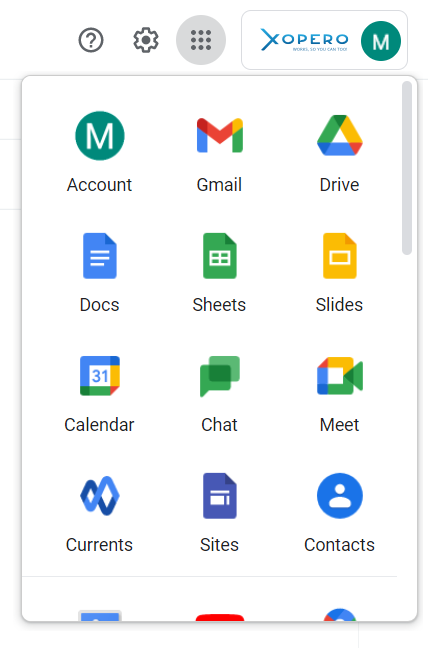
Open google.com, sign into your Google account, open the options menu, and click Calendar.
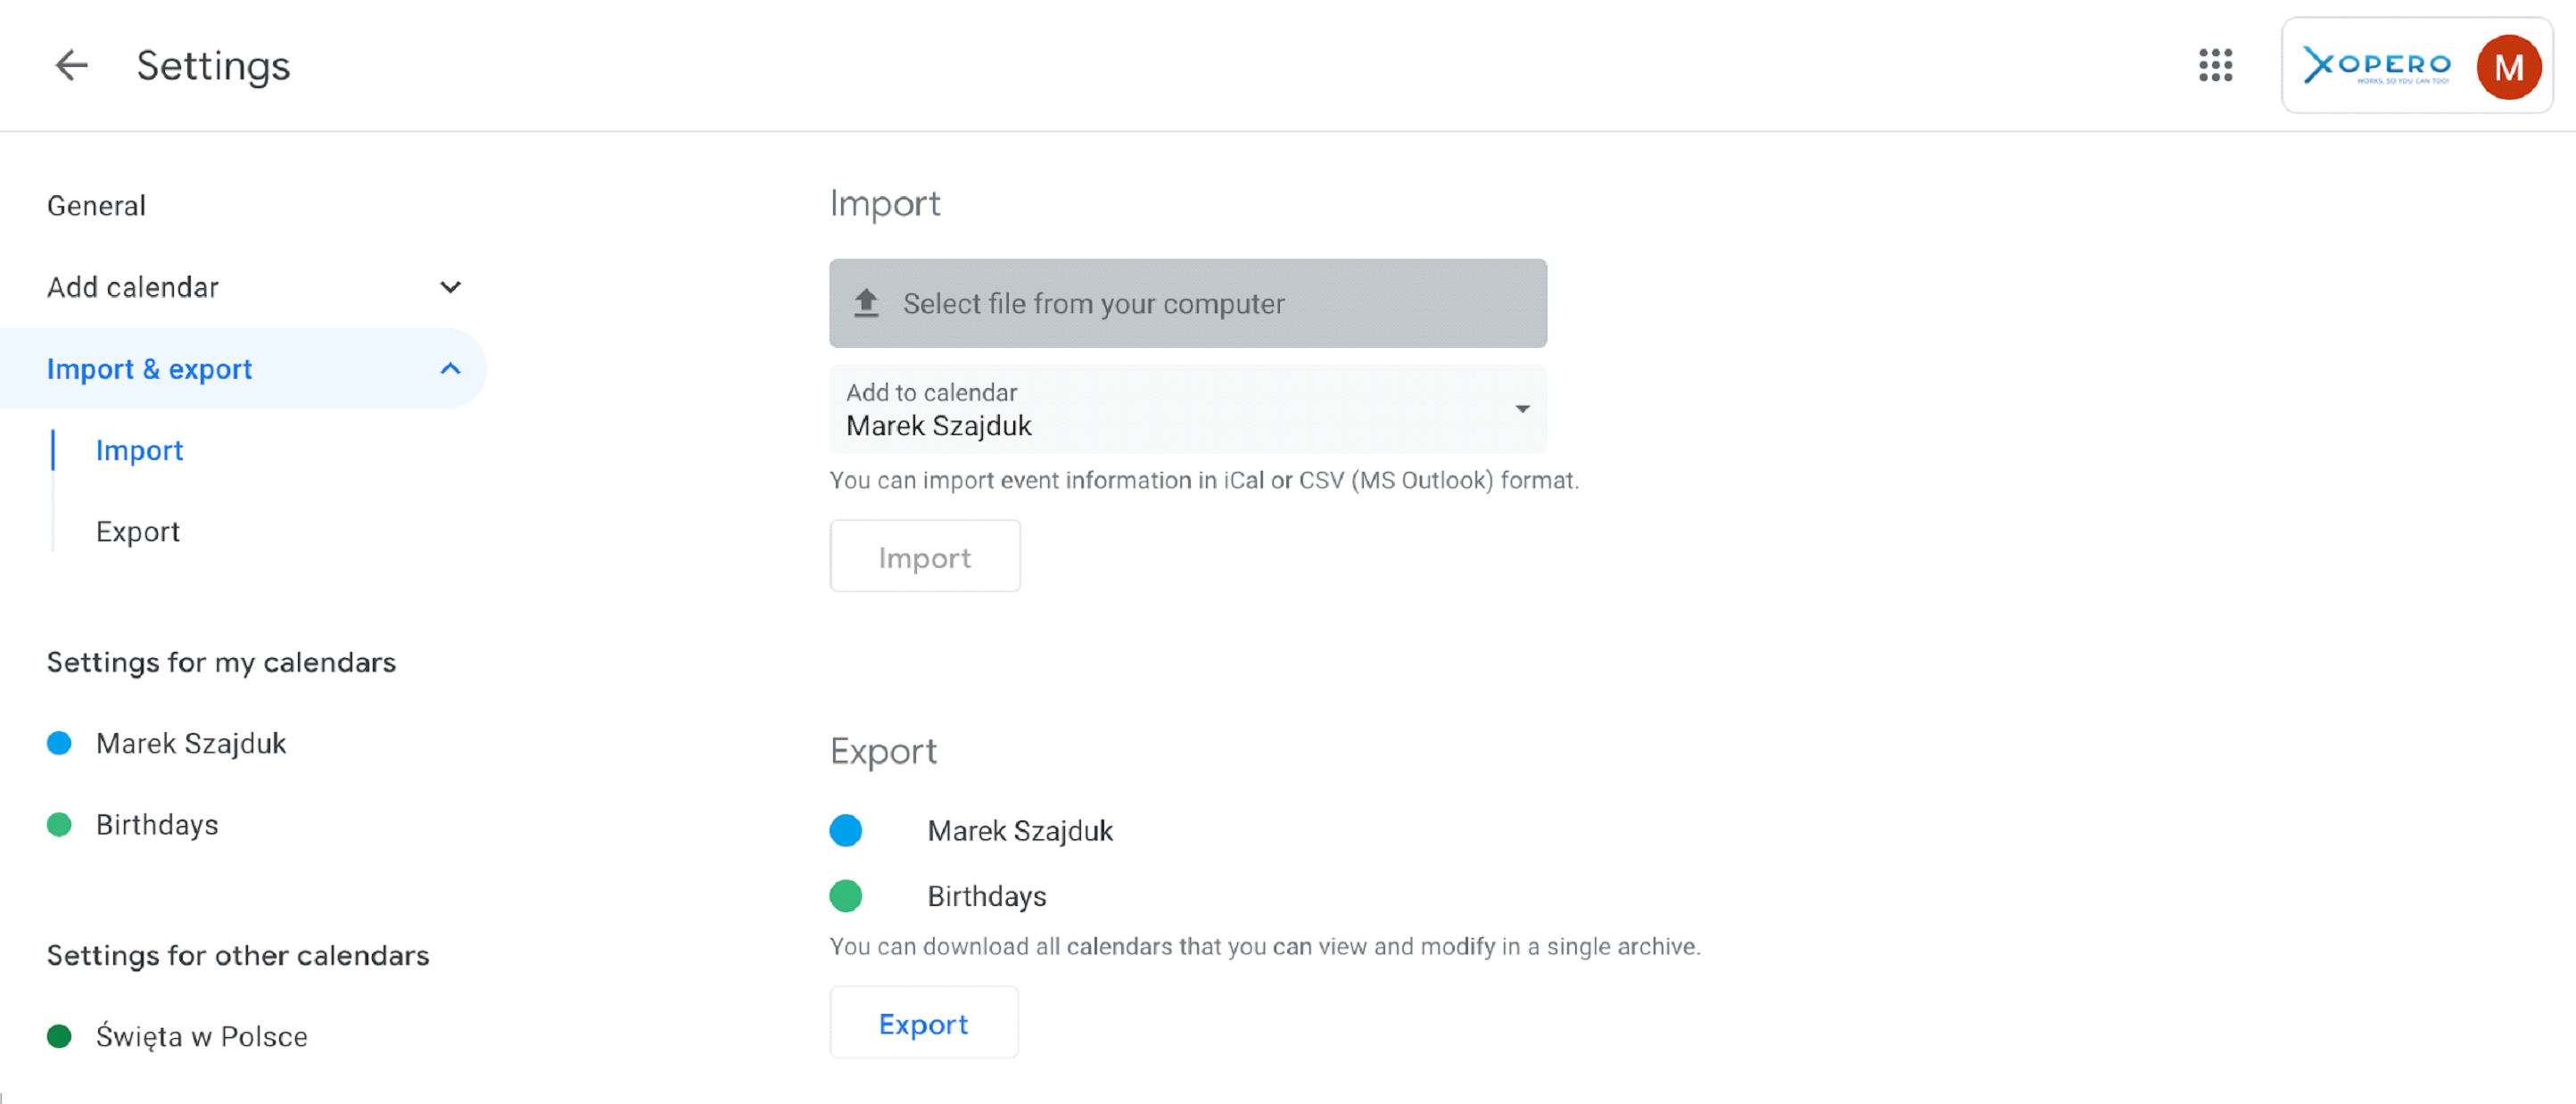
In the panel on the left side, click Import & export, then hit Export. Choose items you want to export and click the Export button.
Save exported calendars to an archive. When the archive is downloaded, unzip files from it. The names of the files will look something like this:
addressbook#contacts@group.v.calendar.google.com.ics
username@domain.com.ics
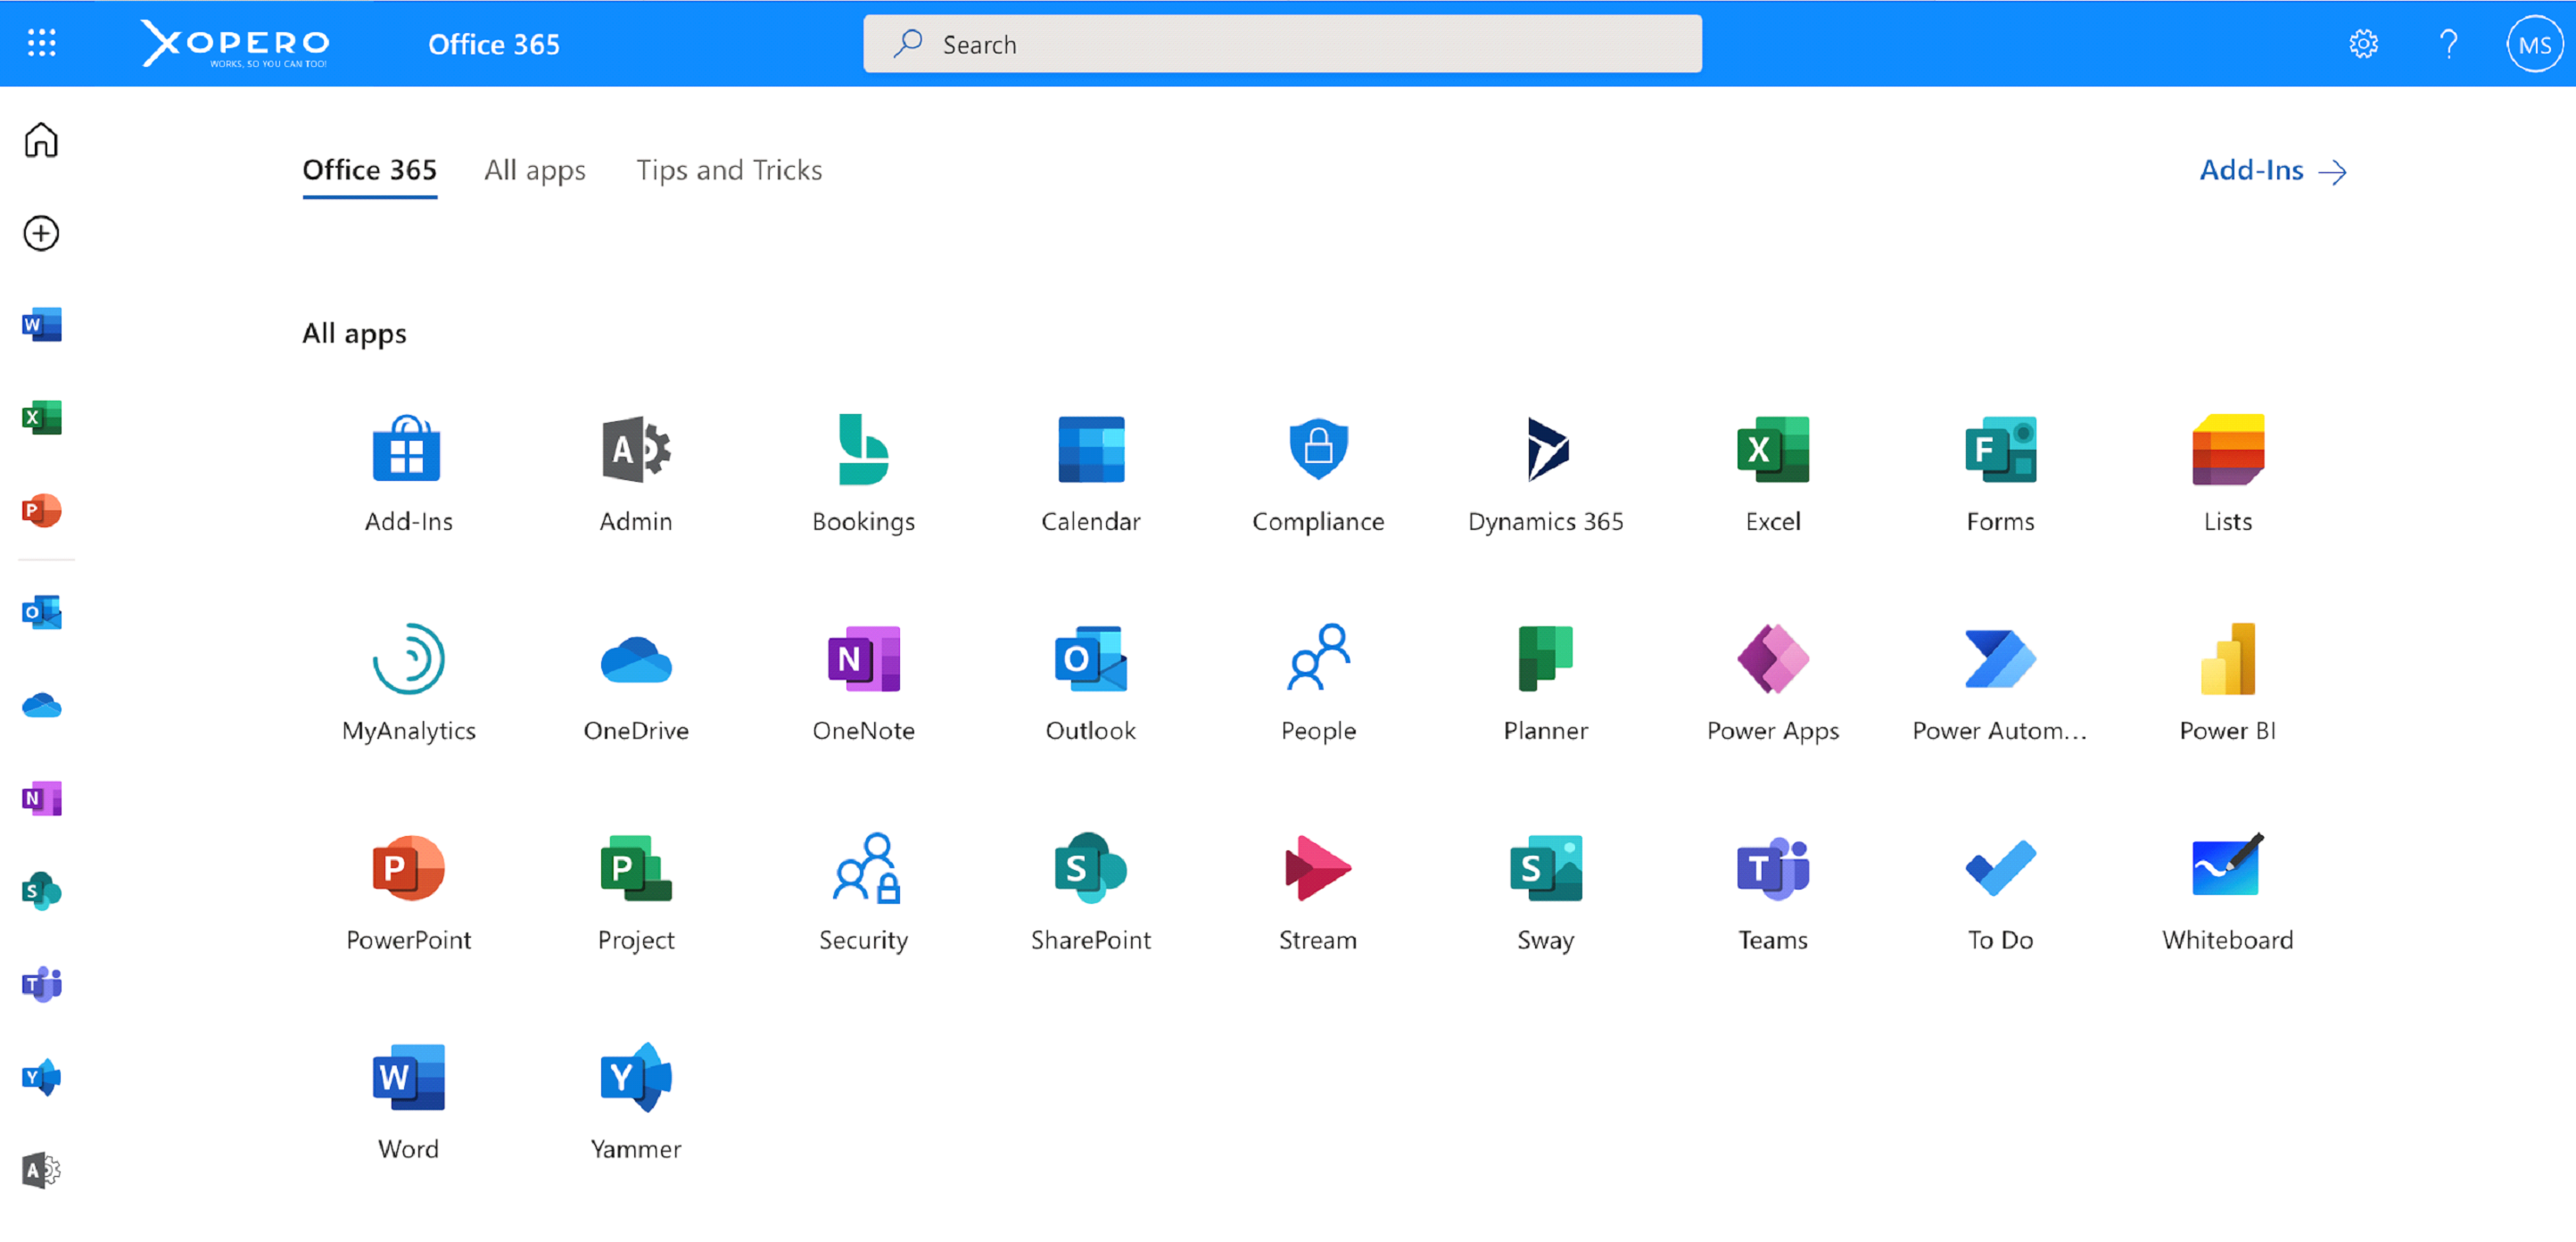
Open https://login.microsoftonline.com in a browser and sign in to your Office 365 account.
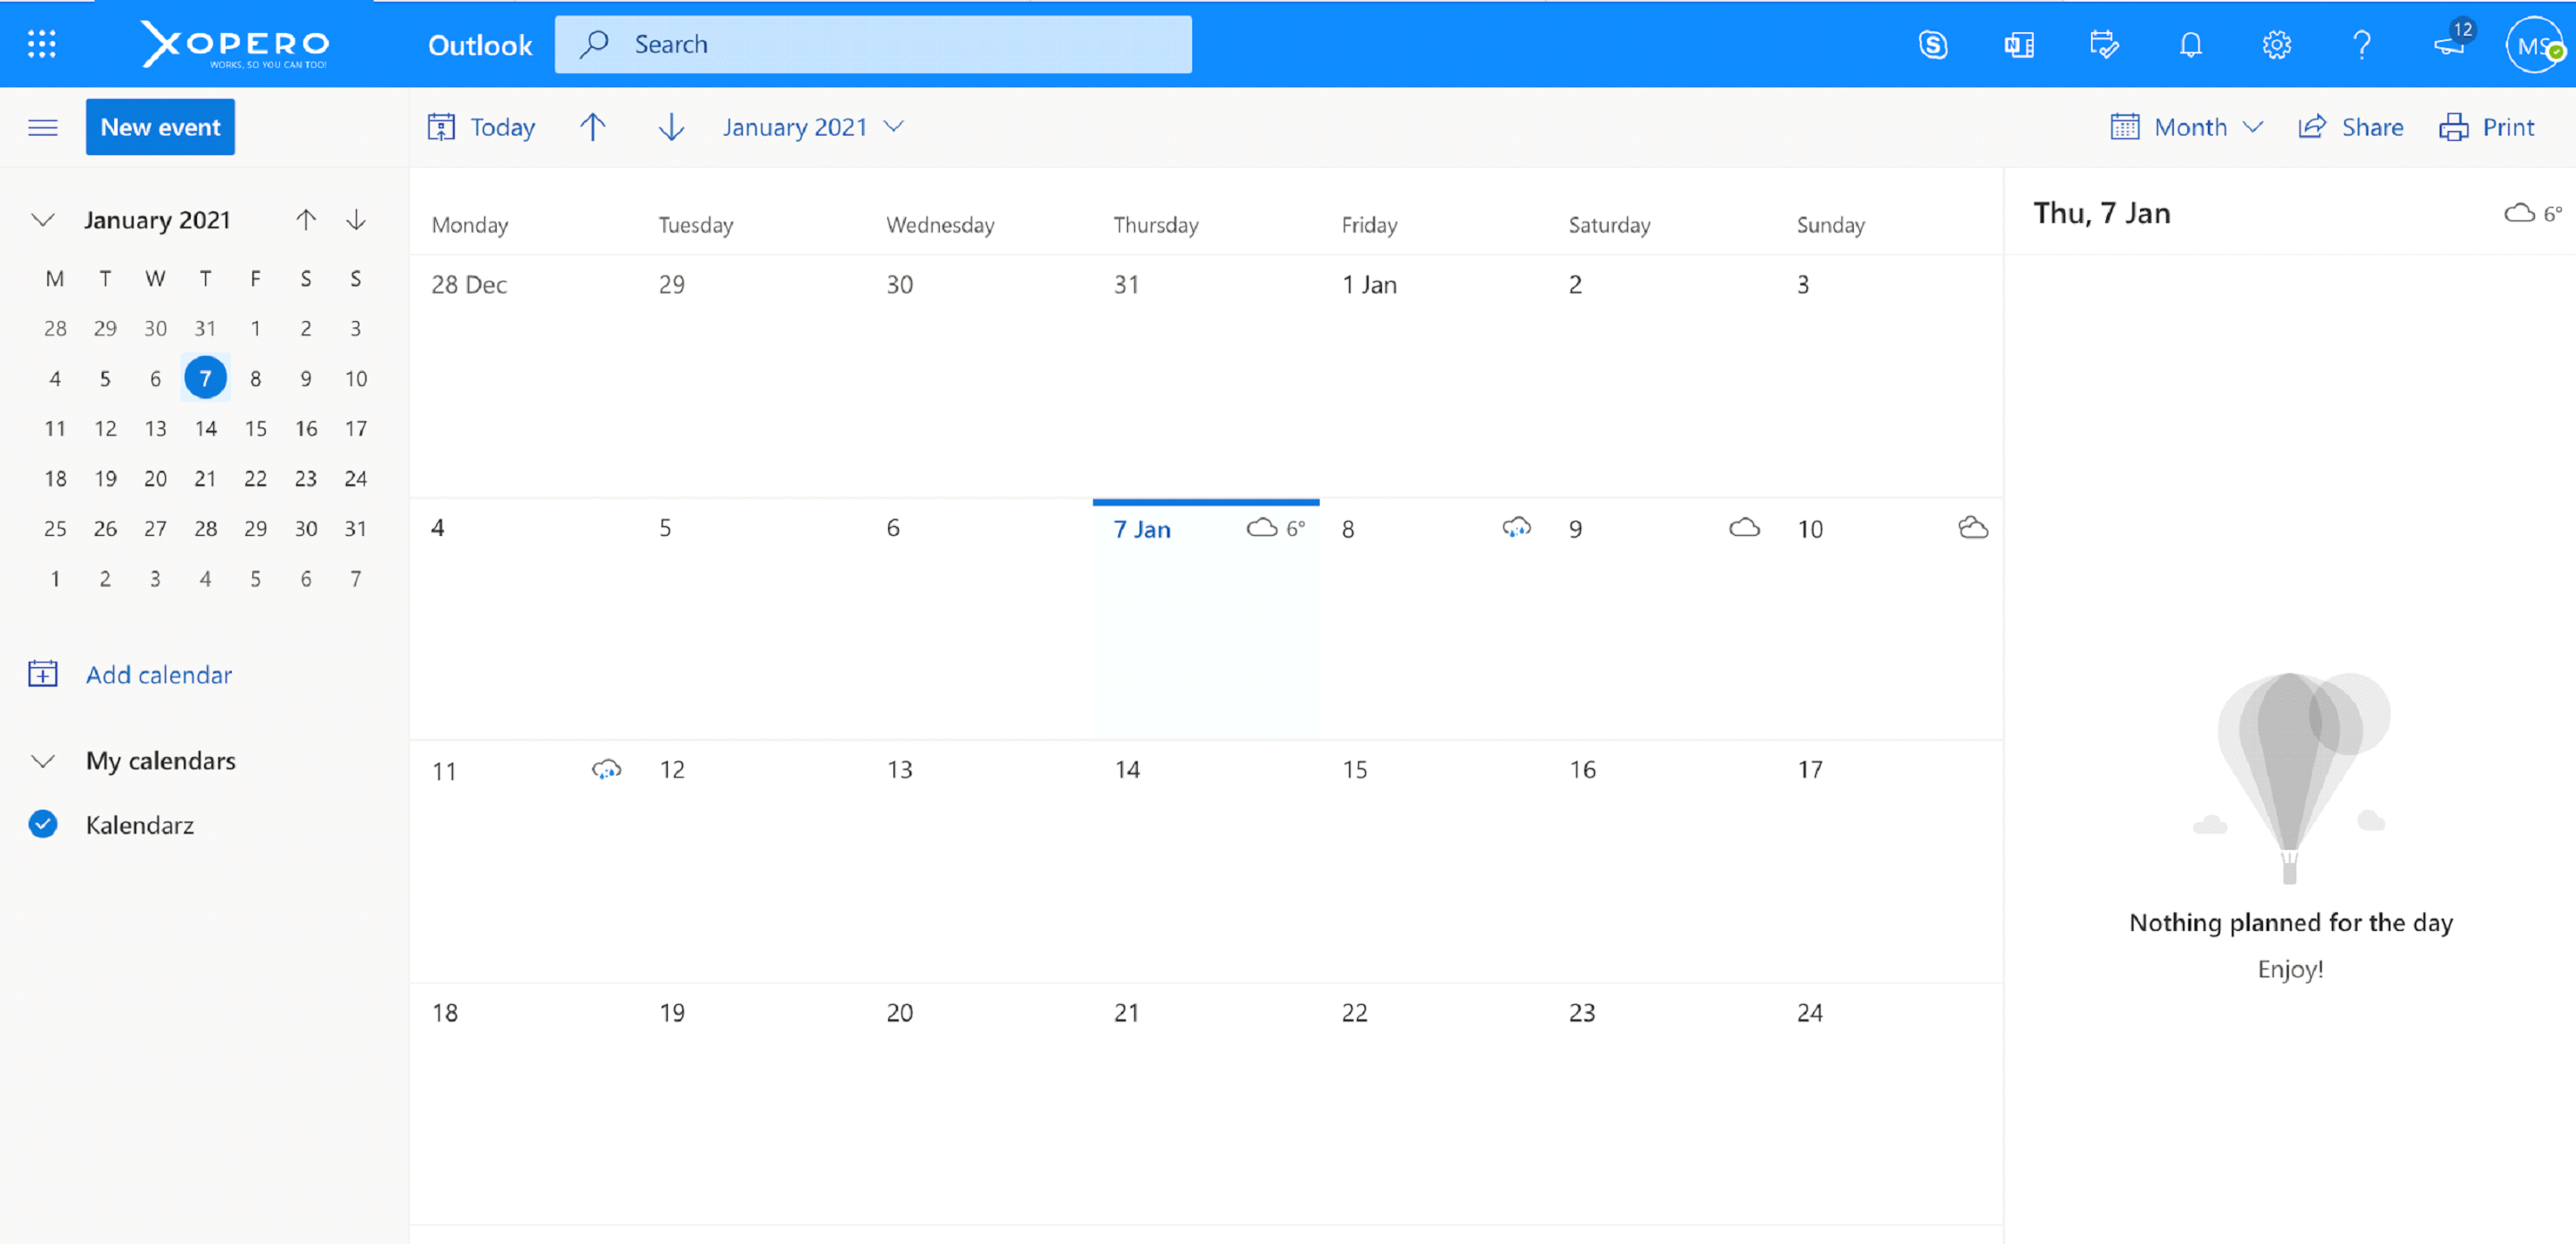
On the Office 365 web apps page select Calendar.

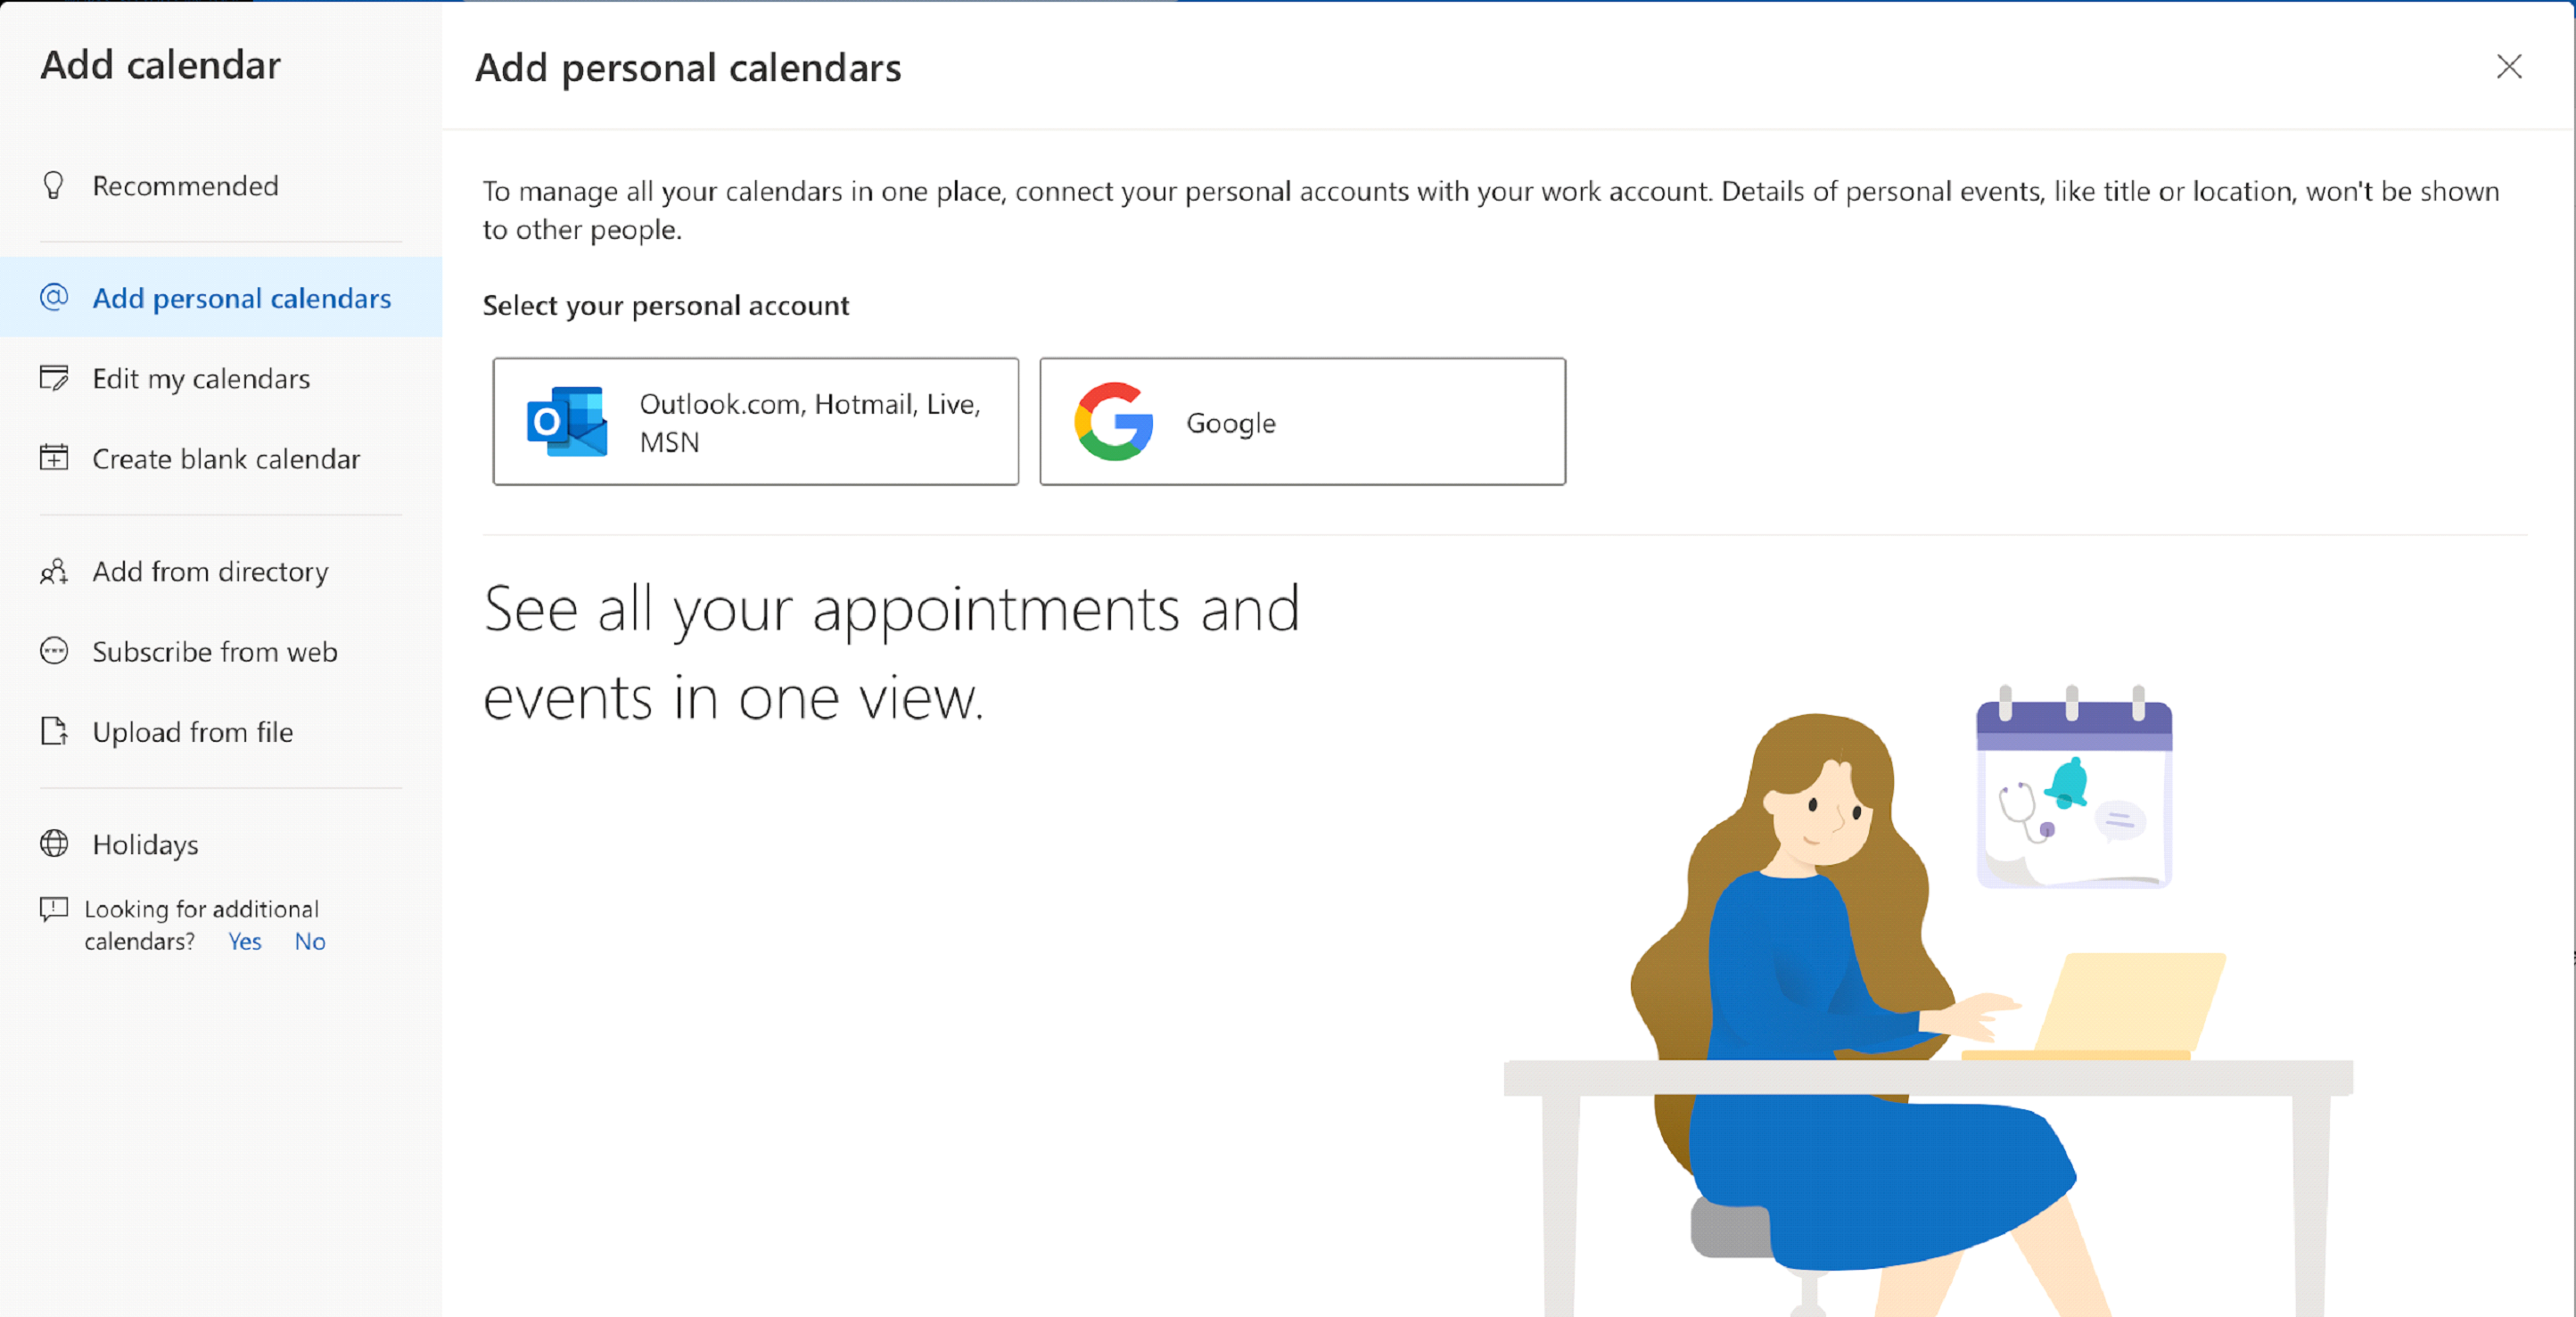
On the left side of the Calendar page, choose add Calendar
You can add personal calendars, from either Outlook or Google, in that case the setup would guide you through the process of adding a calendar. But we will choose to add a new calendar from a file.
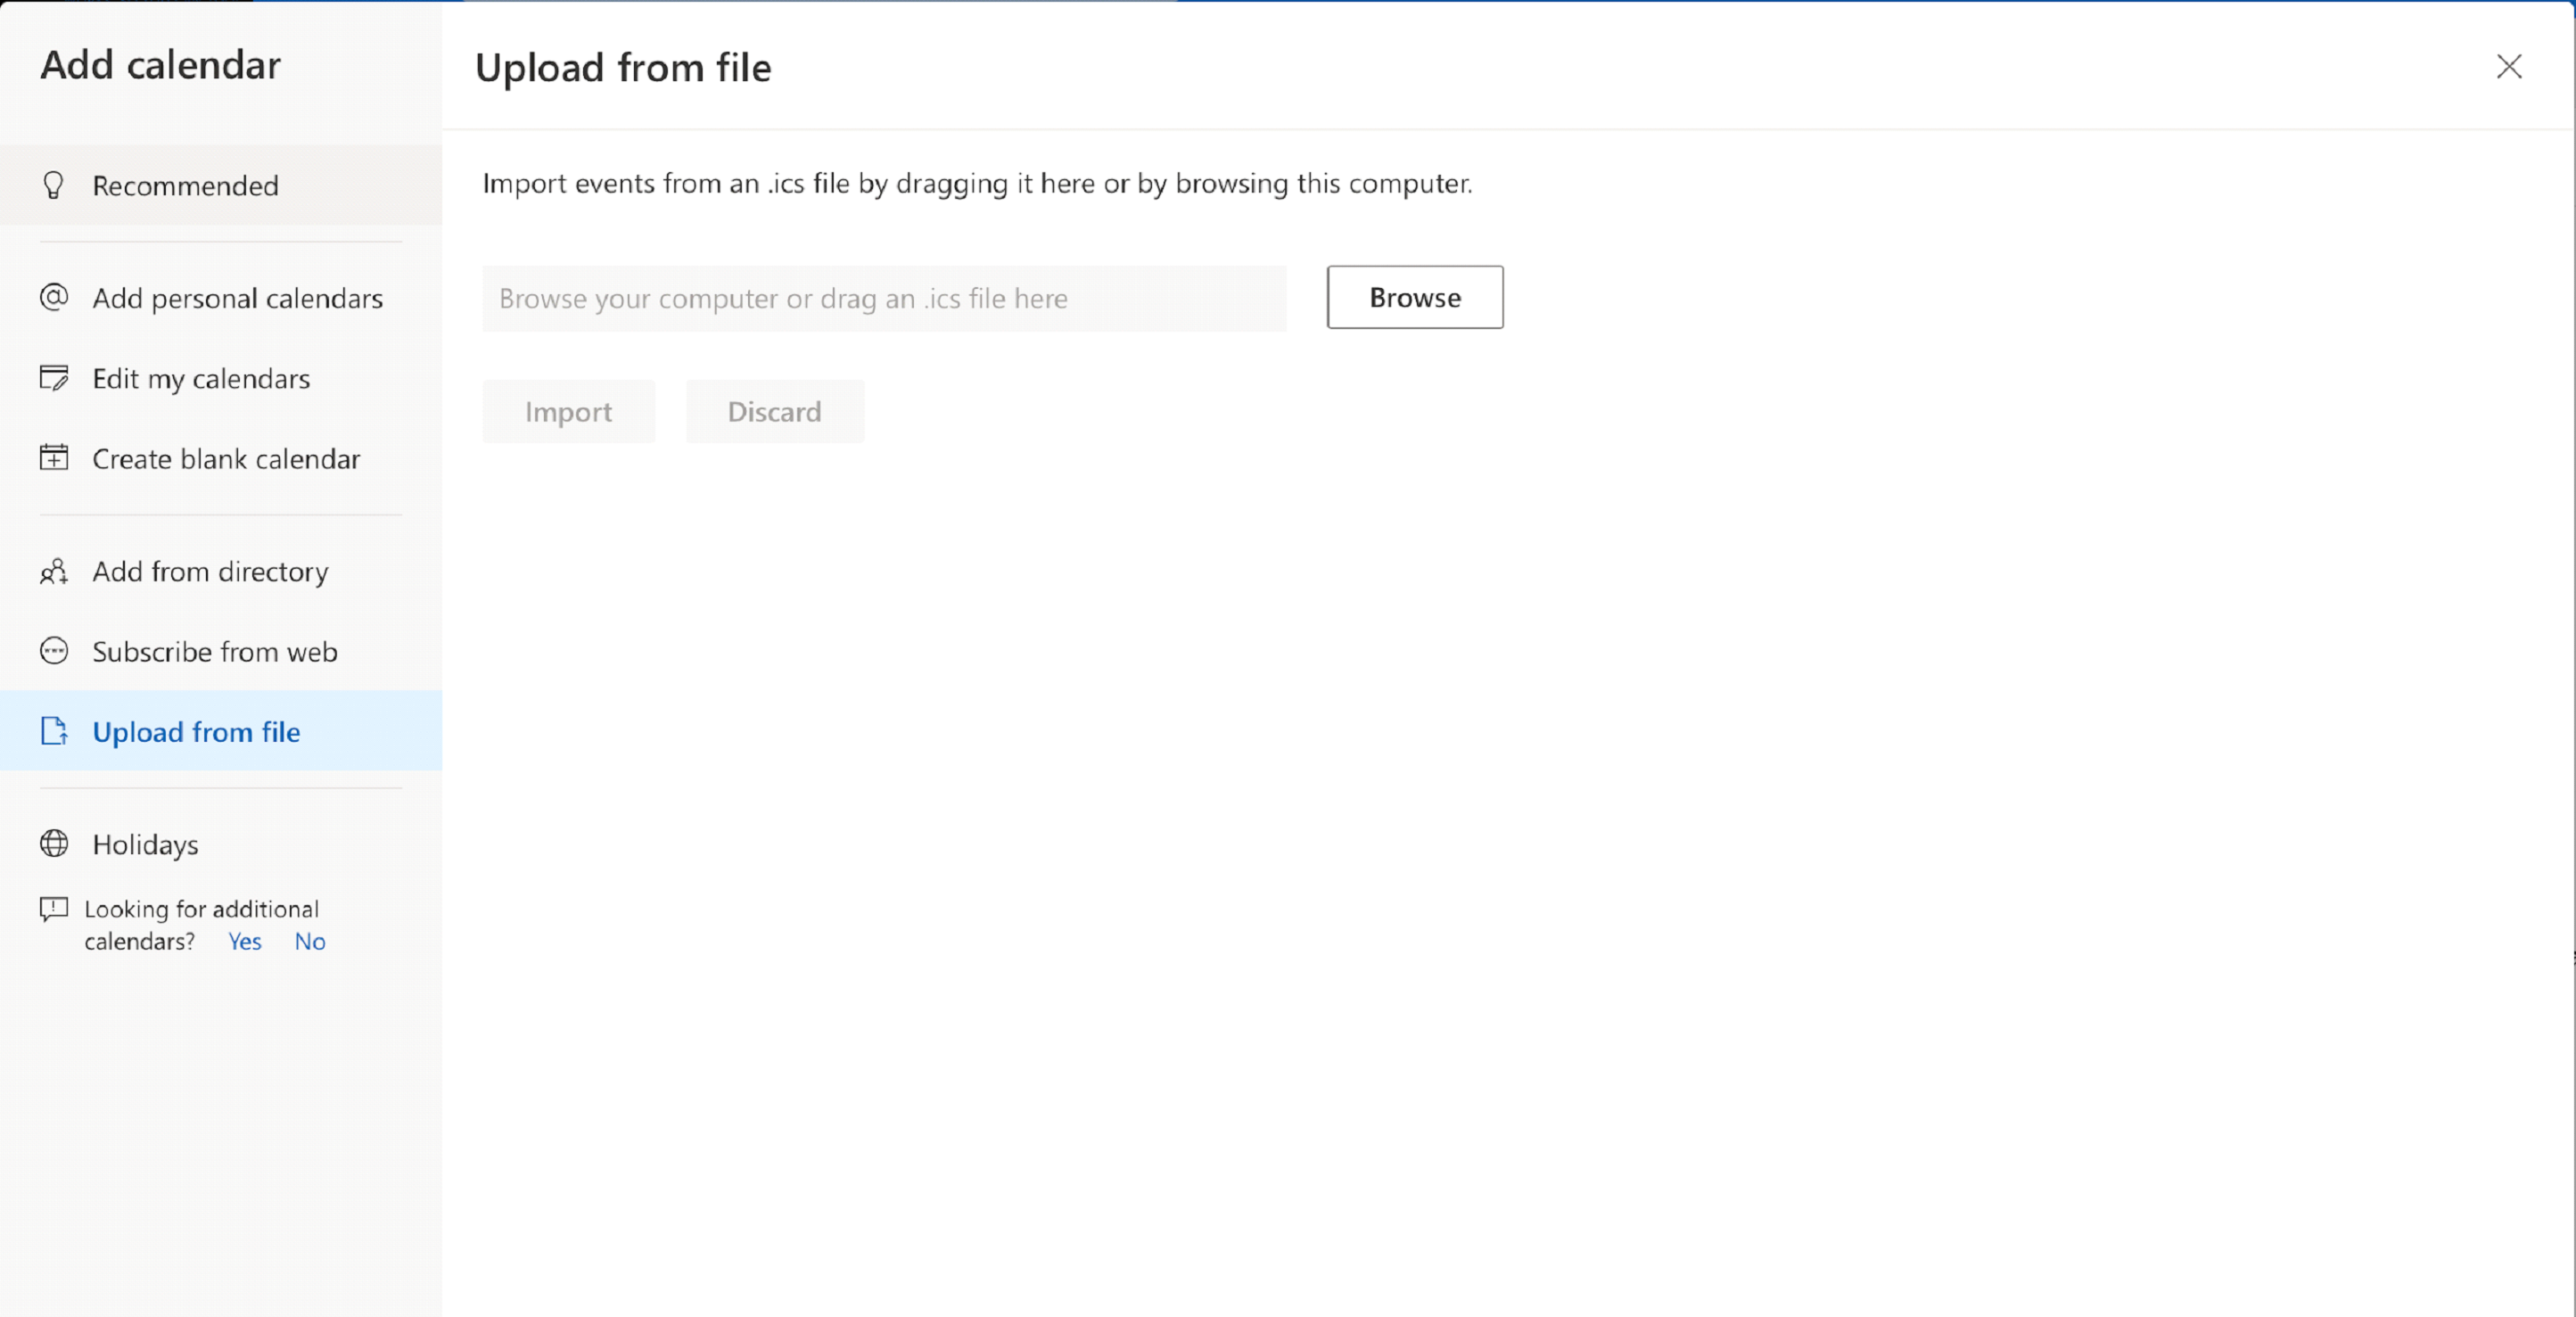
On the left panel choose Upload from file. Click browse, and then choose the file we exported earlier from Gmail account – username@domain.com.isc
In the dropdown menu, select the desired calendar name and click Import.
And done, you successfully migrated calendar from G Suite to Office 365, now let’s look how to migrate contacts.
Importing Contacts
Open google.com, open menu and select Contacts.
On the left panel of Contacts page choose Export.
Select Outlook CSV.
Save that CSV file on your computer. Sign into your Office 365 account, and select people in the Office 365 web apps menu.
It will open Outlook 365 contacts. In the top right corner click Manage and then Import Contacts.
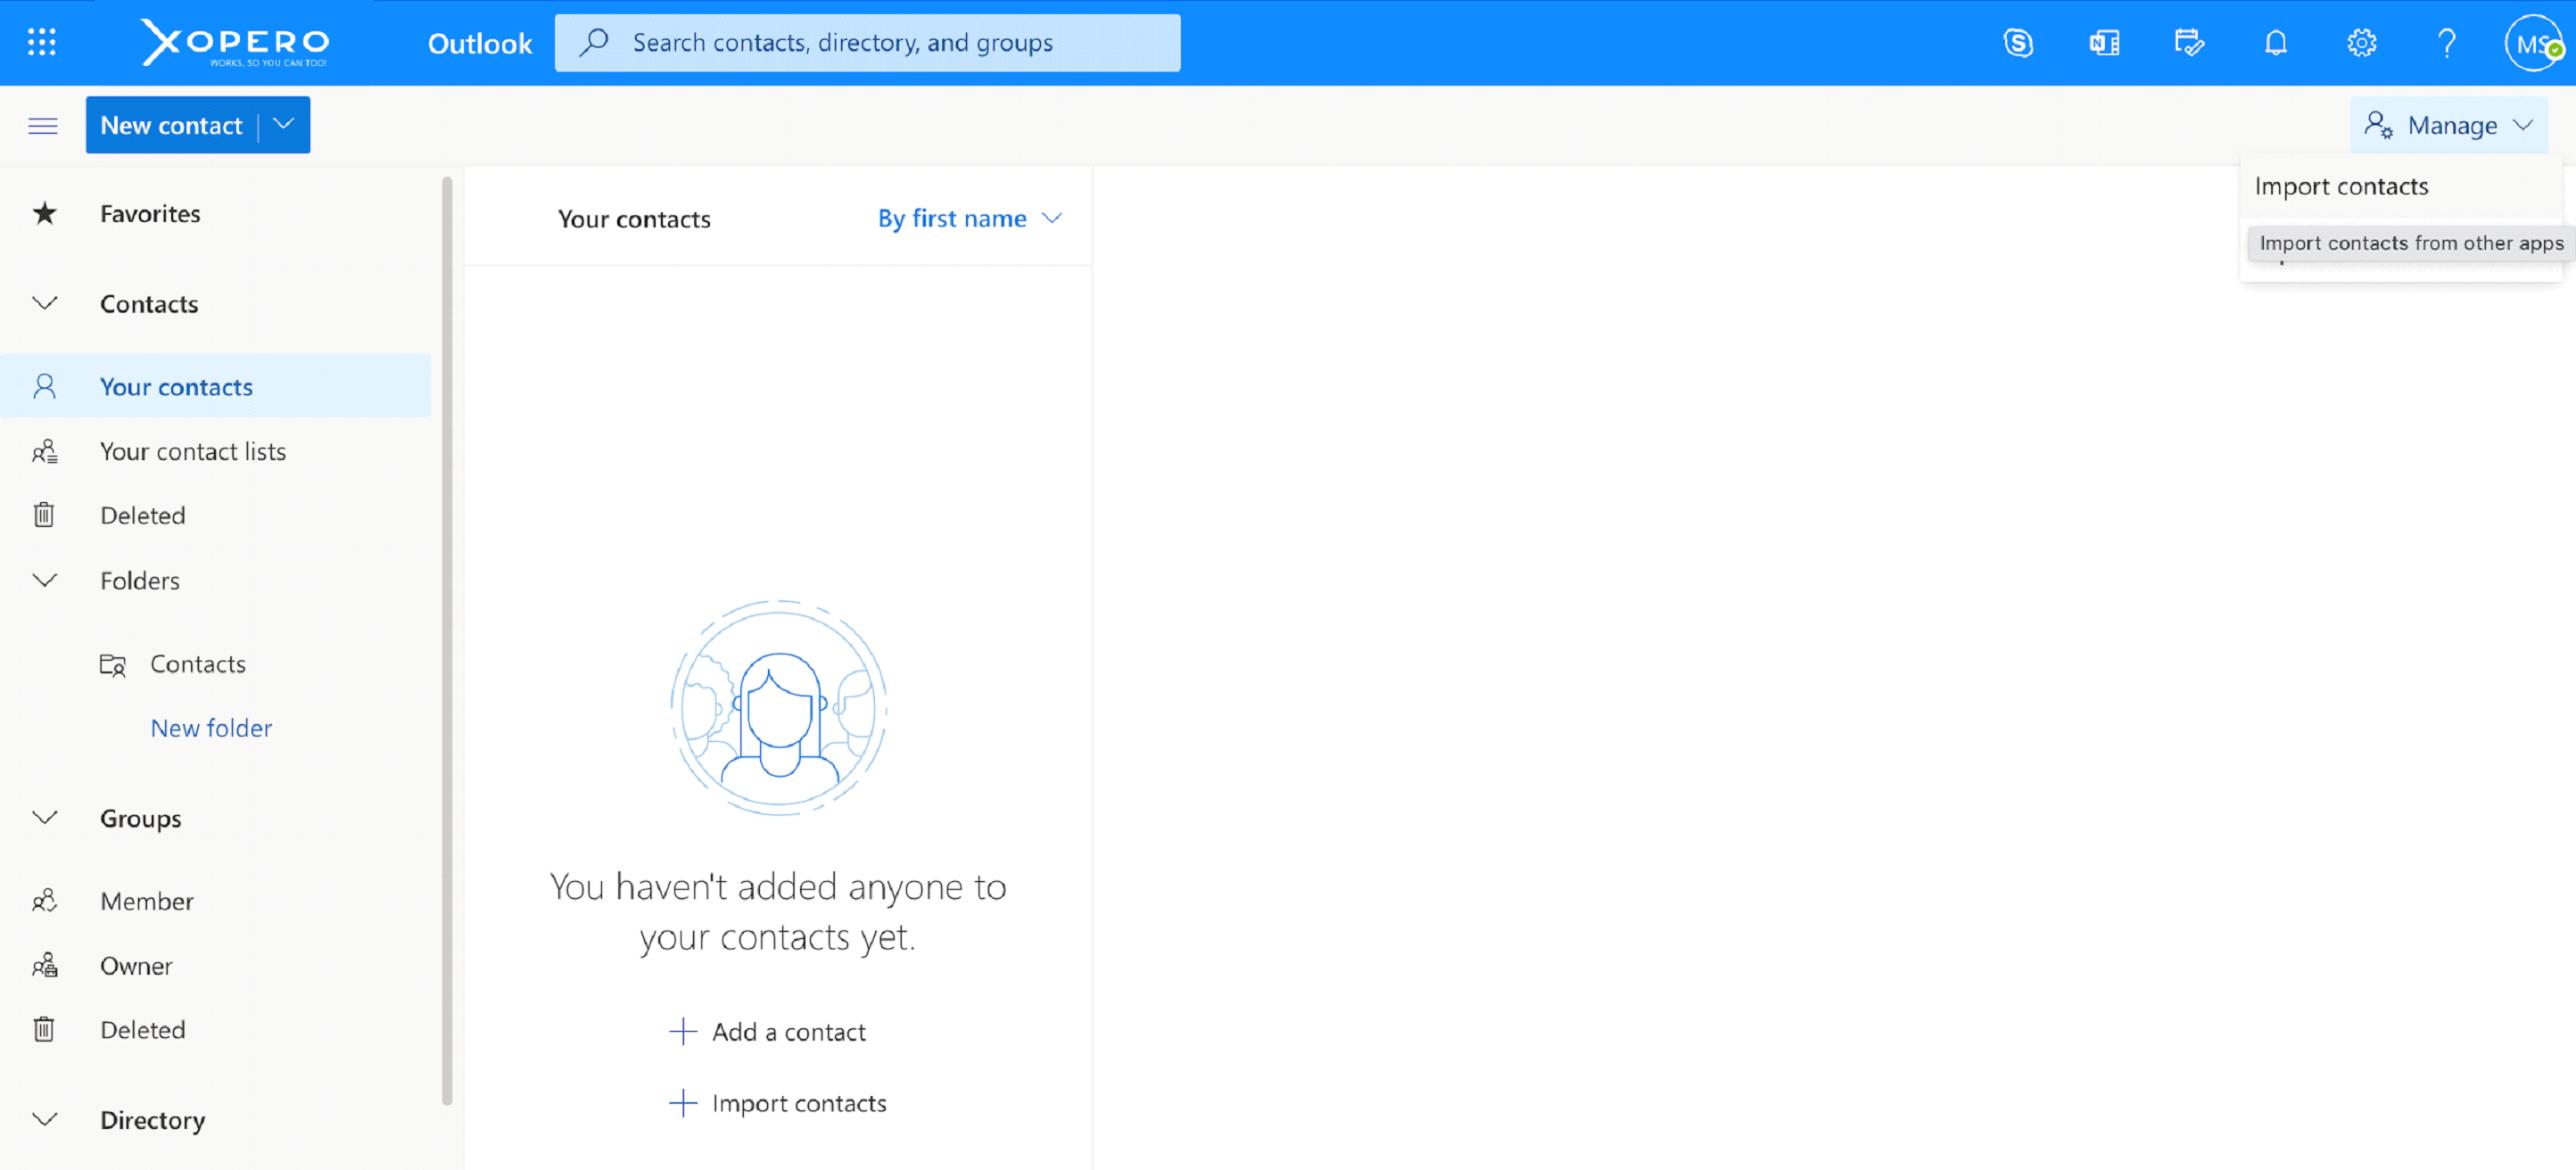
Click browse to search for previously saved .csv file from Google. Hit Import.

Done! You have successfully migrated contacts from G Suite to Office 365.
Summary
This article was a walkthrough of migration from G Suite to Microsoft Office 365. The process can be automated to some degree, by tools provided directly from Microsoft. In addition to mailboxes migration you should also remember to migrate contacts and calendars, and files stored on cloud storage. If you don’t want to do a process of migration by yourself, there are special third-party solutions that can perform a migration for you.
But as in any situation where we are operating on the data, there is a possibility that something can go wrong. And this is one of the reasons why you need to have a backup set up. Xopero offers a perfect backup solution that will fit your needs, whether you want to perform a backup of your on-premise data, or Office 365, we are here to make sure your data is protected.
Once you have migrated your data to Office 365, keep it mind that an event of failure can happen even to Microsoft. Or your data can be accidentally/intentionally deleted – for example by a former employee – and you might notice that after short-term retention within Microsoft’s apps when it is impossible to recover. Thus consider a third-party Office 365 backup software to make sure your data is protected, accessible and recoverable anytime. Even Microsoft recommends such software in the shared responsibility model.